512 LED Standalone Cube

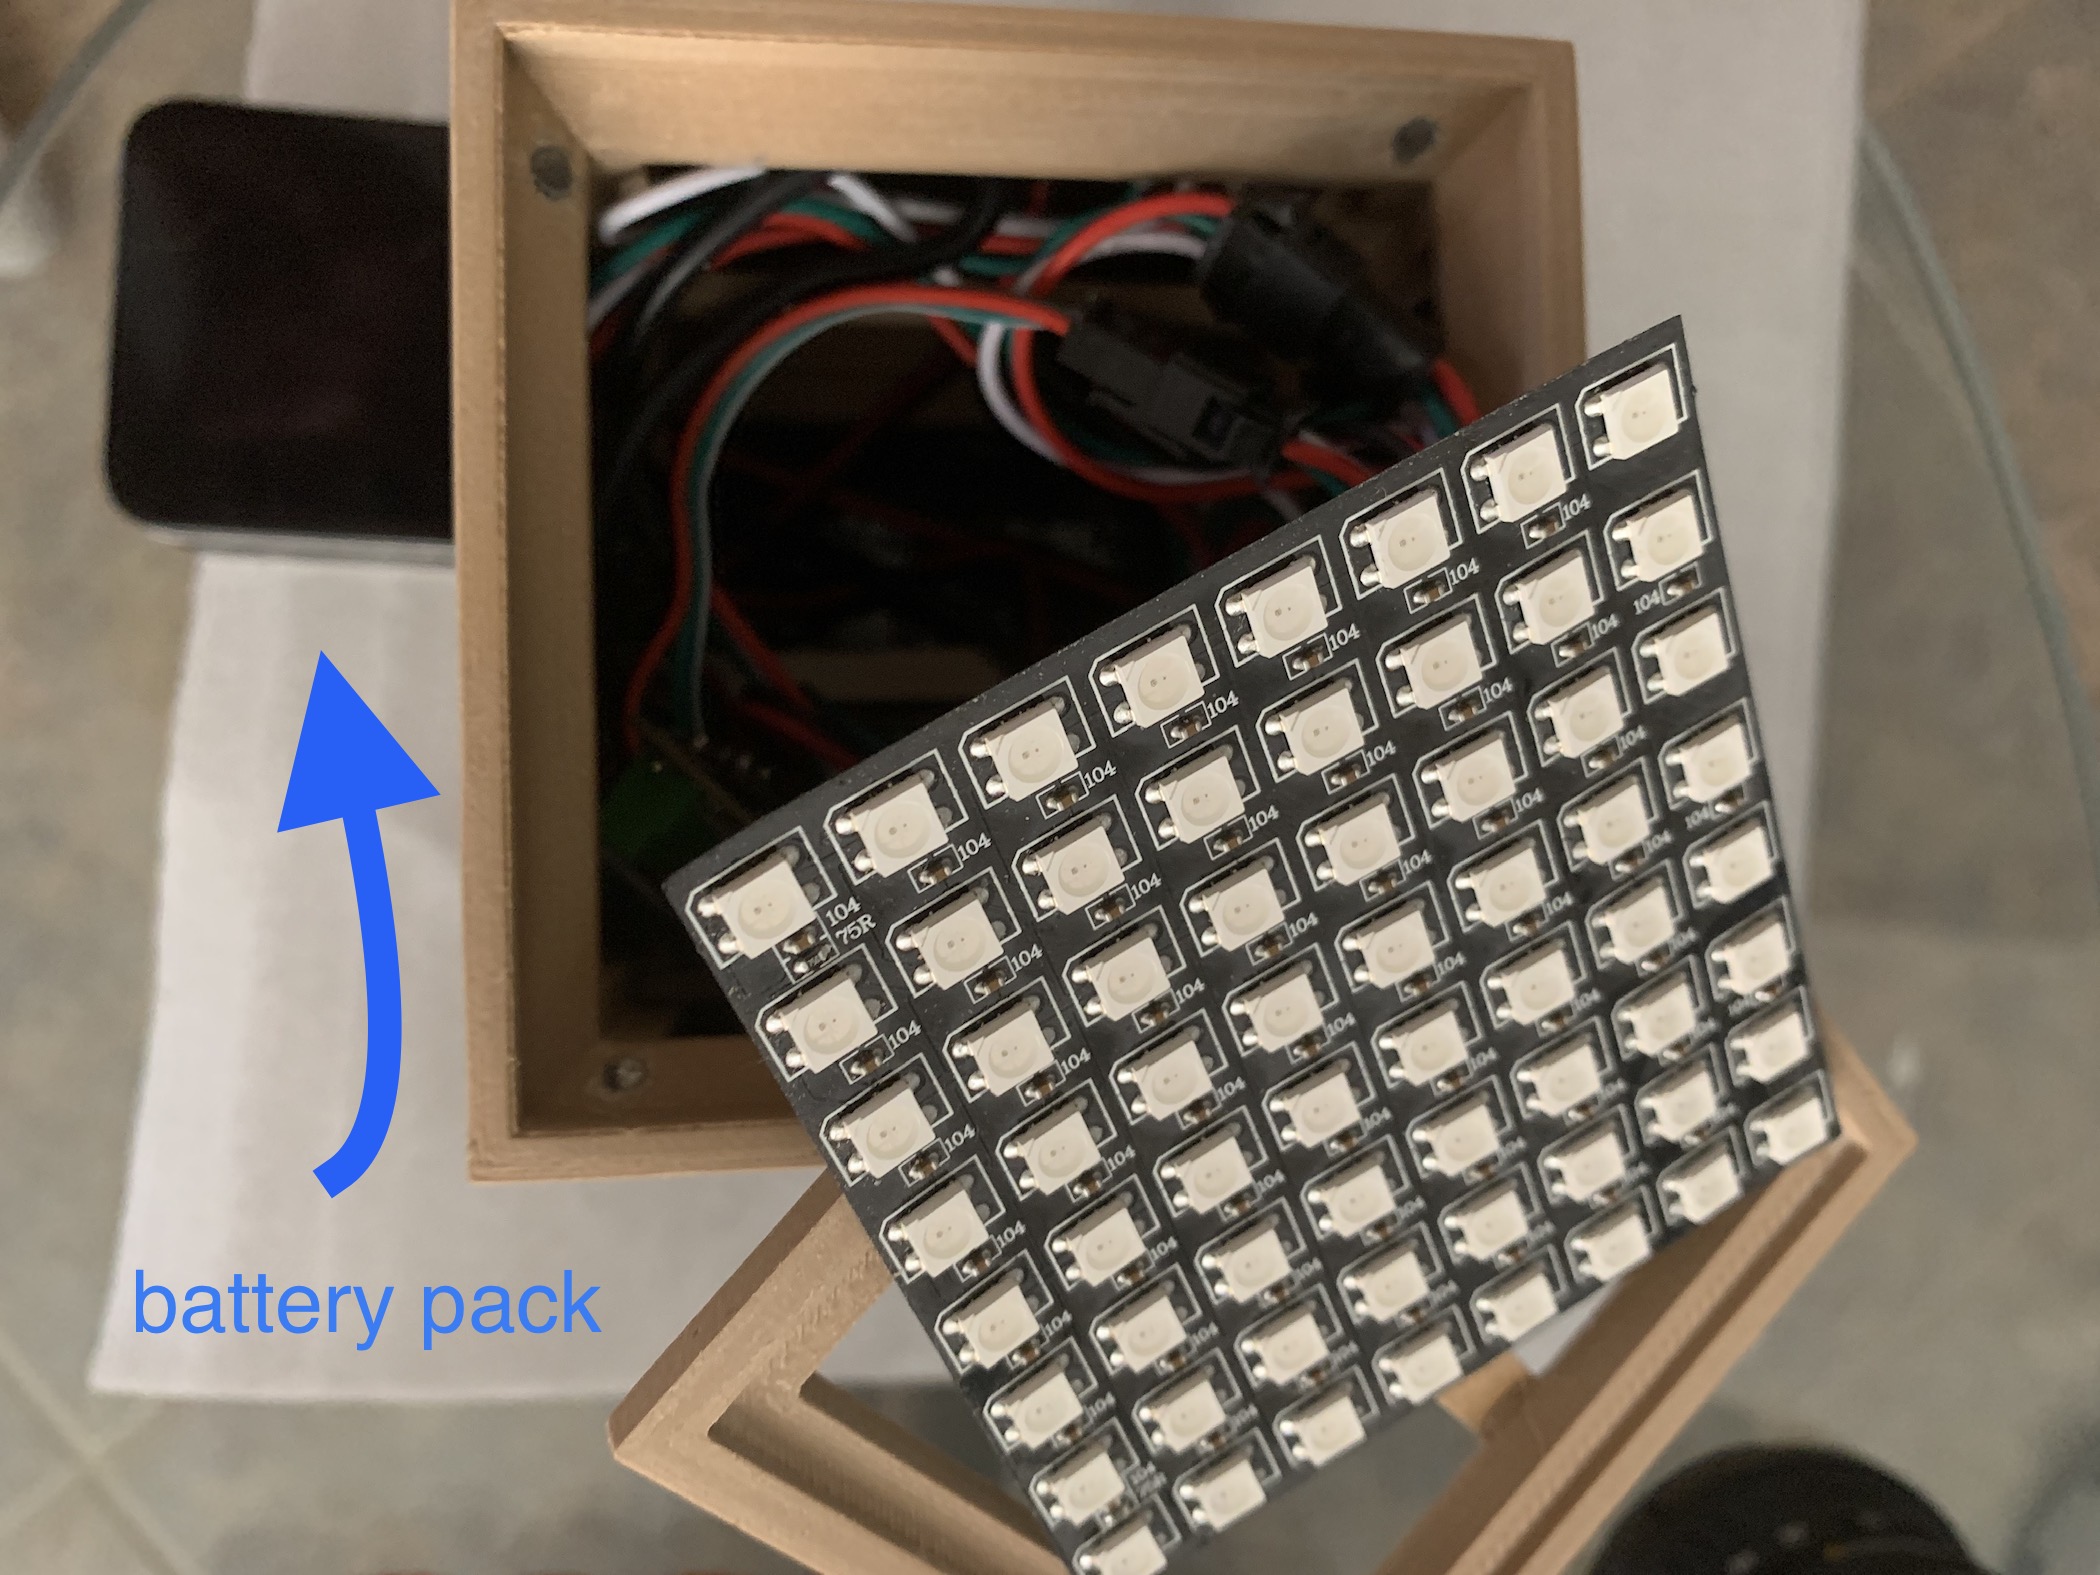
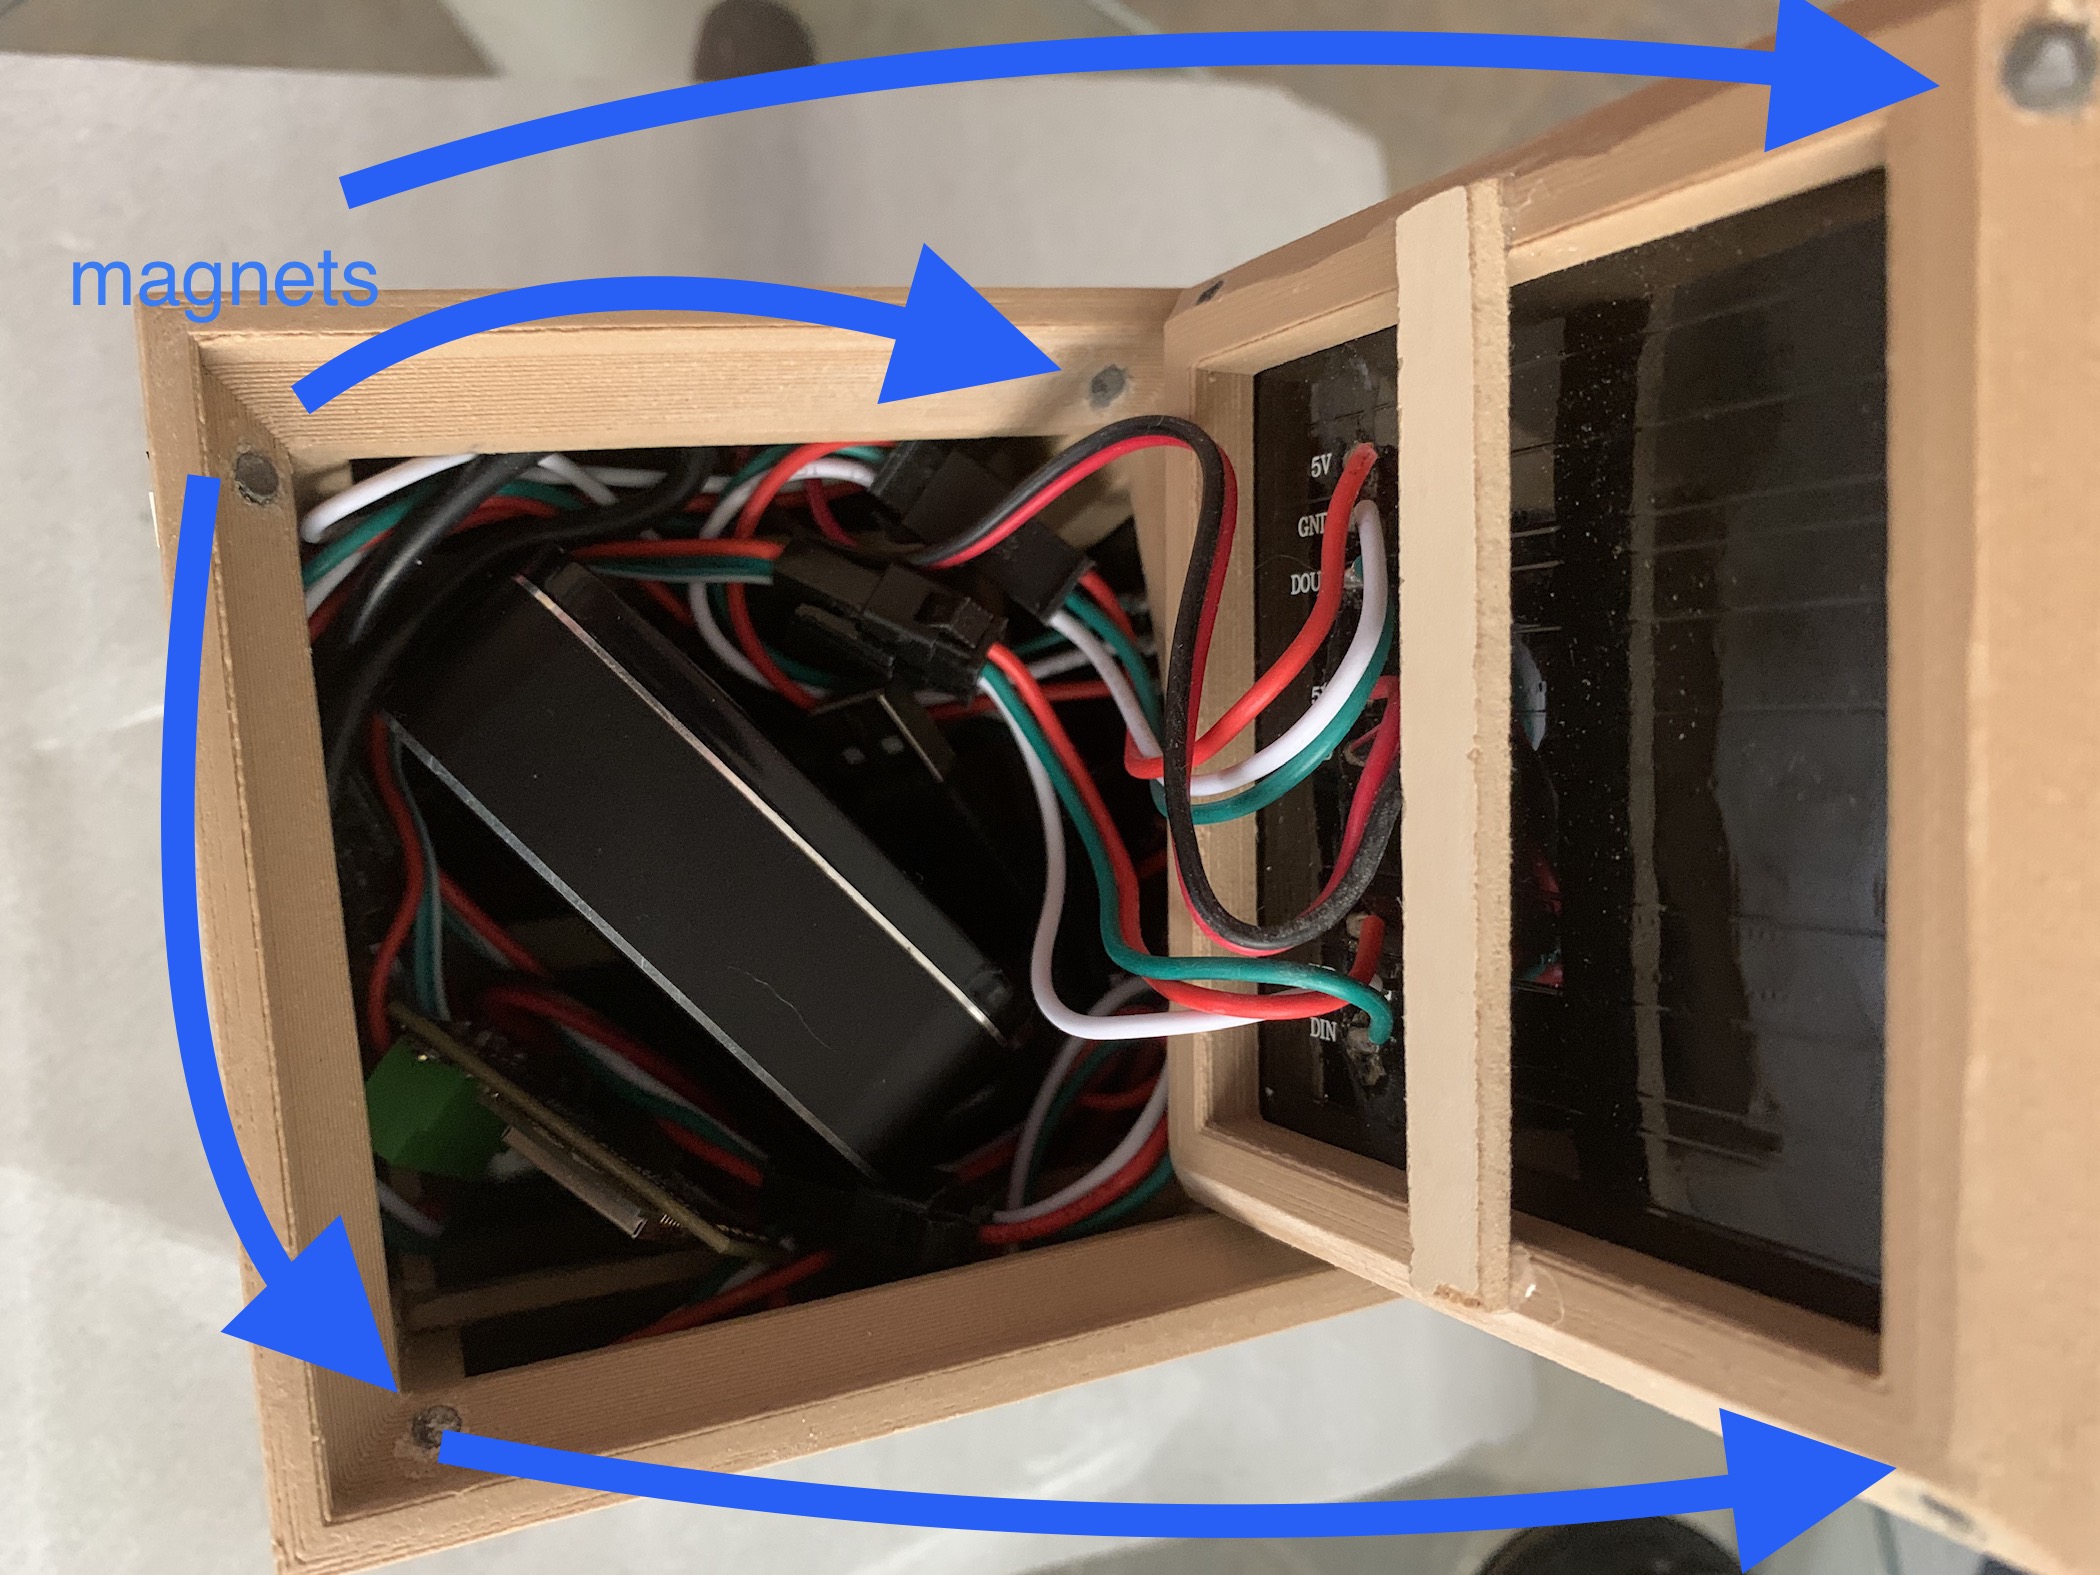
I recently completed my cube project and wanted to show it off a bit. The cube frame is 3D printed (it cost around $40), which houses six 8x8cm LED matrixes. Inside I use a usb battery pack (which just barely fits) and of course PixelBlaze. The end result is a completely self contained cube which contains 512 LED’s total.

Short Youtube Demo

The one thing I haven’t quite worked out completely is the mapping. I’m mostly interested in I guess what what be considered a Polar approach, although I’ve experimented with volumetric and it works well for certain patterns.

My mapping looks like this:

function (pixelCount) {
   //enable zigzag if every other LED row travels in reverse
   //if they are all straight across, disable it
   zigzag = true
  
  //roate a point (x, y), along a center (cx, cy), by an angle in degrees
  function rotate(cx, cy, x, y, angle) {
var radians = (Math.PI / 180) * angle,
    cos = Math.cos(radians),
    sin = Math.sin(radians),
    nx = (cos * (x - cx)) + (sin * (y - cy)) + cx,
    ny = (cos * (y - cy)) - (sin * (x - cx)) + cy;
return [nx, ny];
  }

  //create a set of coordinates for a matrix panel
  // sized (w, h), rotated by an angle, and offset by (sx, sy)
  function panel(w, h, sx, sy, angle) {
var x, x2, y, p, map = []
for (y = 0; y < h; y++) {
  for (x = 0; x < w; x++) {
    //for zigzag, flip direction every other row
    if (zigzag && y % 2 == 1)
      x2 = w - 1 - x
    else
      x2 = x
    p = rotate((w-1)/2, (h-1)/2, x2, y, angle);
    p[0] += sx
    p[1] += sy
    map.push(p)
  }
}
return map;
  }

  //assemble one or more panels
  var map = [];

  map = map.concat(panel(8, 8, 0, 24, -90))
  map = map.concat(panel(8, 8, 0, 0, 90))
  map = map.concat(panel(8, 8, -8, 8, -90))
  map = map.concat(panel(8, 8, 0, 8, -90))
  map = map.concat(panel(8, 8, 0, 16, -90))
  map = map.concat(panel(8, 8, 8, 8, 0))

  return map
  }

Maybe not the right way to go about it necessarily, although if you run the spotlight pattern and see how it rotates around (at least on the first three panels - see video) that’s really the effect I was after.

If anyone is interested in the 3D model files let me know and I’ll post them :slight_smile:

5 Likes

Yay for polar! I agree

2 Likes

I was just about to fire up Fusion 360 to make something similar. I’d love to take a look at how you did it. I have 65mm panels, so I would have to scale yours down. Did it really cost you $40 to 3d print? That’s like 2 entire rolls of filament which seems like a lot. Or do you mean you had someone else print it for you? I have my own printer so that part I can do myself.

Since I don’t own a 3D printer I had it printed through a service named craftcloud3d.com. I tried to keep the design as simple and lightweight as possible. The filament used is wood-filled PLA and was one of the least expensive; I also liked the idea of possibly staining it later on if I decided to. I was told that for having something like this 3D printed $40 was a decent price, and I’m really happy with the quality of work they provided and the finished result.

The cube design you could say is more or less a series of frames welded together nicely which the LED matrix panels snap snugly into. It allows the panels to easily pop in or out, although if you wanted to affix them permanently they could be glued in. I did end up putting some cross members behind the matrix panels because the battery needed something to rest on while also holding it in place and I didn’t want it popping the panels out (I’ll try and upload photos detailing that tomorrow).

The lid is held into place with small magnets which I had to drill holes for. I would recommend including recessed circles in the 3D model design instead of drilling into the finished model like I did if you decide to go that route. I only did it this way because I wasn’t sure how I wanted to secure the lid at the time of printing.

I’ve attached the .stl files here, so let me know if you have any questions and feel free to improve upon them!

lightbox a.stl (113.0 KB)

lightbox b lid.stl (25.9 KB)

1 Like

Here’s what the inside looks like. You’ll notice the battery pack barely fits, so if you plan on making a smaller version you’ll likely have to build your own battery pack, because I couldn’t find anything smaller than this one. If you do happen to find something smaller I would definitely be interested in knowing about it.

Also it would’ve been better to include the cross members in the design (which go behind each matrix). I would’ve had a bit more room inside and the entire thing would’ve been stronger most likely. I plan on incorporating these changes if and when I create the next version.

1 Like

Cool, thanks for sharing the stl’s & the pics. I’m still at the very early stages of thinking about this so I will definitely have to do some homework about battery power.

1 Like