This is a build guide for a black LED acrylic light box as seen in Party-in-a-Box!
I call this device Light Box 3.0, because this is the 3rd generation of these sound reactive light boxes that I’ve built. It is the first to incorporate individually addressable RGB LED strips, a Pixelblaze controller and black LED acrylic for diffusion. It is basically a wooden box, 2 1/2" deep and 12 5/8" square, weighs 2 kilograms (4.5 pounds) and can be freestanding or hung on a wall.

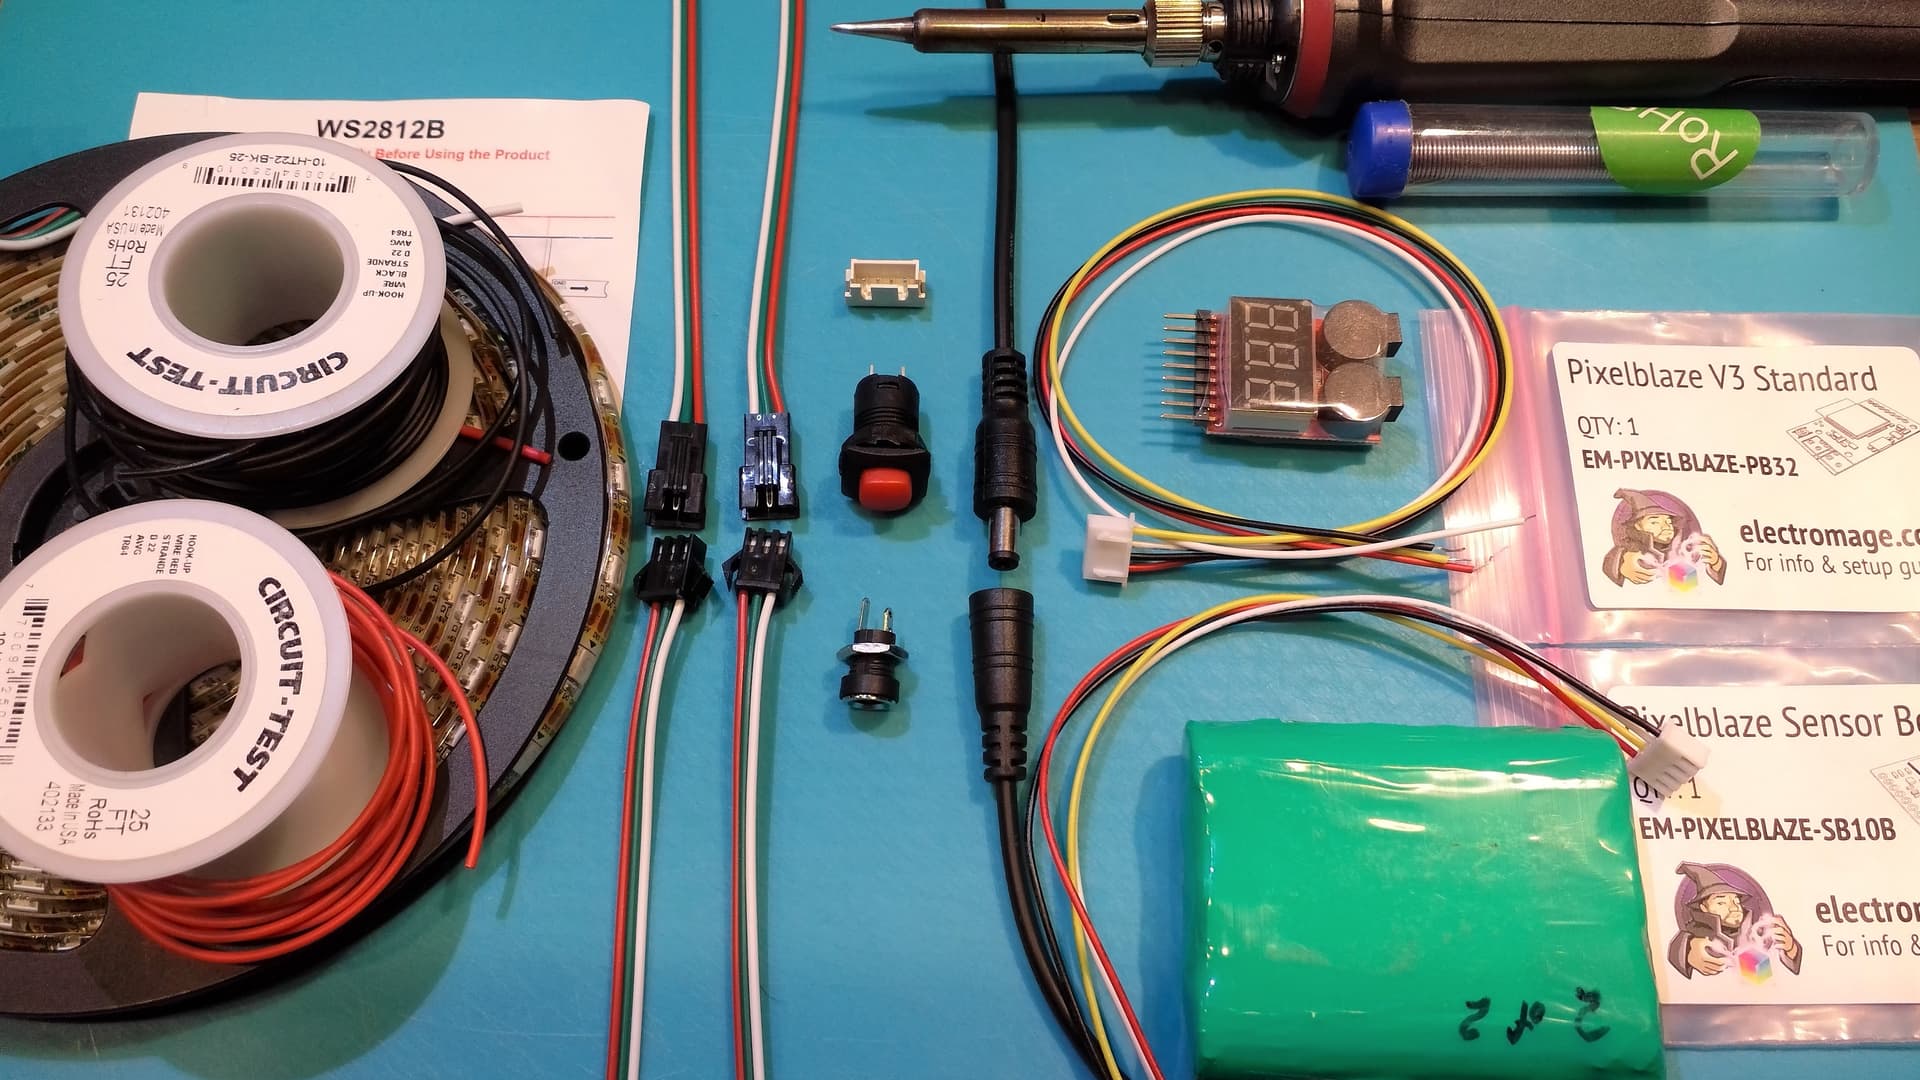
The components consist of a 3S (or 3S2P) 18650 lithium battery pack, a Pixelblaze V3 Standard controller with sensor board, a 17 x 17 matrix of WS2812B addressable RGB LEDs, a Tobsun 75W 12V to 5V converter (not pictured), a push button switch, a 12V charge/external power port and 12V male power cable (both 5.5 x 2.1), a JST HX2.54 4-pin connector, two pairs of 3-pin JST LED connectors, and a 3-30V voltage indicator. This indicator is very similar to those used on model aircraft, with an adjustable threshold to warn when any cell in the battery pack is discharged below a set value. The battery monitor is constantly displaying total voltage, cell 1, cell 2, cell 3, in rotation, allowing a manual balance of the pack if required. Also required are 12" x 12" sheets of, A) 3mm black LED acrylic, B) 0.025" aluminum and C) 3mm hardboard.
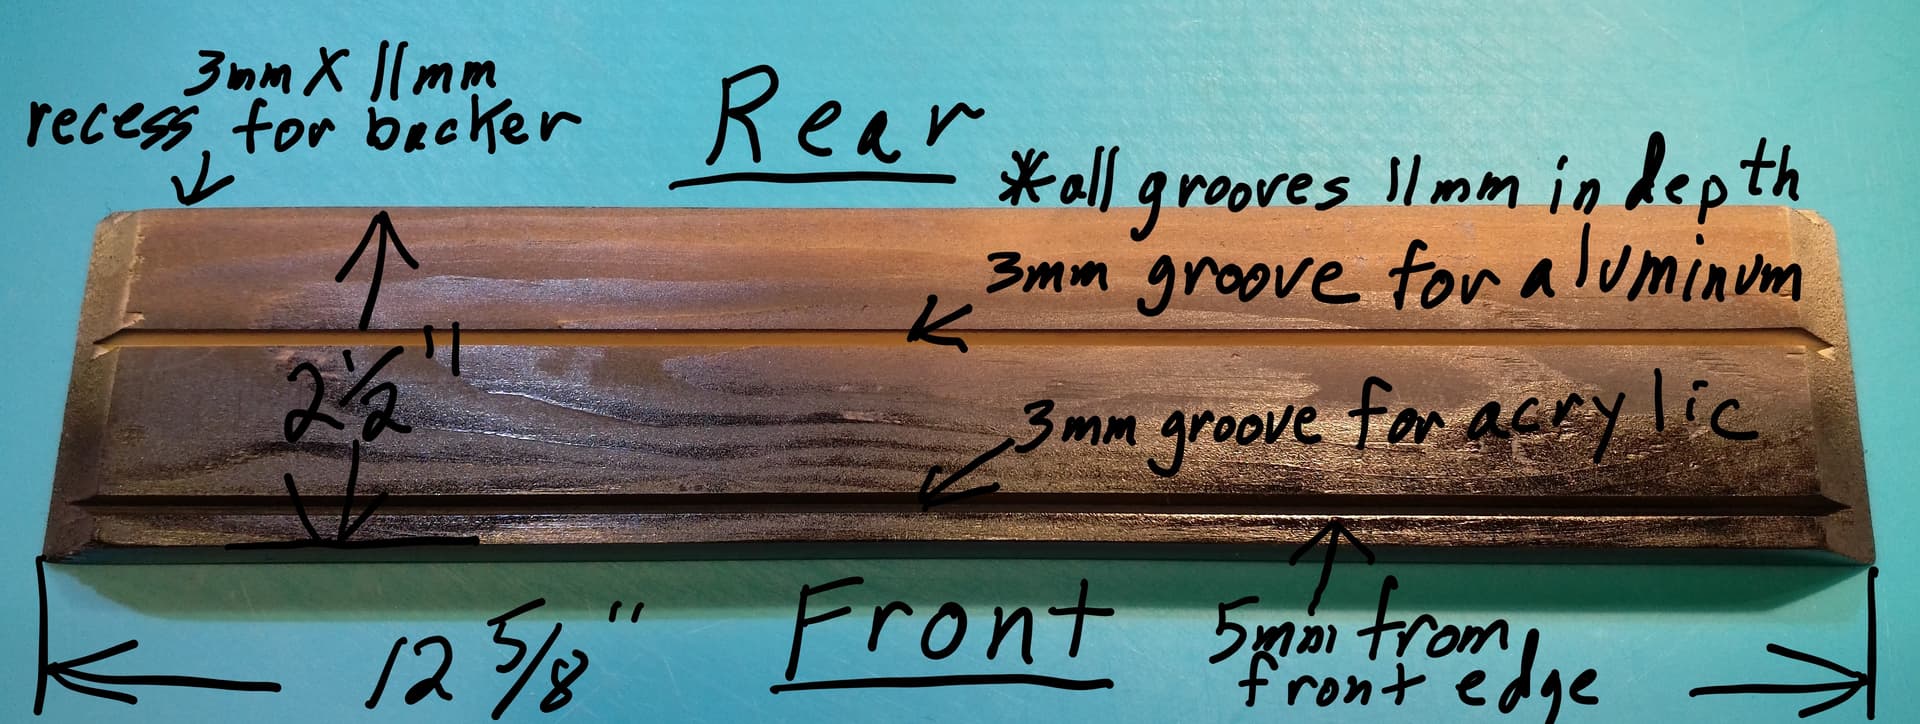
The box was built from 4 scraps of 3/4" cedar, each 12 5/8" x 2 1/2", with the ends cut at a 45 degree angle and grooves on the inside faces to accept the acrylic sheet, aluminum panel and the backer board. My table saw blade was just the right size to leave a groove in the wood that accepted both the aluminum and the acrylic with only minor sanding required for a perfect fit. The three upper sides were glued and screwed together and everything was painted with the bottom piece unattached. Four coats of Rustoleum (Tremclad) Gloss Black spray paint were applied with a light sanding between the third and fourth coat.
The part below is one of four required for each box.
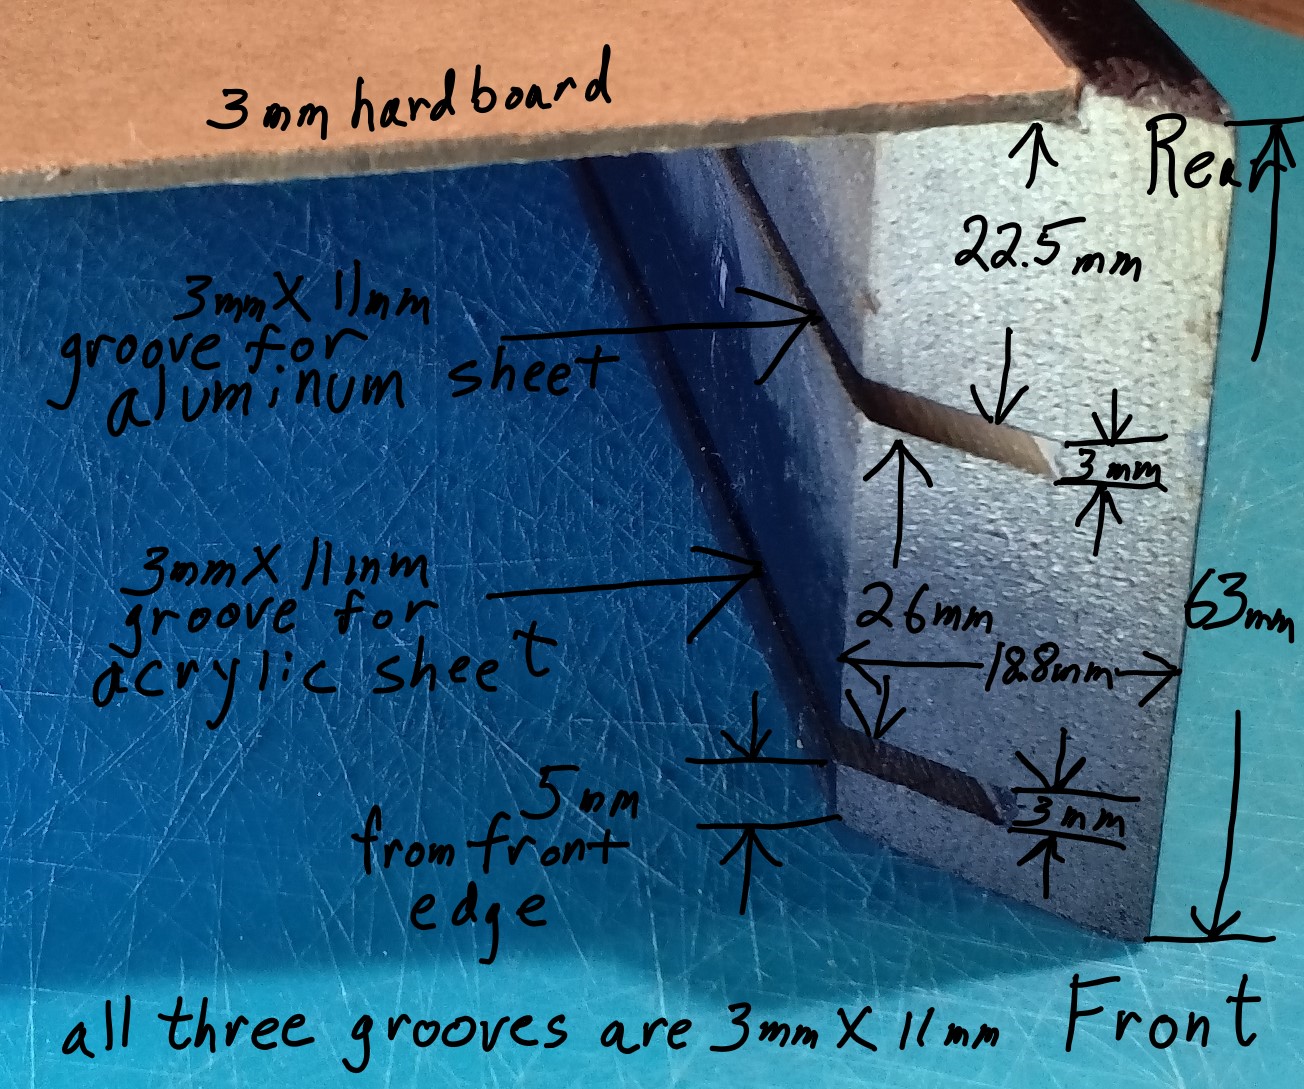
A closer view of the end detail on each corner of the frame.
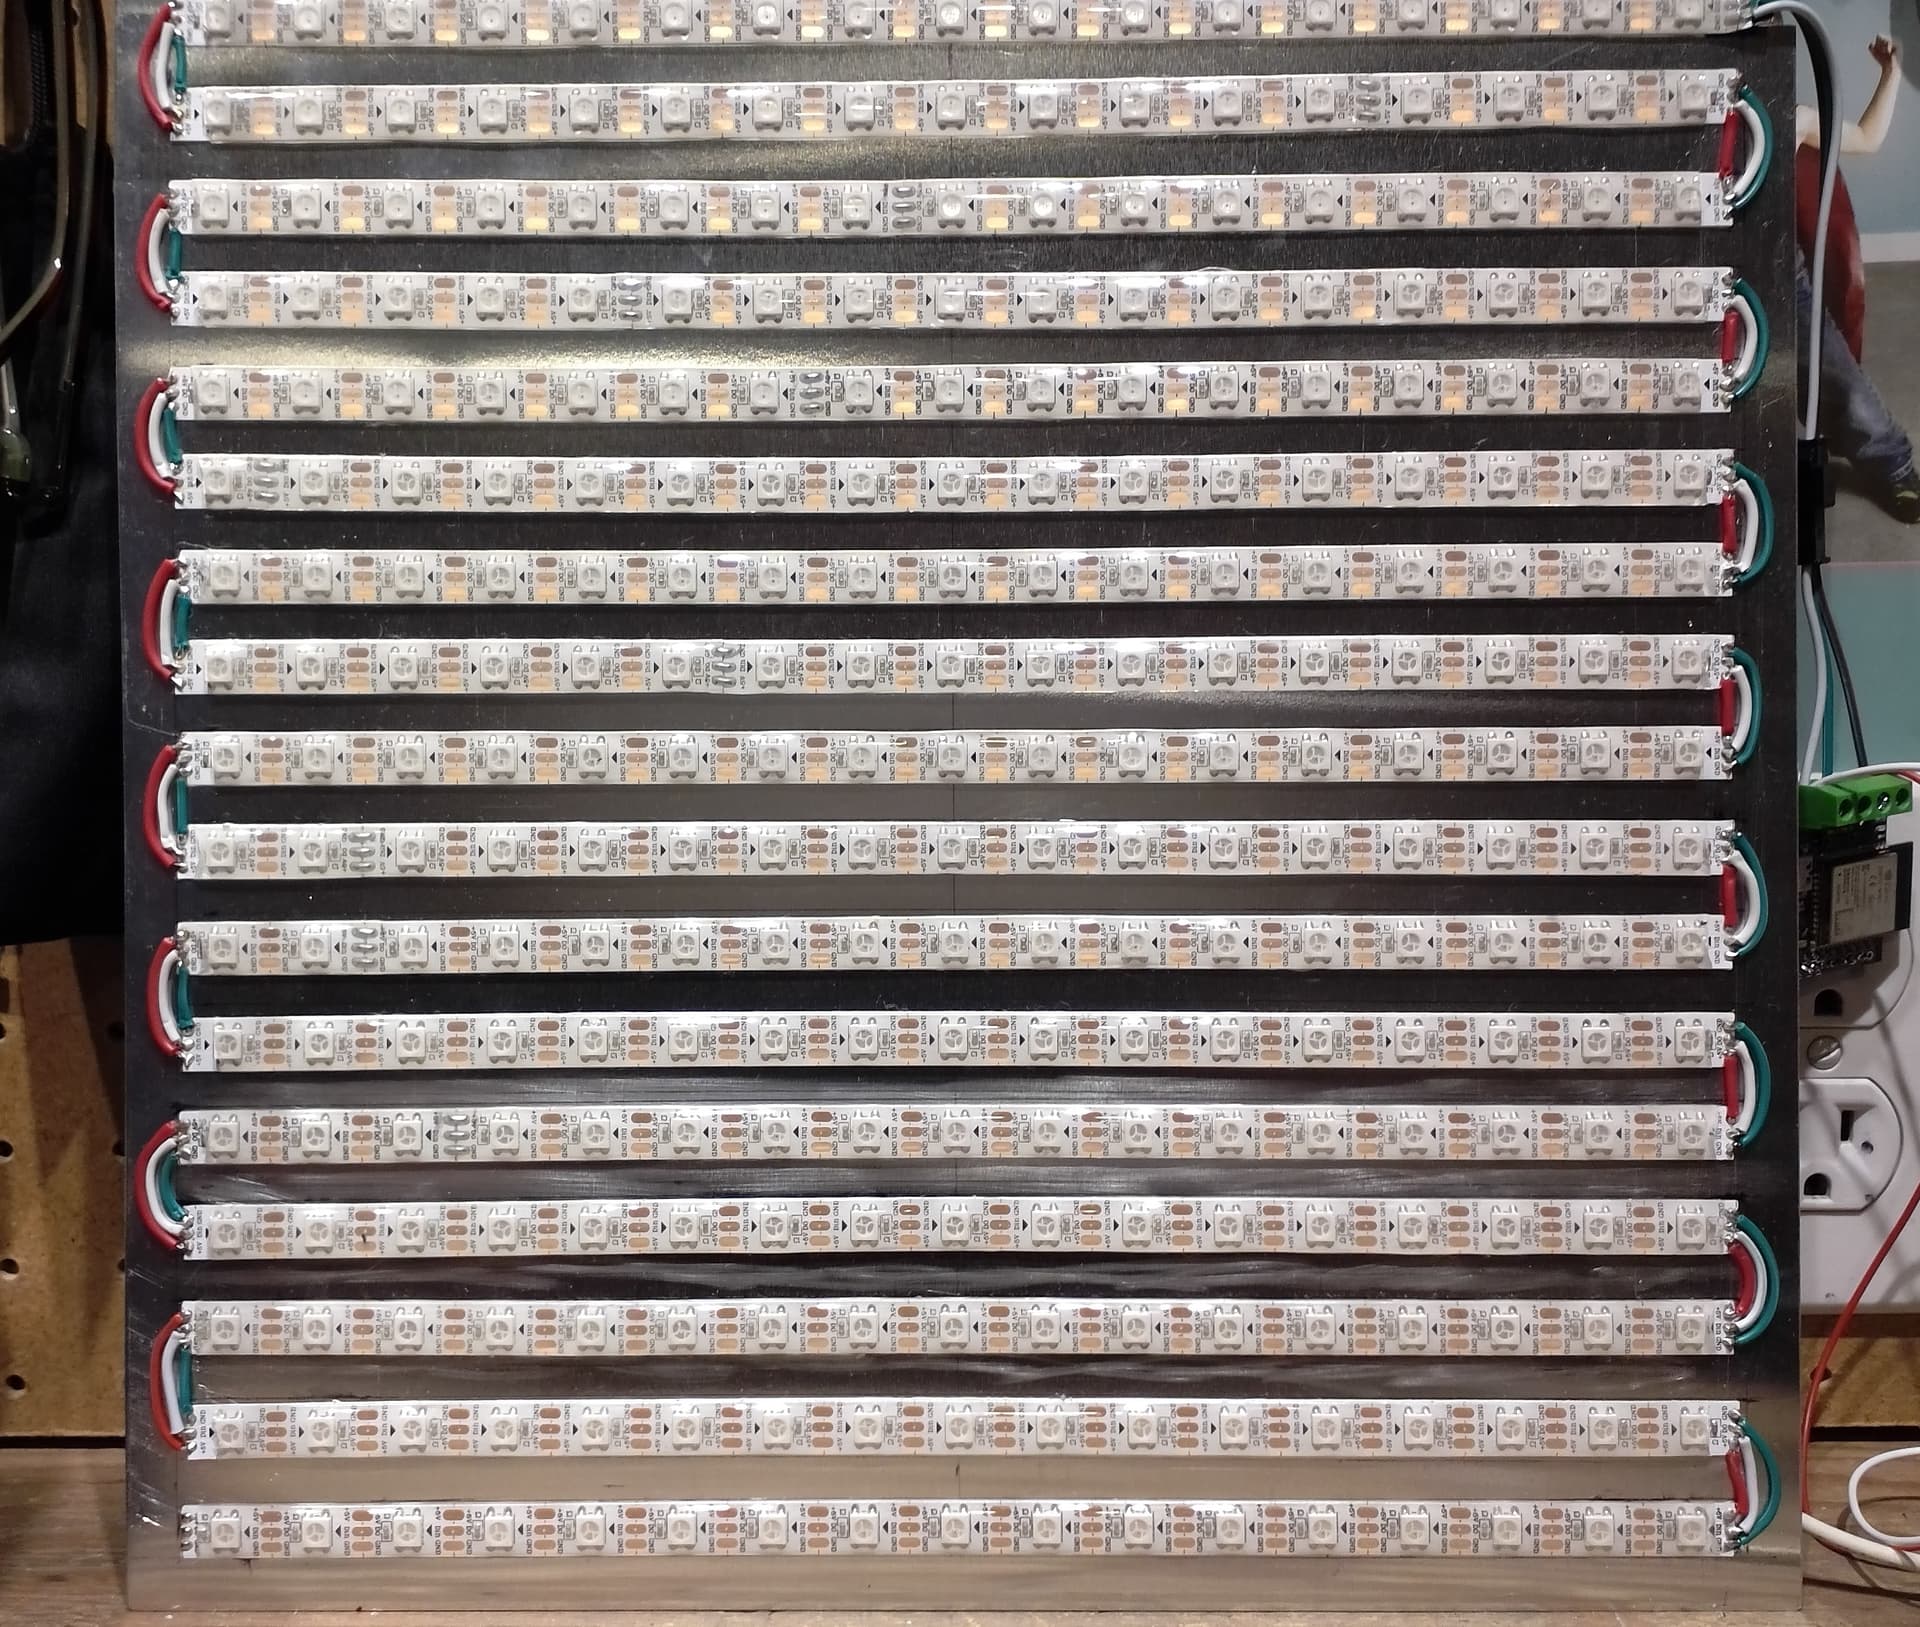
At this point 17 strips of 17 LEDs each were mounted onto a 12" X 12" sheet of .025" aluminum, wired in a zig zag, and operation tested before sliding it into the rear slot. The vertical spacing was matched to the horizonal spacing on the strip (60LEDs/m = 16.66 mm), and a 10mm margin left on all four sides for clearance to the frame.
The 12" X 12" piece of 3mm black LED acrylic , (Opti-k from Chemcast) was then slipped into the front slot, glossy side facing out, matte finish facing in. NOTE- peel the protective film off the sheet just before inserting to minimize any scratches or dust. The bottom piece was installed using only screws and no glue just in case the box ever needs to be taken apart. After assembly, I rubbed on a couple of coats of Turtle Wax (yes, for cars!) and hand polished. The finish looks similar to that of a grand piano, but with a subtle grain effect.
On to the back of the aluminum sheet I mounted the battery pack, Pixelblaze controller, voltage monitor, 12V to 5V converter and necessary wiring. 3mm hardboard was used for the backboard and a 12V female power outlet for charging/external power supply, a female JST XH2.54 4-pin connector for the balance leads used during charging, and a push button switch were mounted through the back for external control and charging. The use of JST LED 3-pin connectors between the interior components and those mounted externally on the backboard allows for complete removal of the back without cutting any wires. A cutout in the board right over the voltage monitor and Pixelblaze controller is covered with a small speaker grille to allow the mic on the controller better access to ambient sound and the voltage display is also visible through the speaker cloth.
I decided against wired line-in connections to the controller because I wanted totally cordless units and there is talk that soon we will be able to use one controller on a line-in audio feed and the others on the network will sync their sound reactive display to the connected unit.
![]() Mesh Networking - Sync Pixelblazes
Mesh Networking - Sync Pixelblazes ![]()

Here is what the back looks like after completion.
Four self-adhesive neoprene foam blocks were added on the back and the base to protect walls and furniture from scratches.
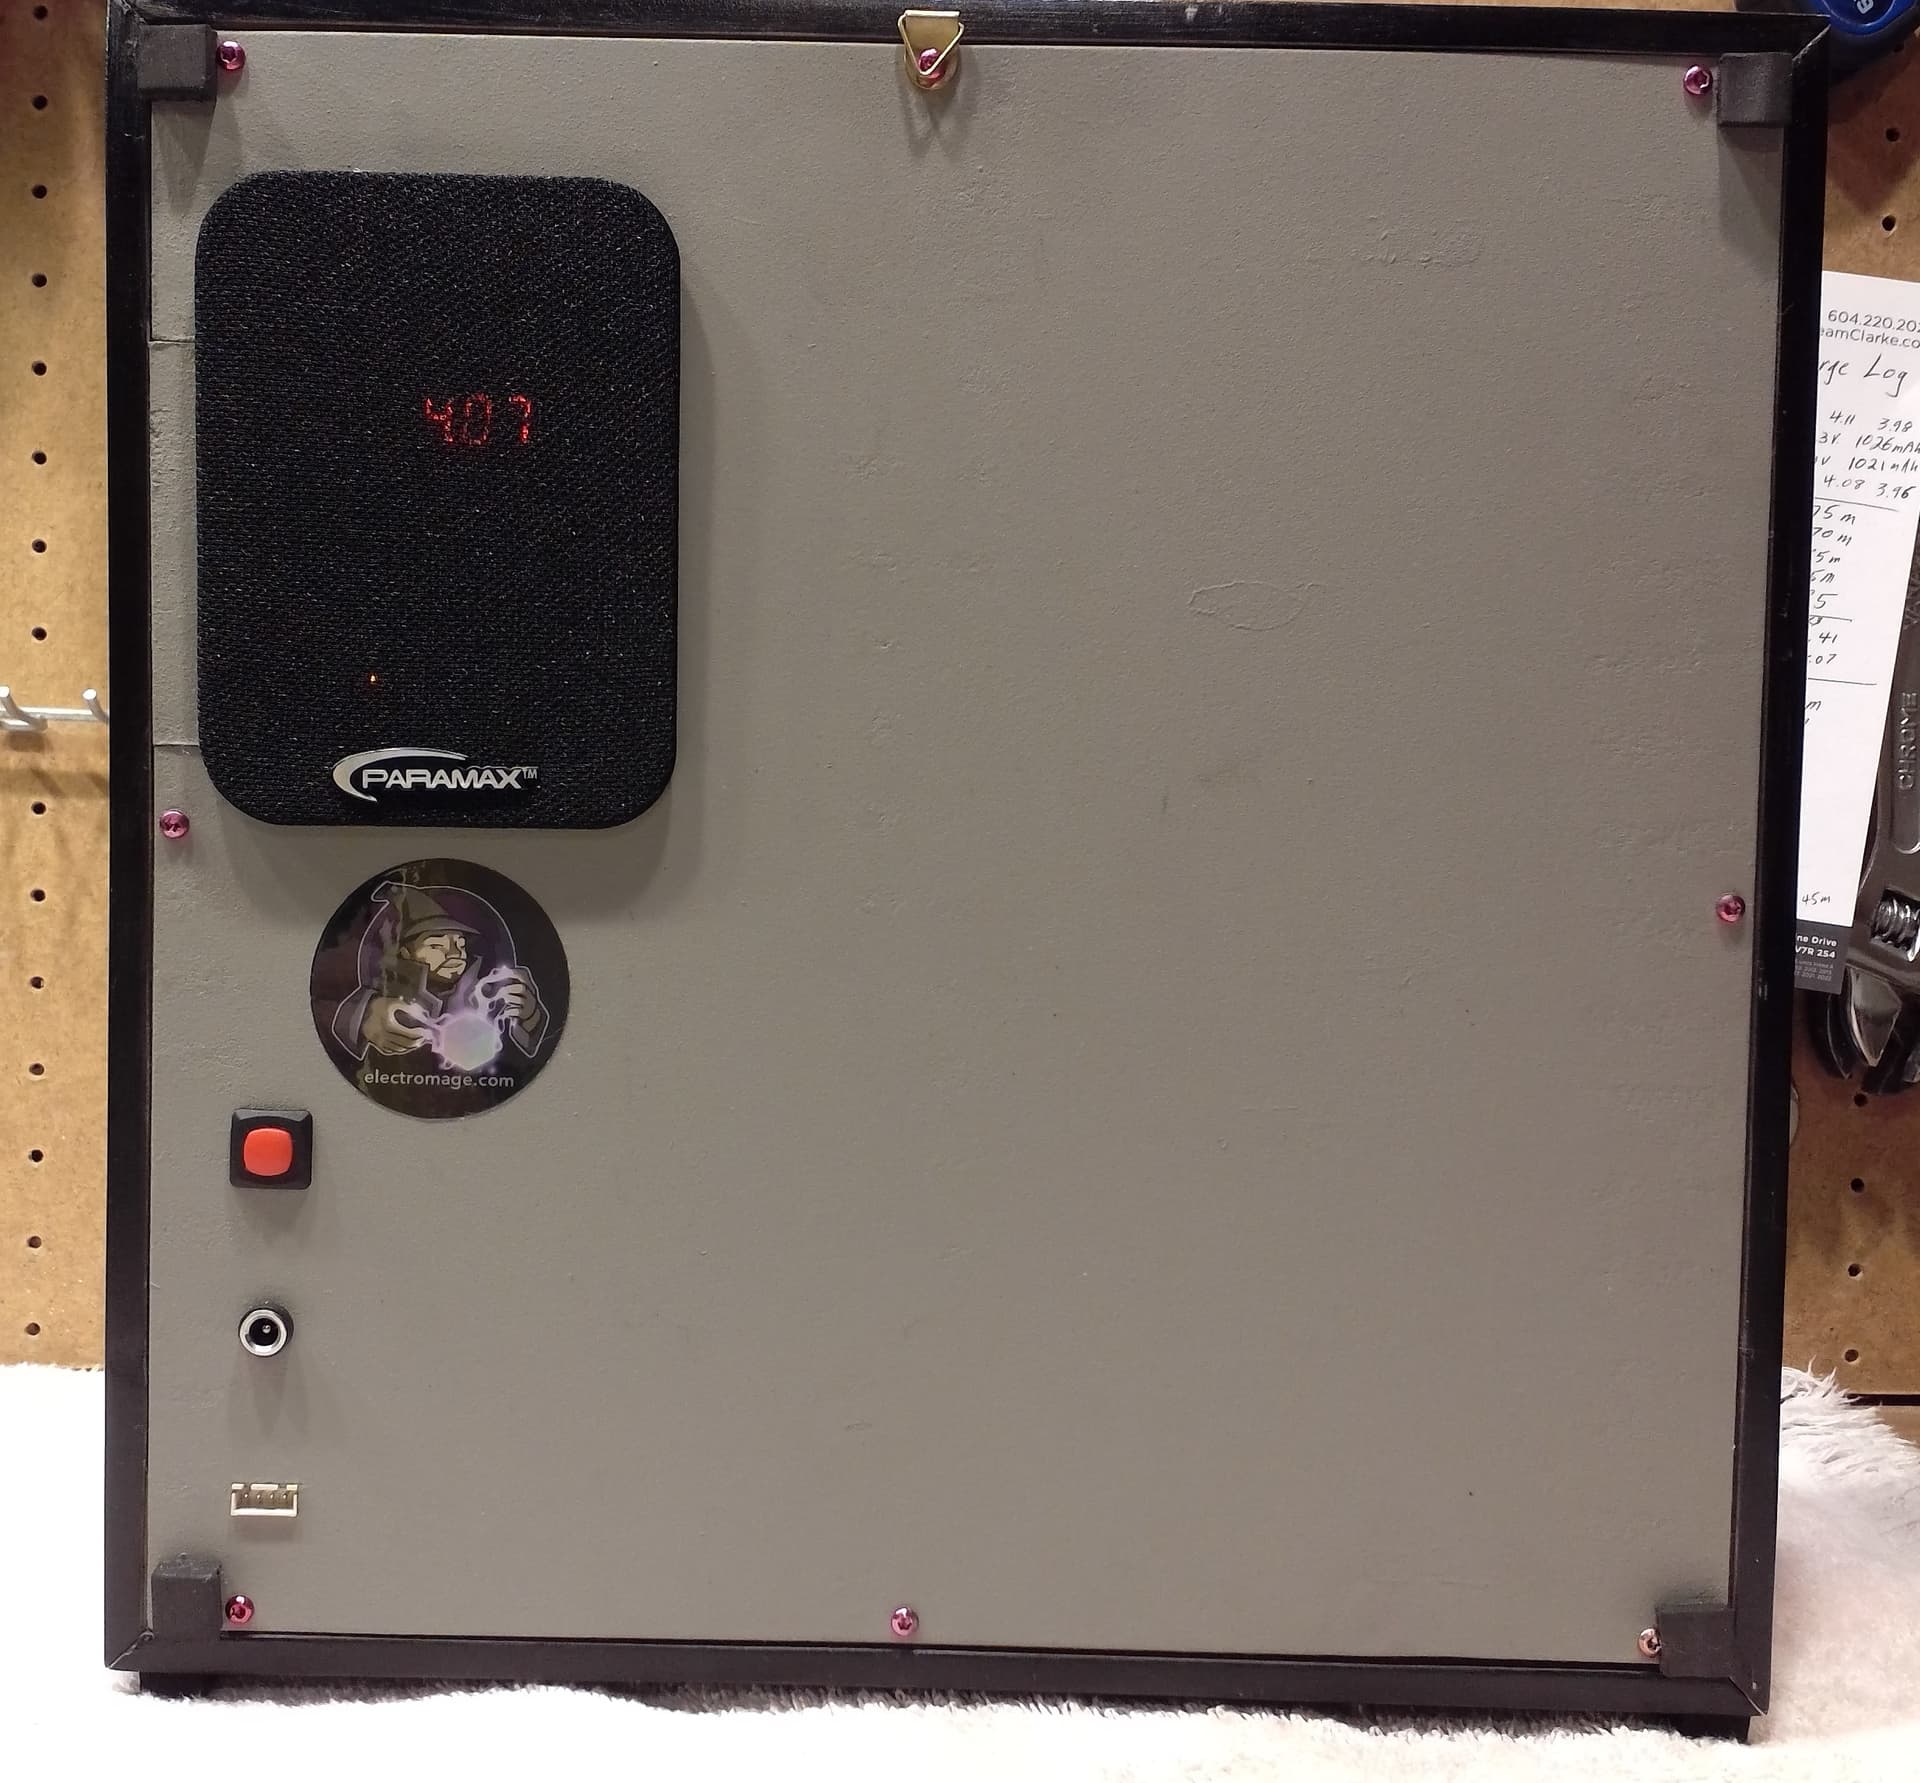
I think I may have found the perfect spot for the Wizard’s hologram sticker!