Hi I have two questions:
-
Is it possible to change from the pattern mode, where one pattern plays without changing, to the playlist mode with an external button?
-
Can an external button be added to a pico?
Hi I have two questions:
Is it possible to change from the pattern mode, where one pattern plays without changing, to the playlist mode with an external button?
Can an external button be added to a pico?
Hey @slippers! Welcome to the forums!
No, this isn’t possible right now. The external button will advance the current running pattern. If it’s in a playlist mode, it advances to the next pattern in the playlist. If the playlist mode is off, it advances the pattern from the full pattern list.
If you’re in an environment where you have a mobile phone or other web browser available, you can connect to the Pixelblaze’s IP address and toggle the playlist on/off from your web browser.
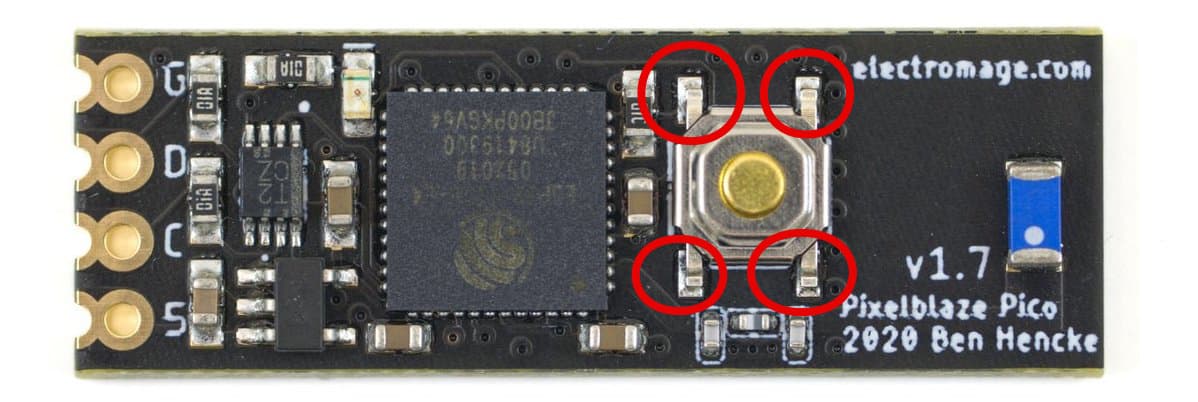
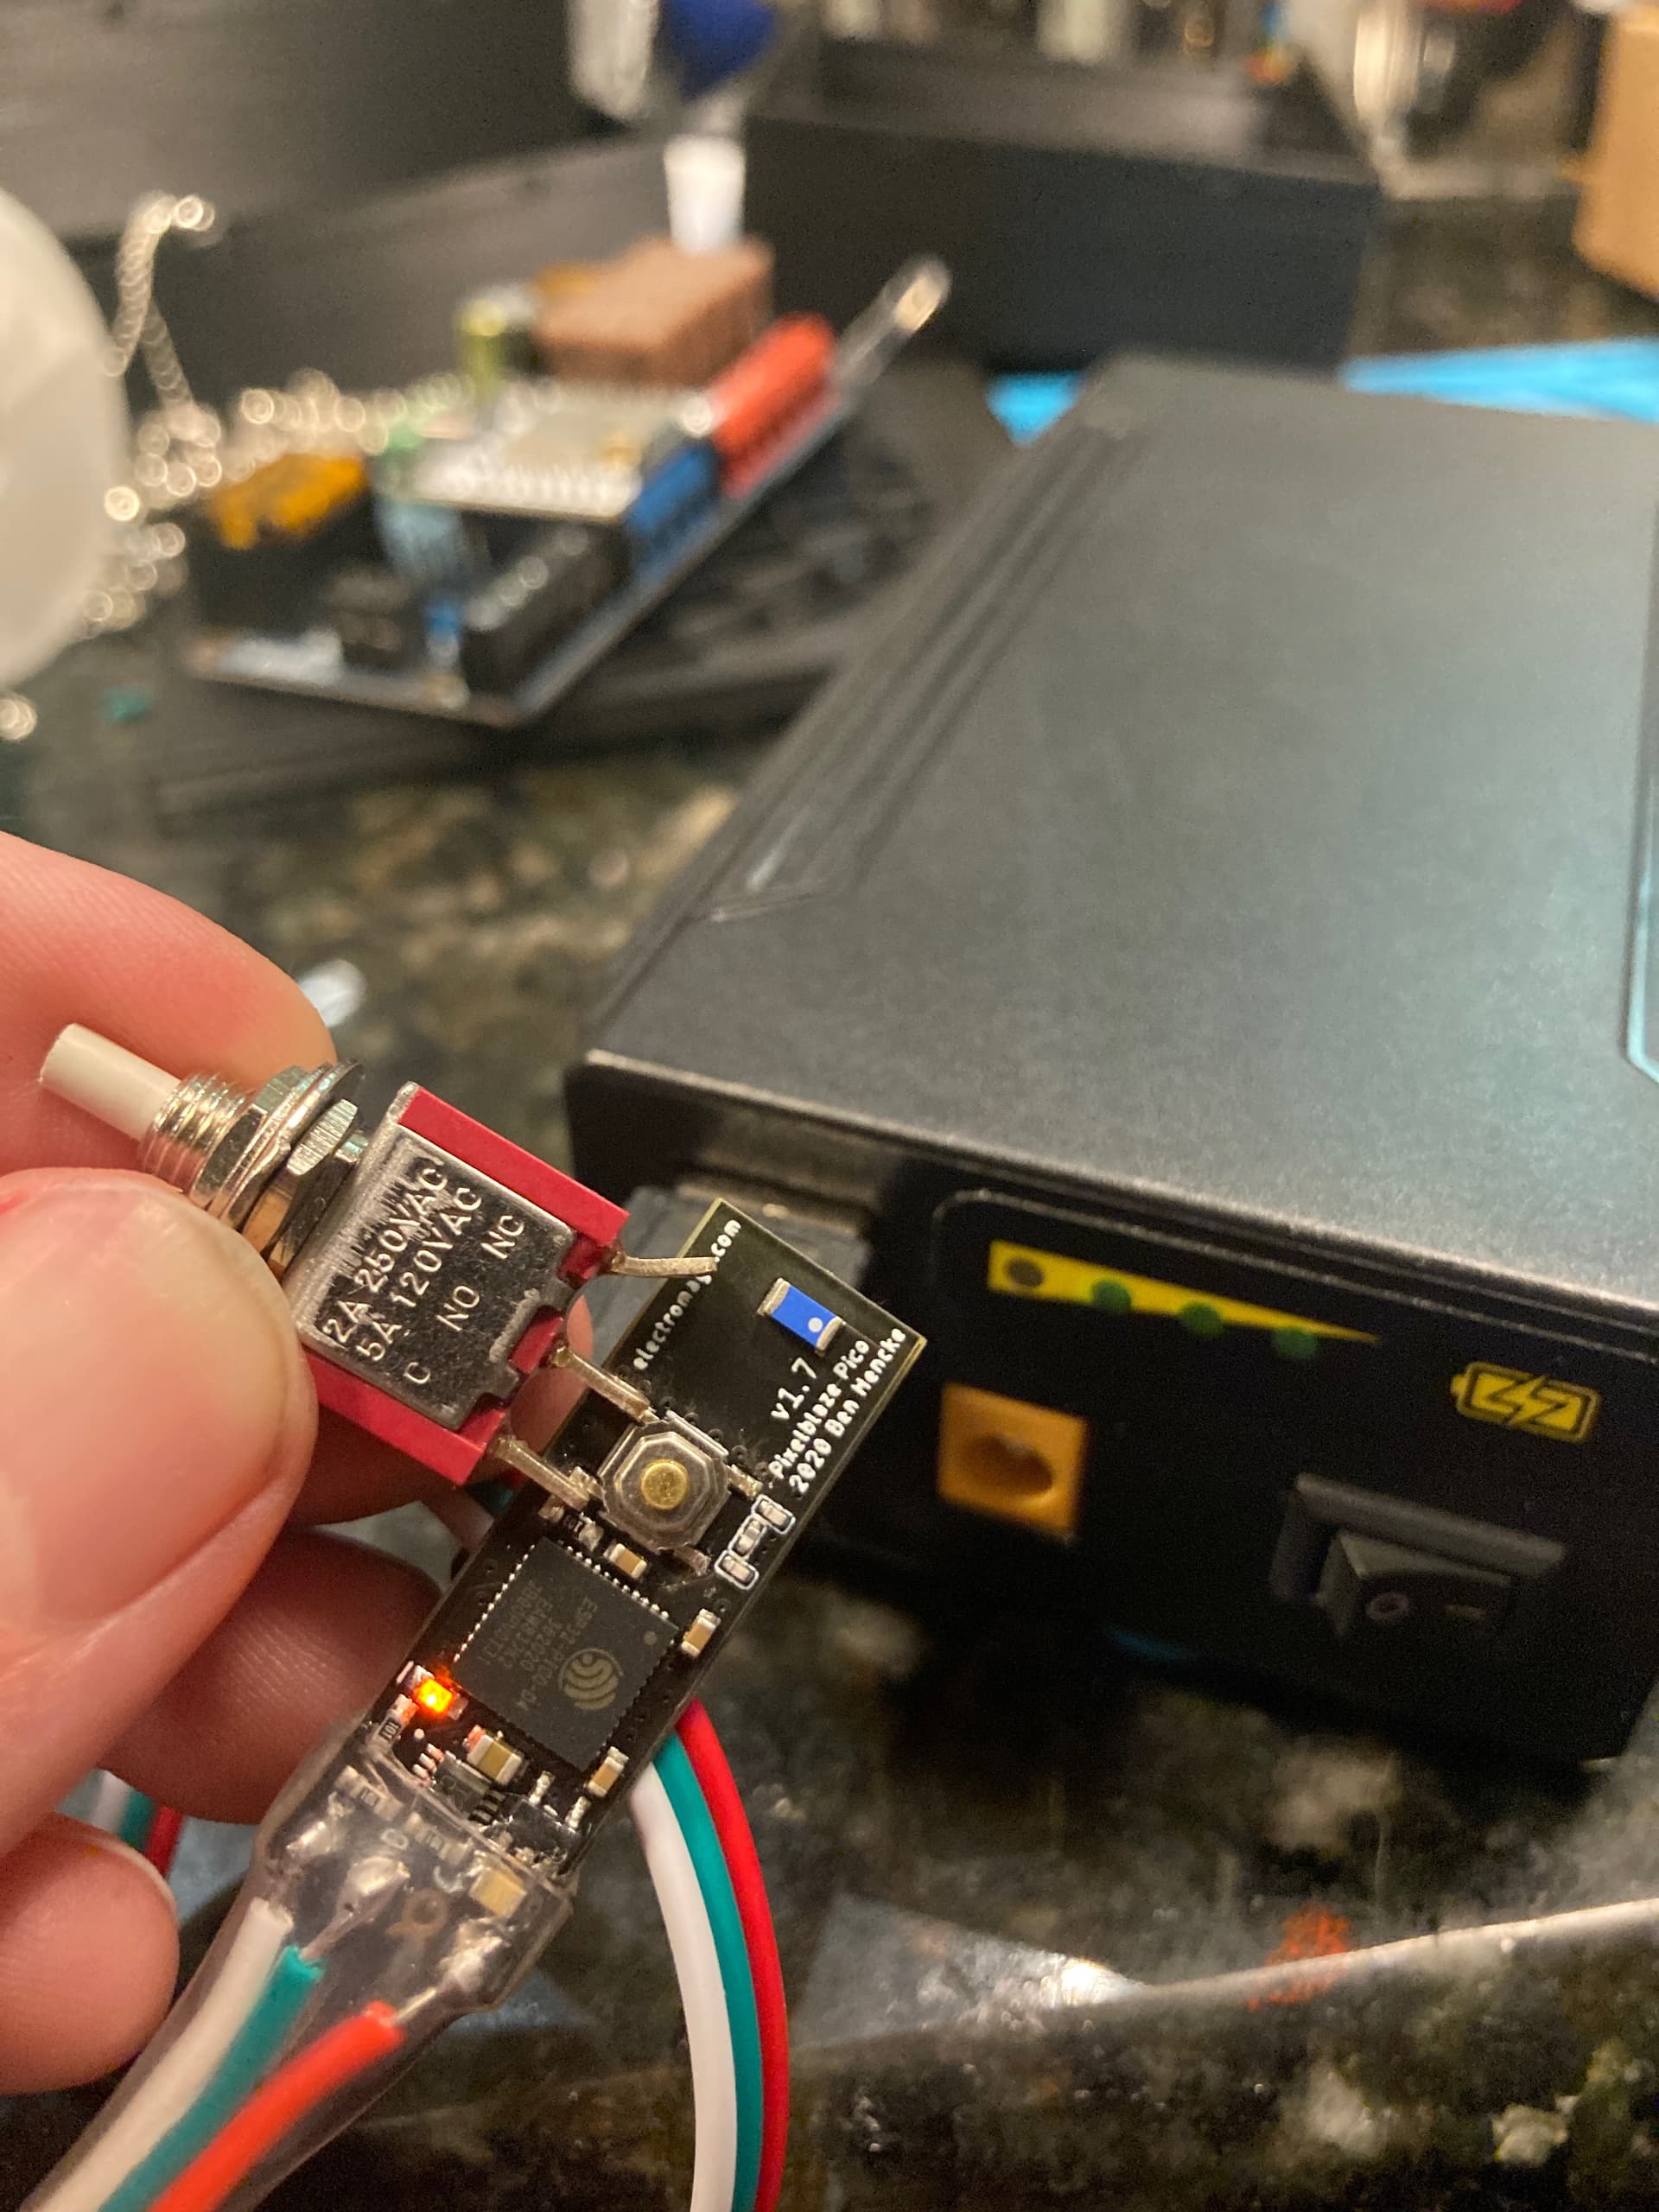
Yes, but only via very careful soldering to one of the surface-mount button’s small leads. Here’s what the backside exposes:
Here’s a description of those pins:
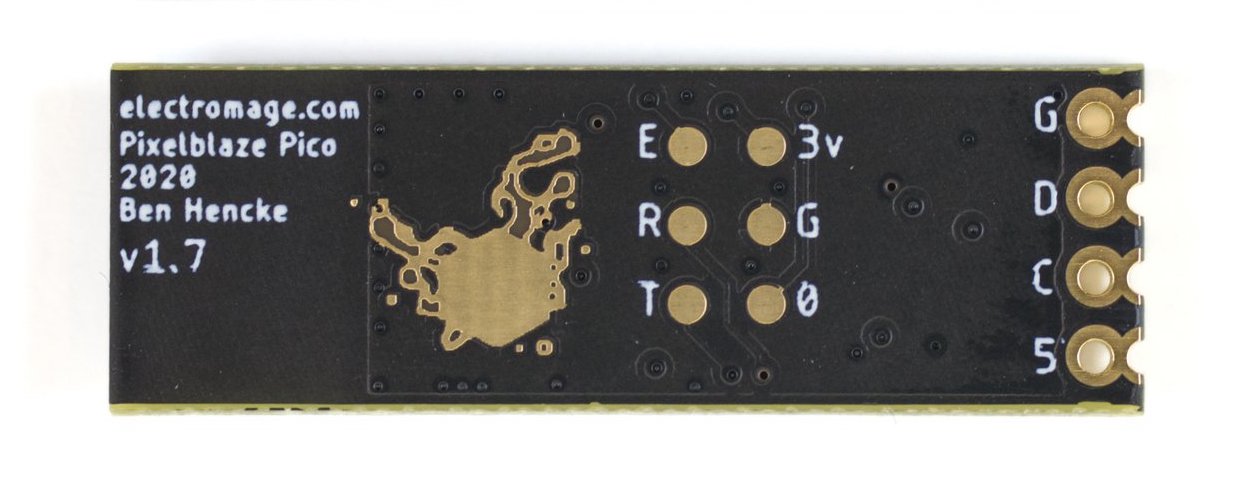
- Programming pads: six pads on the underside of the board carry GND, EN, 3.3 V, RX0, TX0, and IO0 for factory programming and can be hacked to support the Sensor Expansion Board
Which matches the schematic at https://github.com/simap/pixelblaze/blob/master/V3/hardware/PB32Pico_1.x.pdf
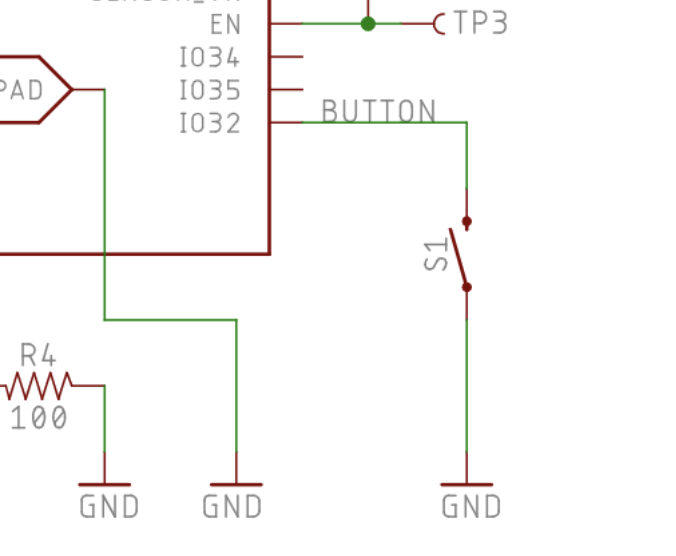
Zooming in on one part of the schematic, we see that the underside pad exposed pins are shown with a semicircle (for example, EN is exposed as TP3), and there’s no such “TP_” pad for the button pin (IO32) on the Pico.
Therefore, I think the best way is to solder a external, normally-open temporary pushbutton in parallel to the existing button with one side going to GND (either of the pads labeled “G” or the GND side of the existing button) and the other external button lead going to the IO32 side of the button on the top side of the board. I’m away from my equipment right now, but you’ll need to use a continuity meter or ohmmeter to figure out which of the four pins on the button to (carefully!) solder to.
With power off, it will be one of the pins that does not have continuity with ground. With power on, you could (once again, very carefully) use a test lead or probe to try momentarily tapping to connect each of the four button legs to ground, and see which one advances the current running pattern.
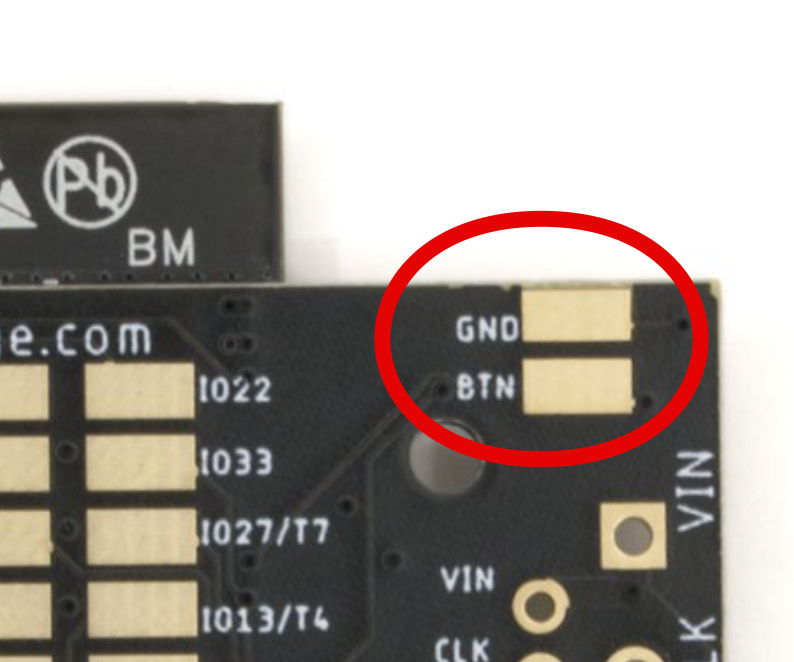
On the full-size Pixelblaze v3, this is quite easy; it has exposed pads on the underside to solder to:
@jeff Thank you so much for this very detailed answer!
When I get a chance, I’ll solder wires from the top two pins of the pico’s button to mine. Thanks again!
Hey all wondering on pico V3 which pads i need to solder for to add external button or can i safely test this by connecting them together to work out which works ?