So, much of this information you can find other places, but much of it seems to assume that you know much more than I did when I first got a Pixelblaze. So, I figured I would write a tutorial for all of us that don’t want to worry about theory and don’t have a degree in programming.
So, if you are a non-techie that just wants to make something for your child and you came across this Pixelblaze thing…
First, go to the bottom and check the list of things that you need that PixelBlaze does not come with, that way you can order all at once and once most of it comes in, you can get started with:
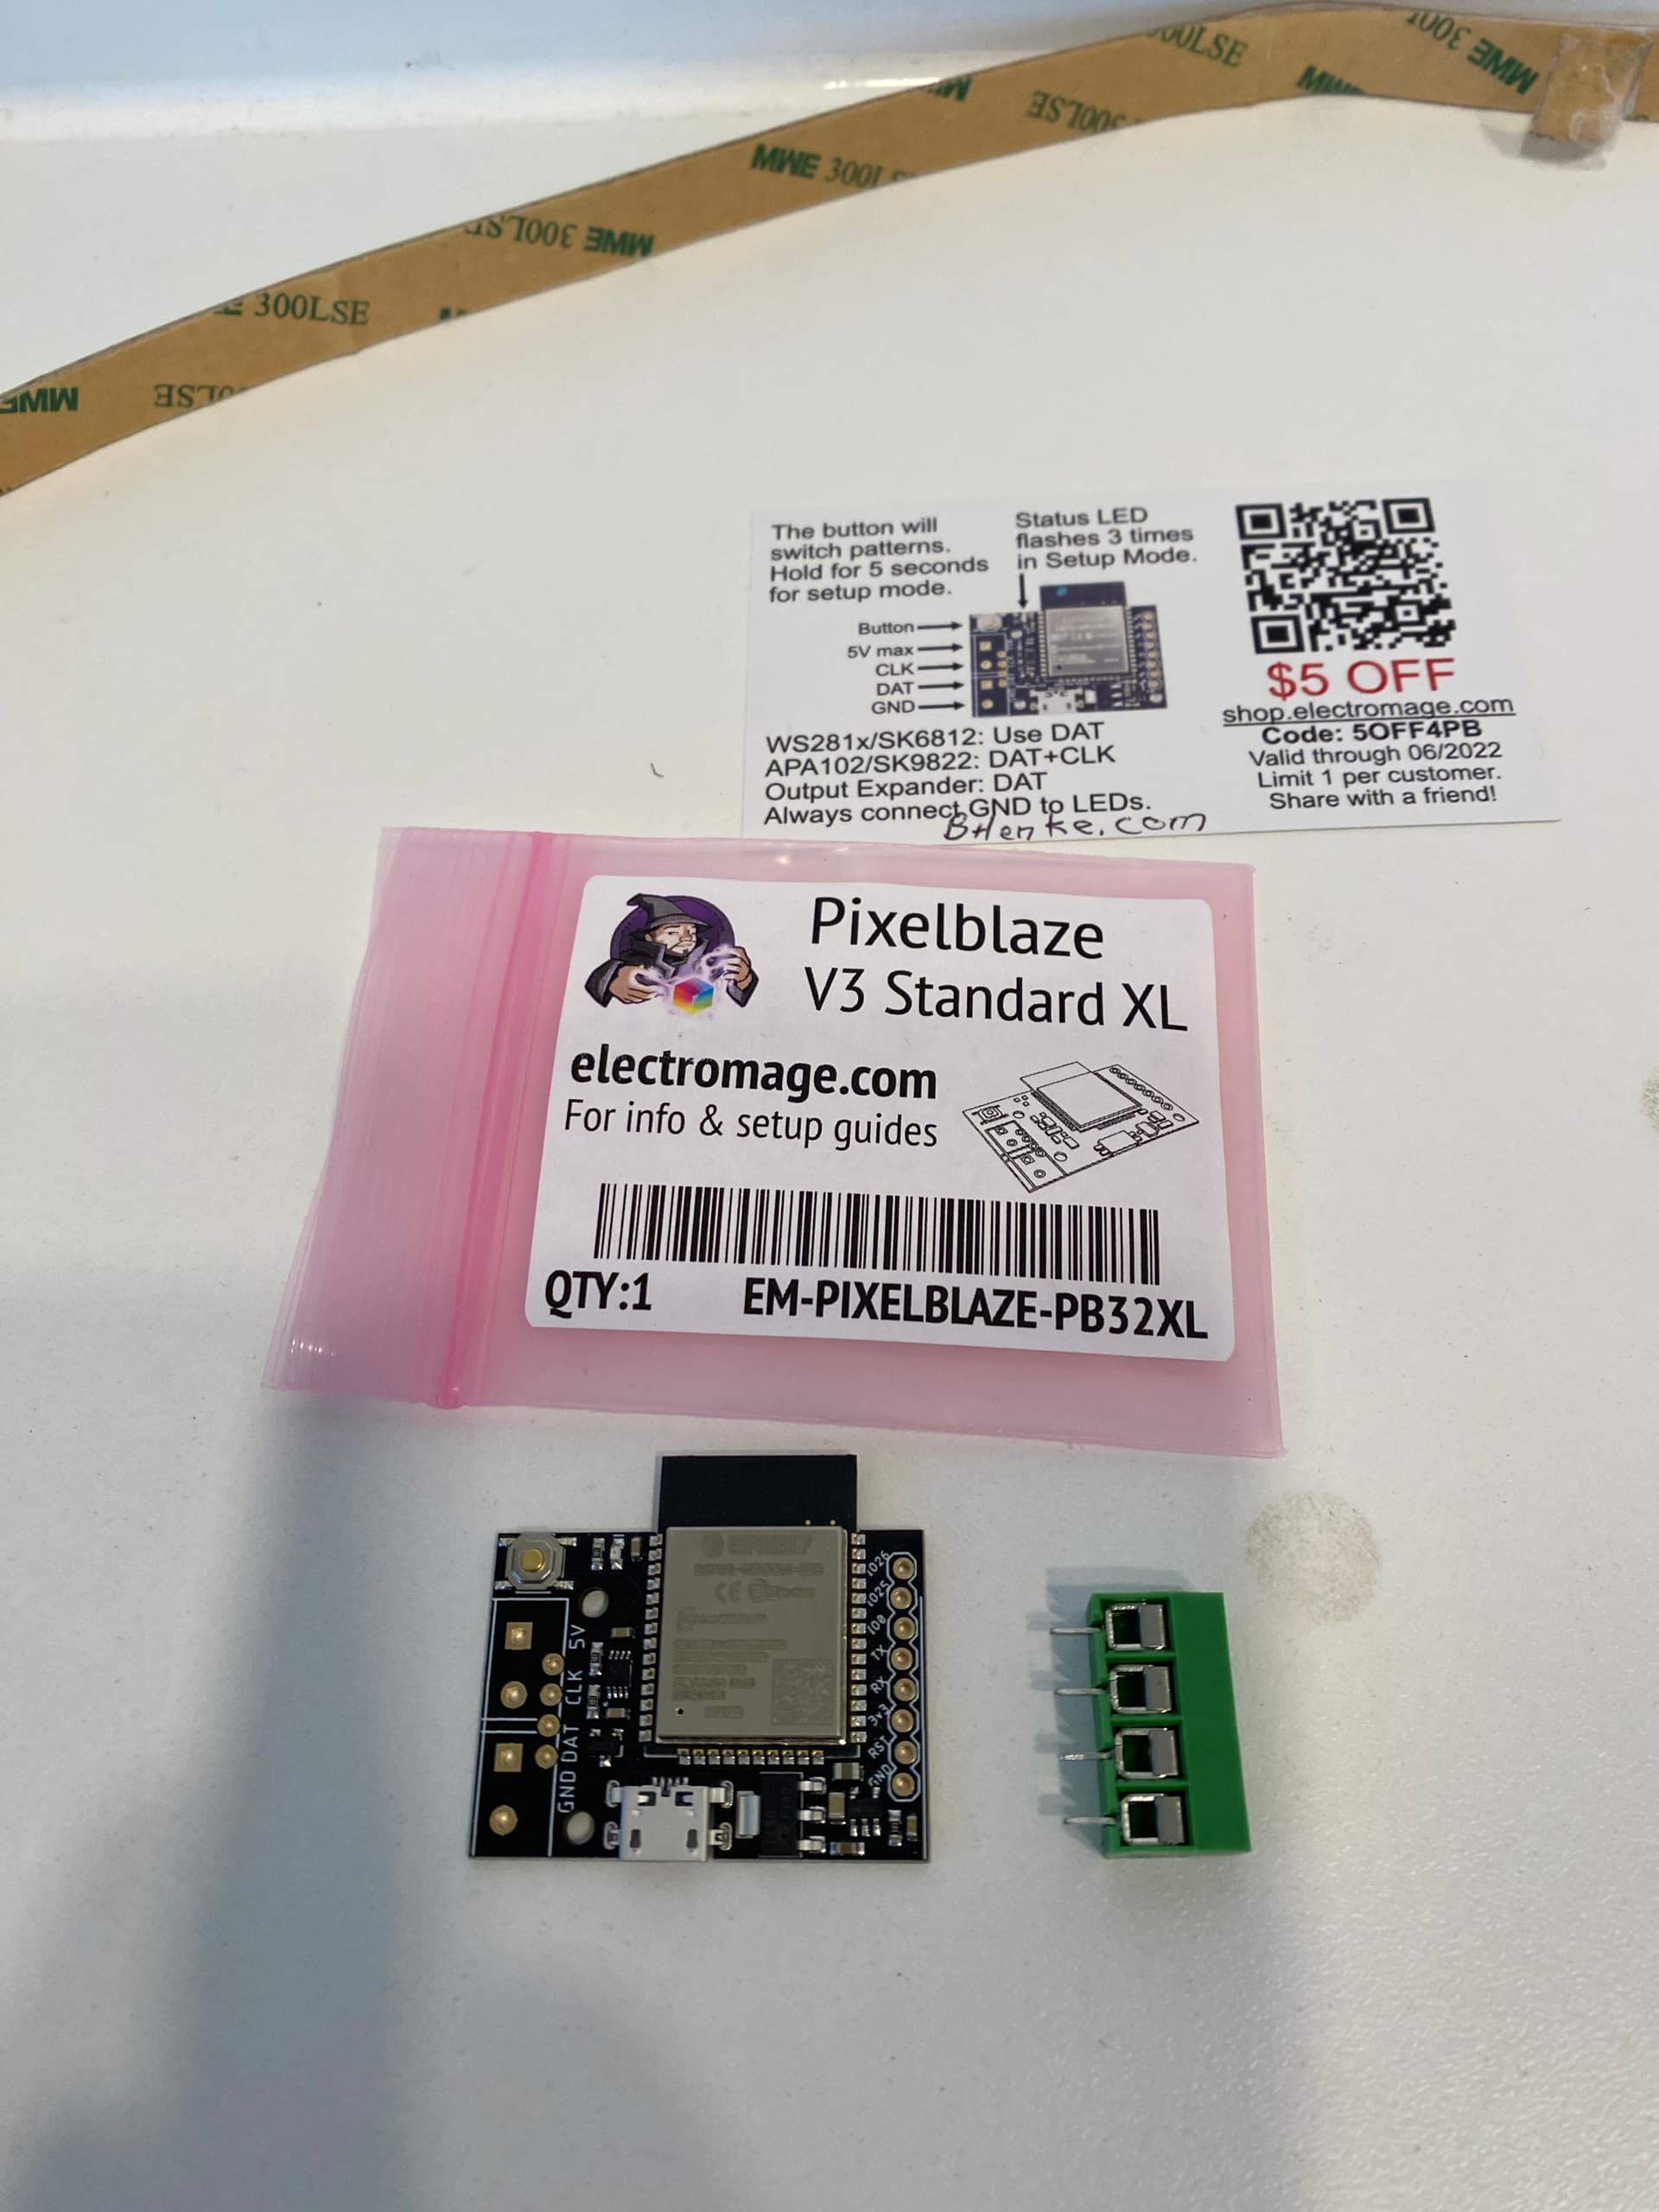
First, when the package shows up, it looks like this:
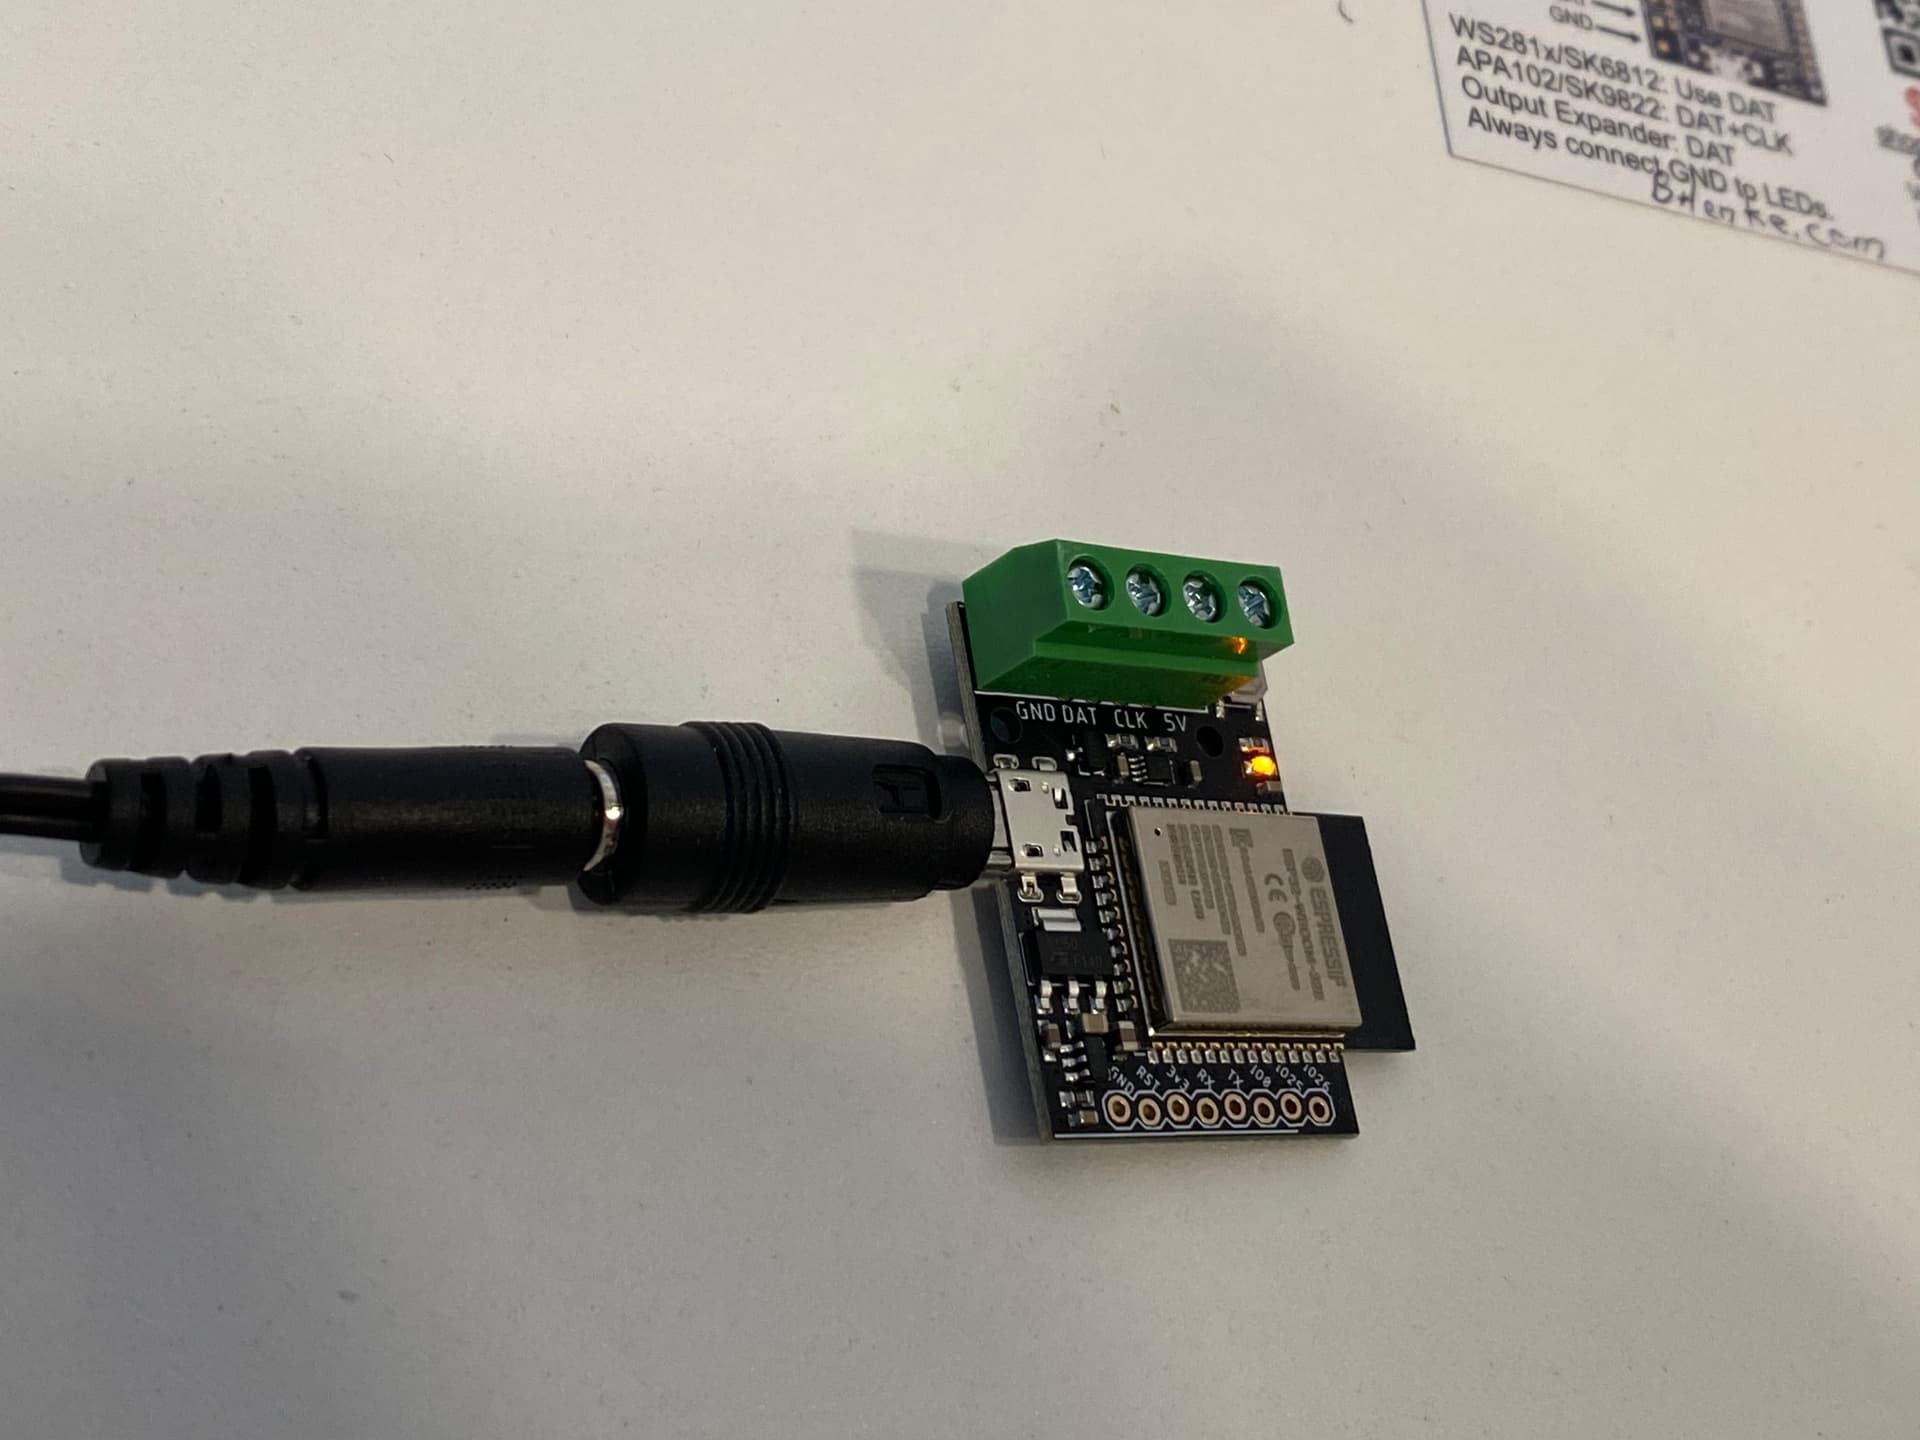
The first thing to do is plug a micro-USB connector into it. Note that the port is upside down from what I expected, but it should look like this when you plug it in:

Note: I got both a battery powered and a wall-wort USB power supply. I recommend both as the whole point is this thing is small and mobile, but it always worries me as I am trying to set it up and I know battery is draining in the background. See below.
Once you plug it in, the little orange LED will light up for a second, go out, then come on and stay on after a couple of seconds. You can see it in the below, right next to the Green attachment block. (the green block is not on it when it arrives, but more on that later.)
Once that happens, go to your cellphone and open Settings and go to the Wifi setup. There should be a Pixelblaze network showing up. Connect to that. It will take a few seconds and complain that it does not have internet access, which is fine.
Once you are connected, get out of settings and bring up a browser. On an Apple it is Safari, open it up and type into the address block 192.168.4.1. (That is the default Pixelblaze IP address from the factory). It should show you a spinning cube and then pop up a page that looks like:

Congrats! You know you got a good chip from the factory!
Now, at the top of the page it says Pixelblaze, Patterns, Edit, Mapper, Settings and Wifi. Select WiFi.
The page should now look like this:
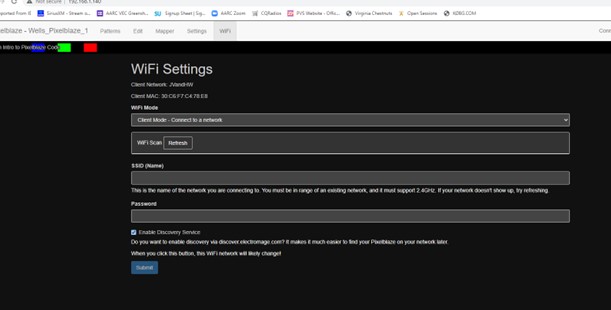
Change the WiFi mode to Client Mode, Then click on the Refresh just below that and select your home WiFi network. Put in your Password, make sure that Enable discovery service is checked, and click on Submit. The Pixelblaze will now reboot. You will see the LED go out, flash and eventually come back on and stay on. You can now switch your phone back to its normal WiFi settings.
And now, you can go onto your laptop or regular computer and continue the setup.
First thing, go to your web browser and go to:
http://discover.electromage.com/
You will see a page that looks like:
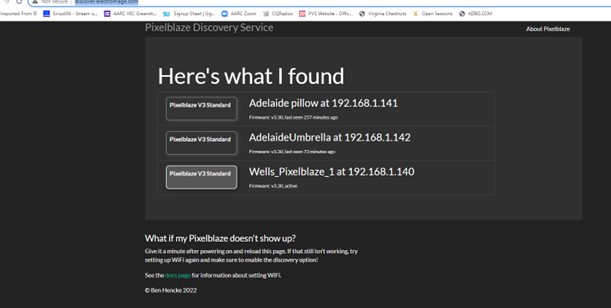
If you click on the big bubble beside your Pixelblaze, you will see the cube again and then the patterns page comes back up. Success! Your Pixelblaze can now be operated from your computer.
Next thing you need to do is:
Click on the Settings word (technically it is a tab, but there is no edge that shows) at the top. You will see a page that looks like this:
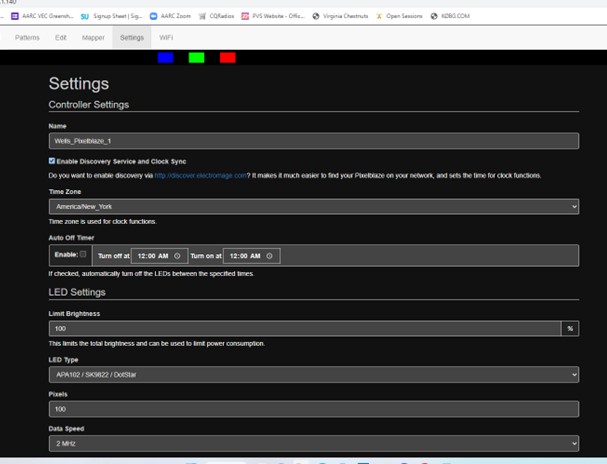
You will be happiest if you do the following four things:
- Change the top line that Says Name: Change it to something you like, but keep Pixelblaze in the name. You can see above where I named one AdelaidePillow, since that controller runs the pillow I made for my daughter. I have since added PixelBlaze to the name so that with all the devices that accumulate on my home network, I at least know what this is when looking from the router and I am tired and looking to kick stuff off…
- Scroll to the bottom and click on check for updates. Once they show, click on perform update and restart. Wait until the chip LED stops blinking and then refresh the web page.
- Find the line that says Limit Brightness about half way down the page. Limit the brightness to 50%. Especially when you are first playing with it, 50% is plenty bright and you can look at the LEDs without squinting.
- Find the line that says pixels (two down from brightness) and change it to the actual number of LEDs in whatever string you purchased.
Now the initial setup is done and you know you have a good chip and can tinker with it. Now another round of hardware setup.
First, unplug the Pixelblaze and grab the green post block. Solder it into place in whatever orientation you like. Technically four are possible, all of them work. This is the orientation I chose:
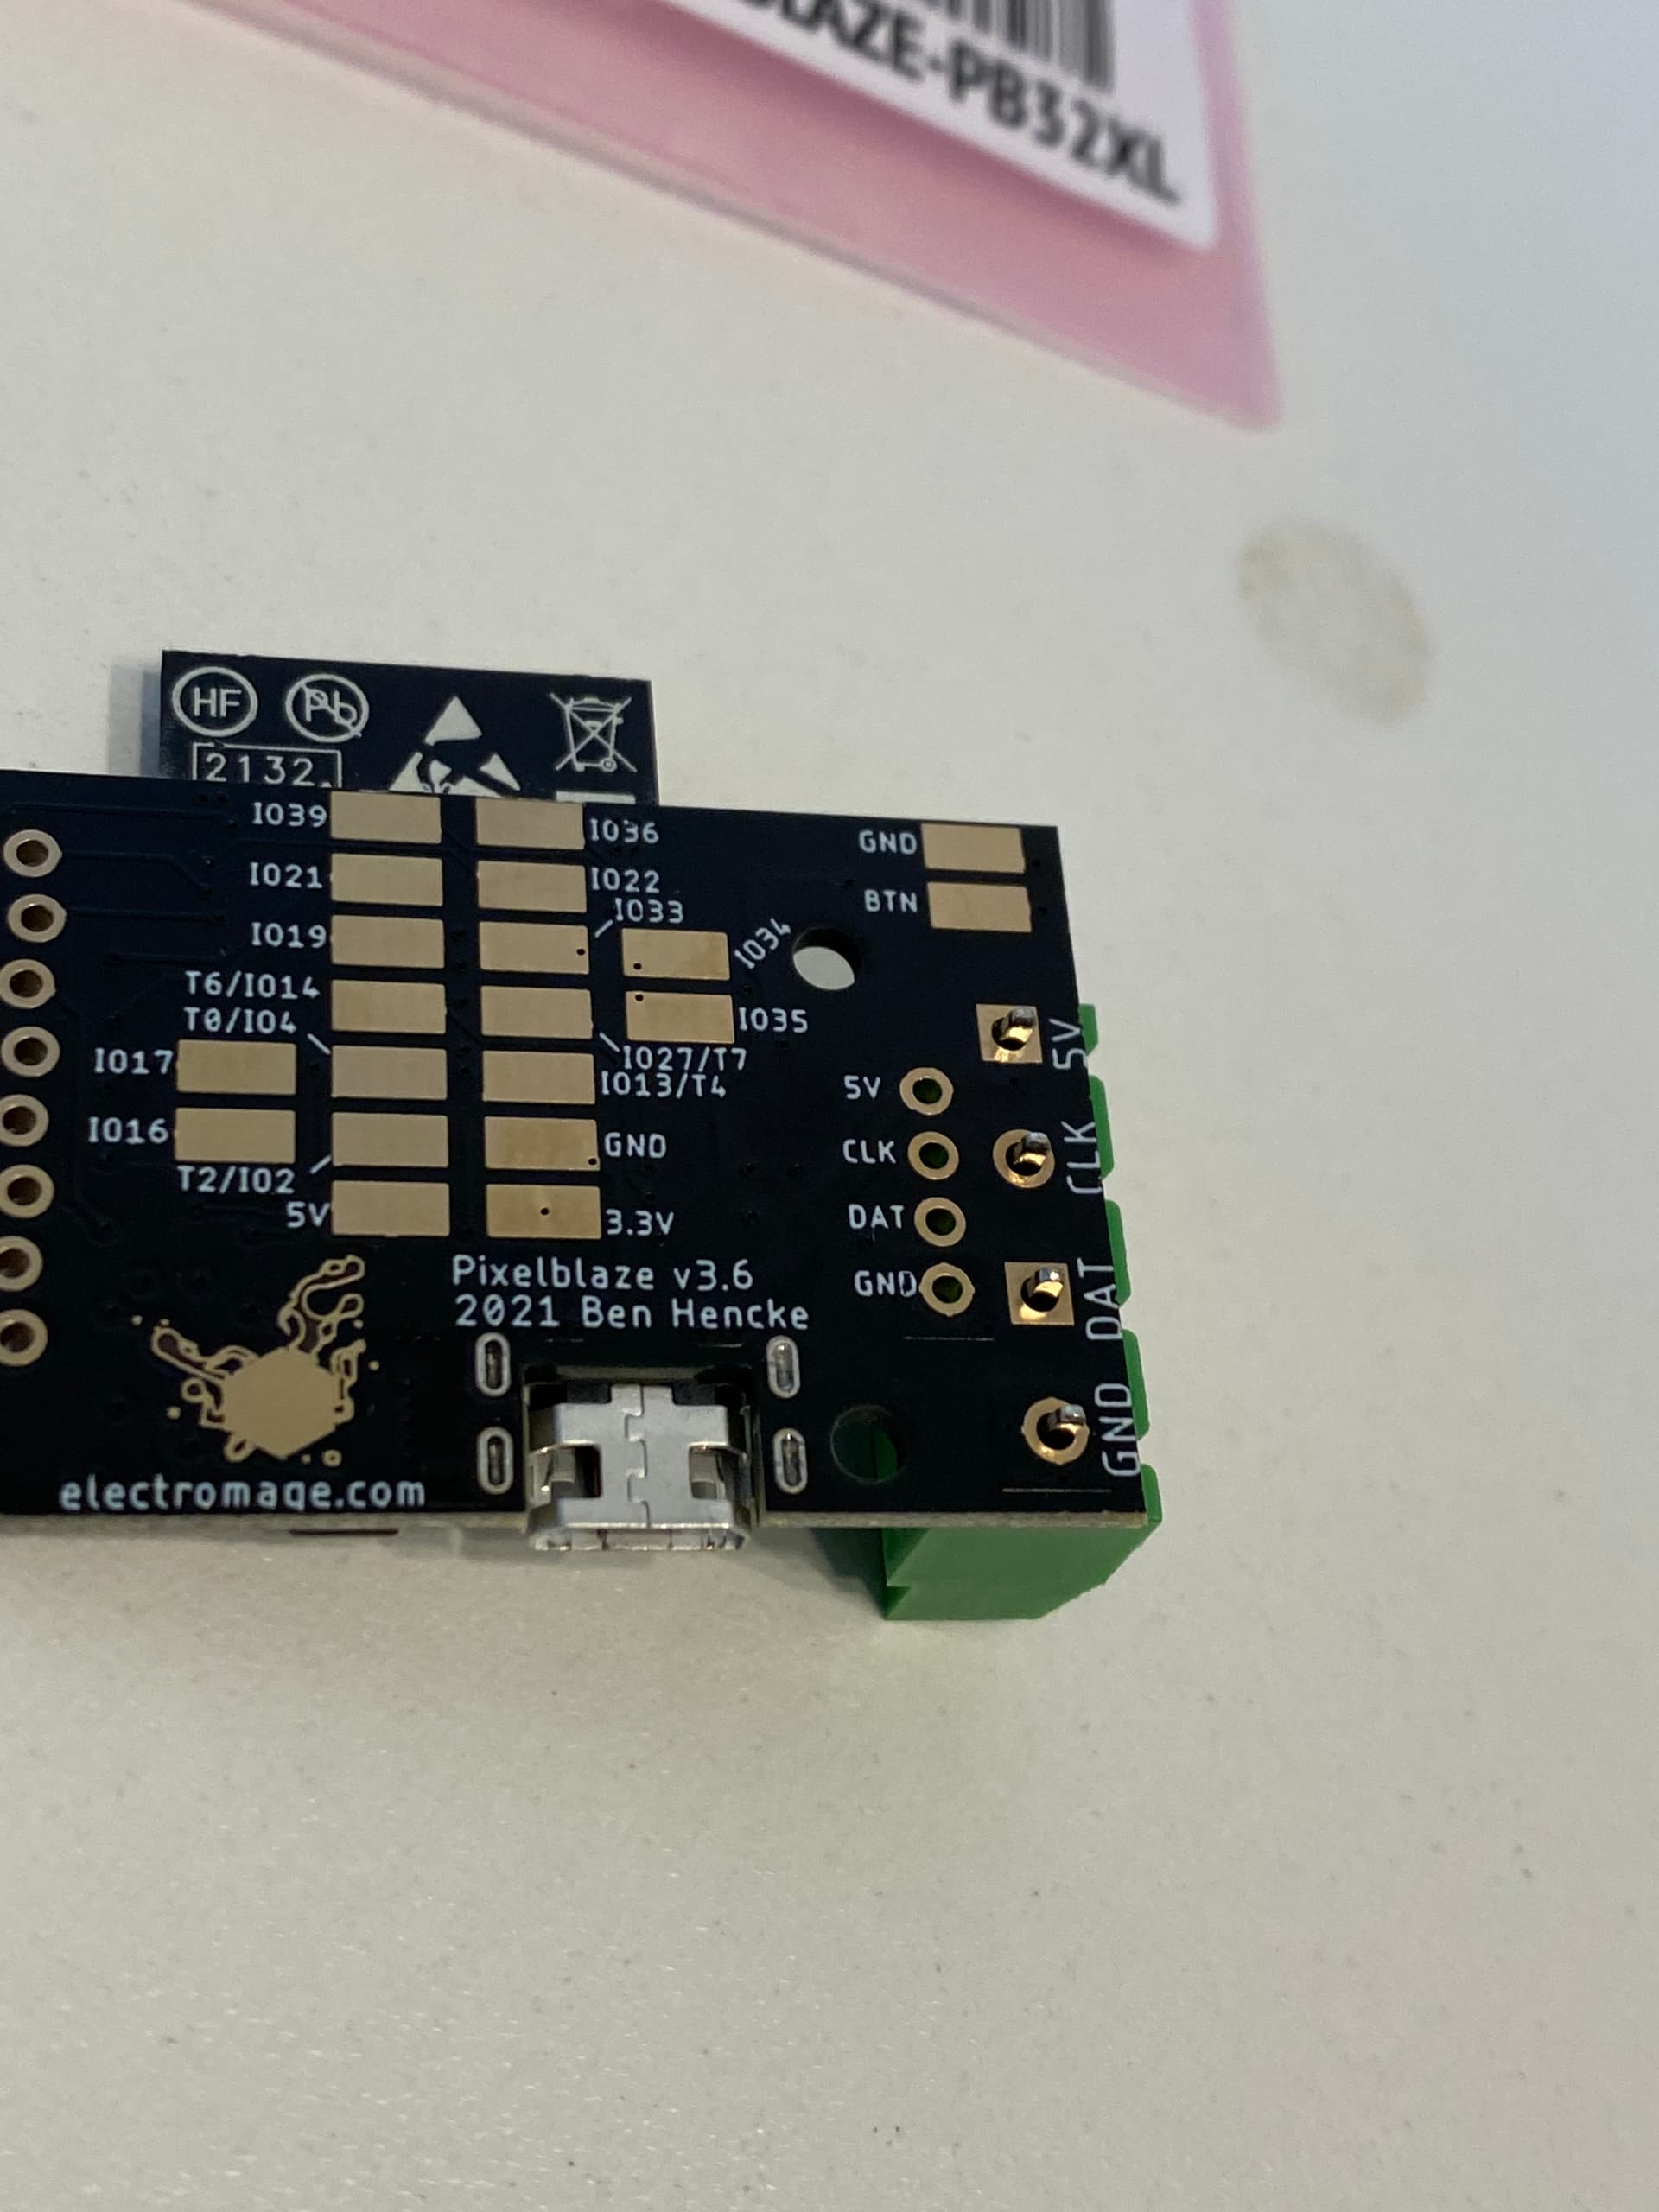
If you do not have a soldering iron, see below for a moderate kit from Amazon. That kit includes a tiny philips head screwdriver that you need to attach the LEDs. Also, note that fully open for the screw in the green block is flush with the top of the green. They show up that way. Unscrewing them further just makes the screw fall out. Ask me how I know.
I recommend starting with a string of the APA 102 LEDs that look like this:
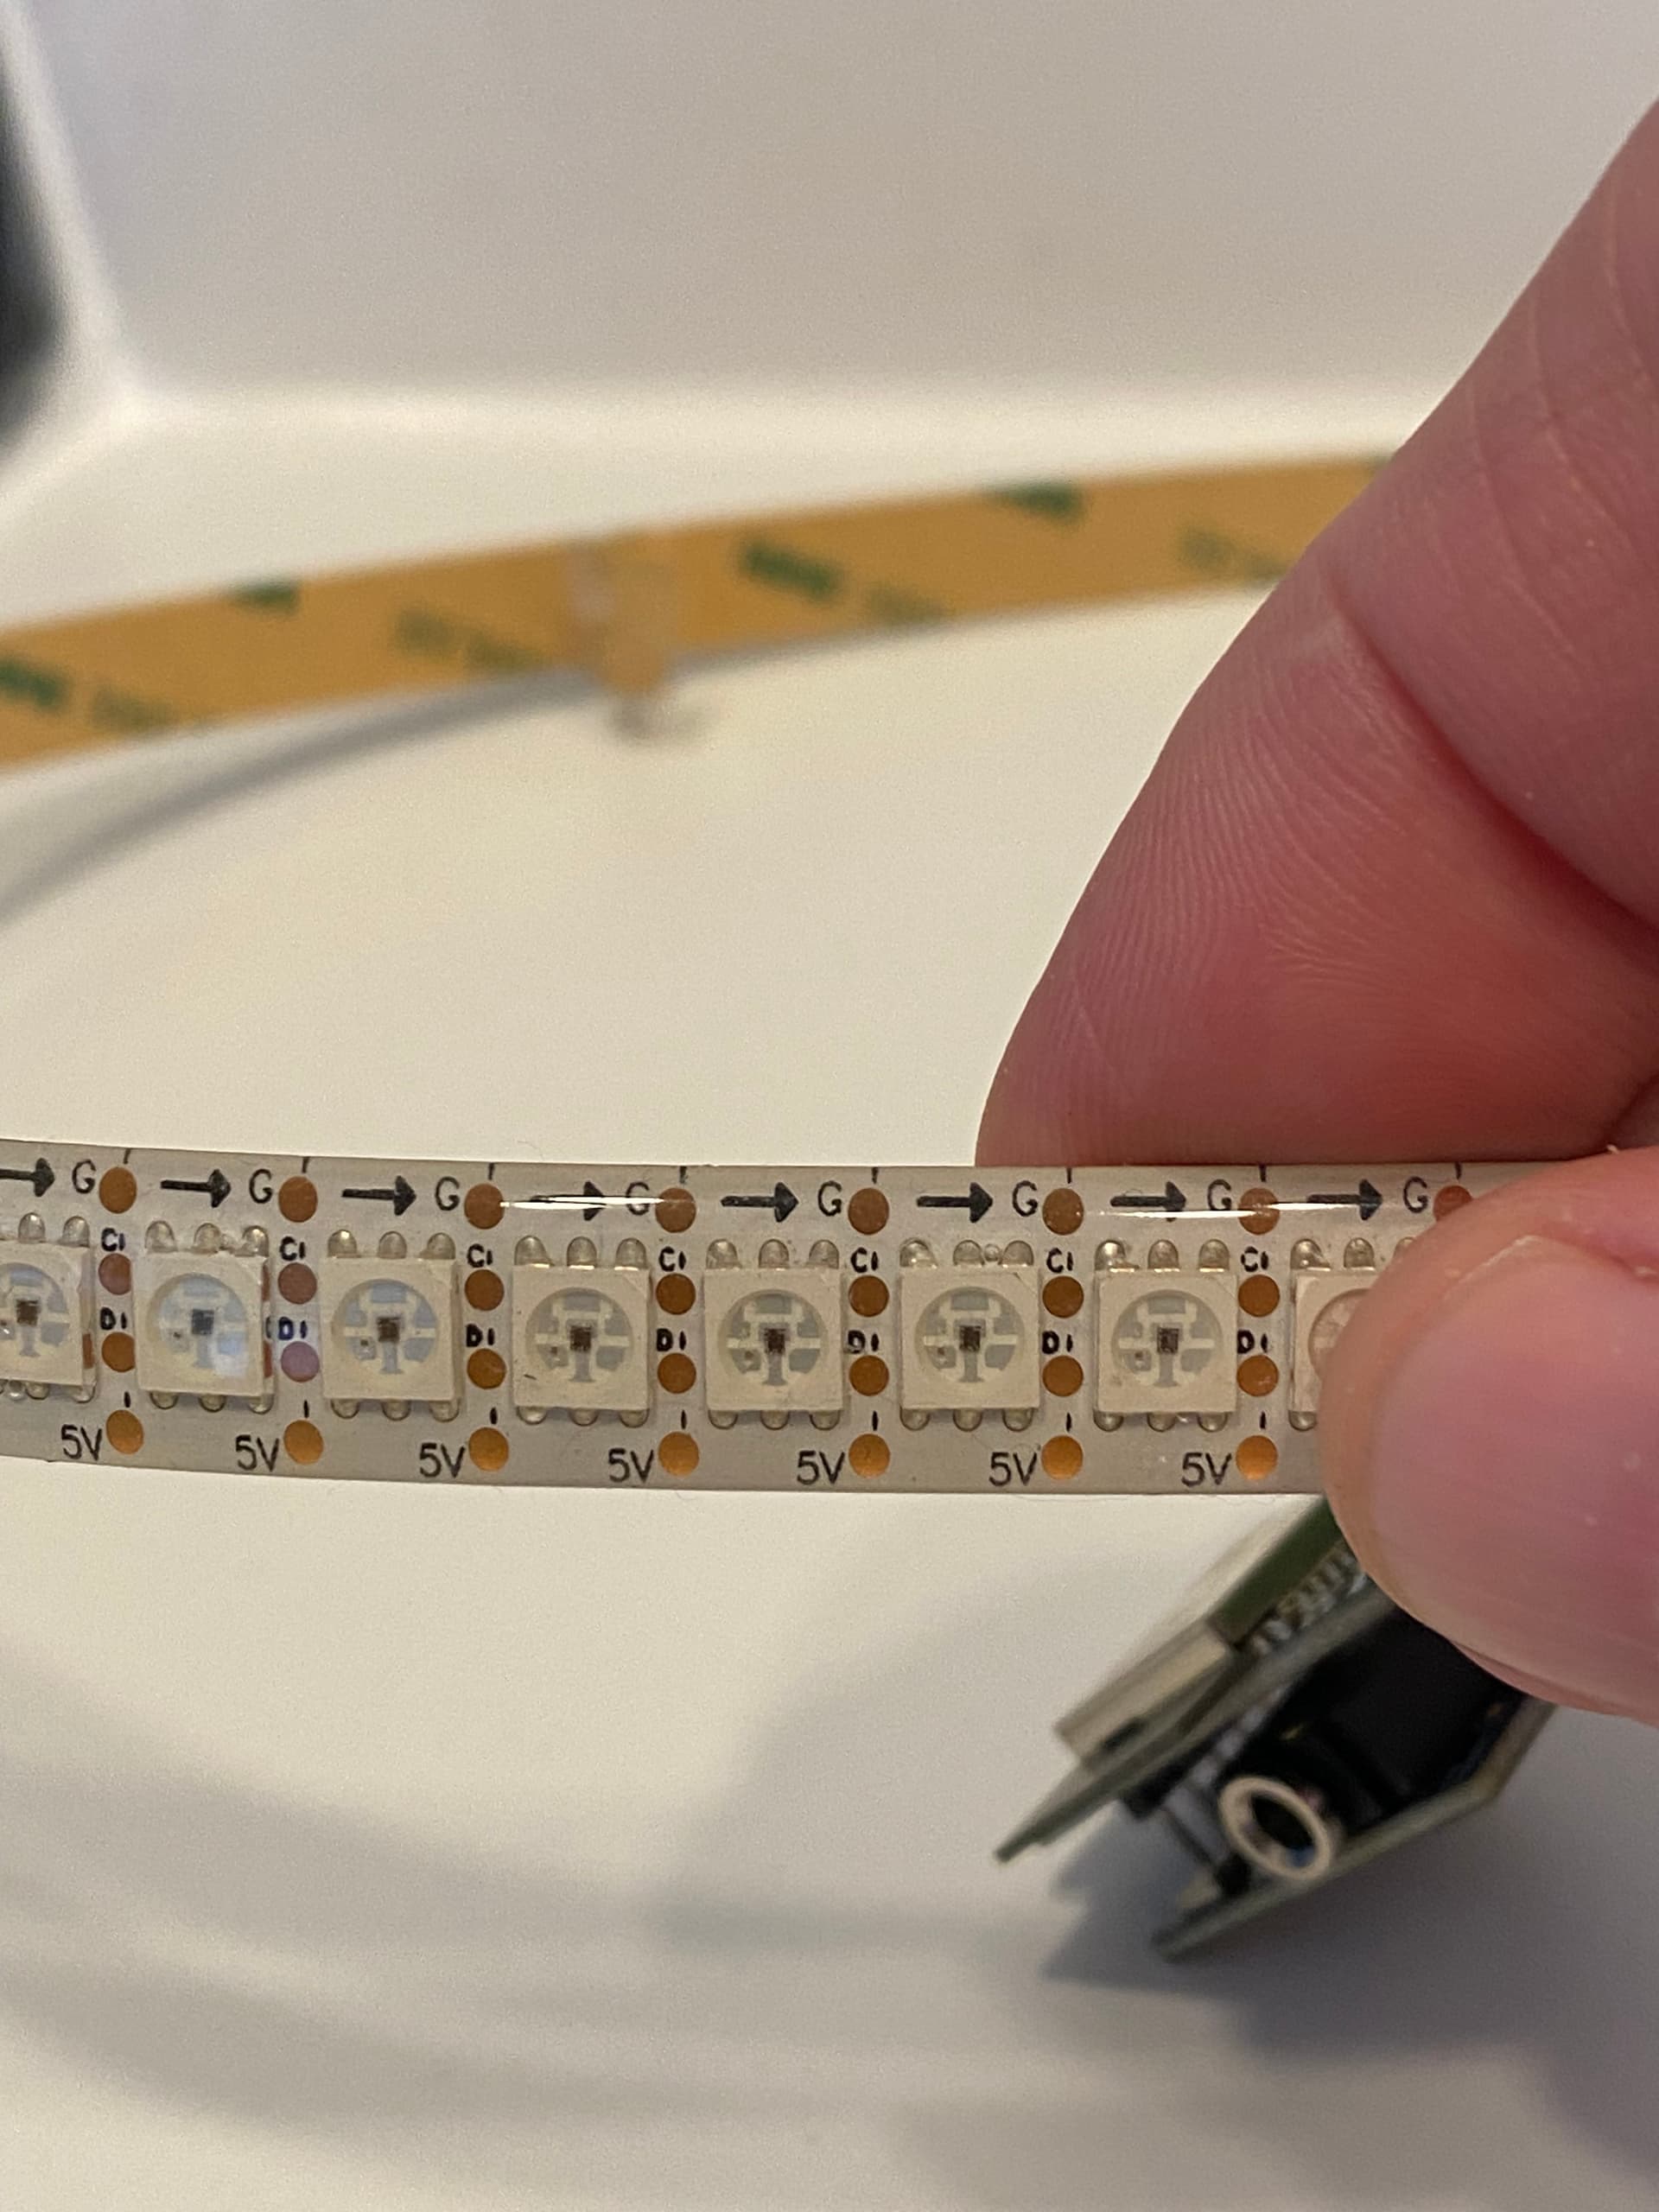
They show up with 144 on a big strip and are great for figuring out how it all works.
You will likely have to snip off one of the manufactured ends of the LED to fit it into the posts. Both ends are not equal. LEDs are directional, so you need to cut off the male end (The one that is smaller and made to fit inside the other end piece.) You can also note that end will have two extra wires sticking out. If you strip and also put those wires into the green block, you can power the Pixelblaze through those wires. I recommend just using the MicroUSB block. Easier and the USB port is made to take the constant plug and unplug.
I attached the stip like this (unplug first) :
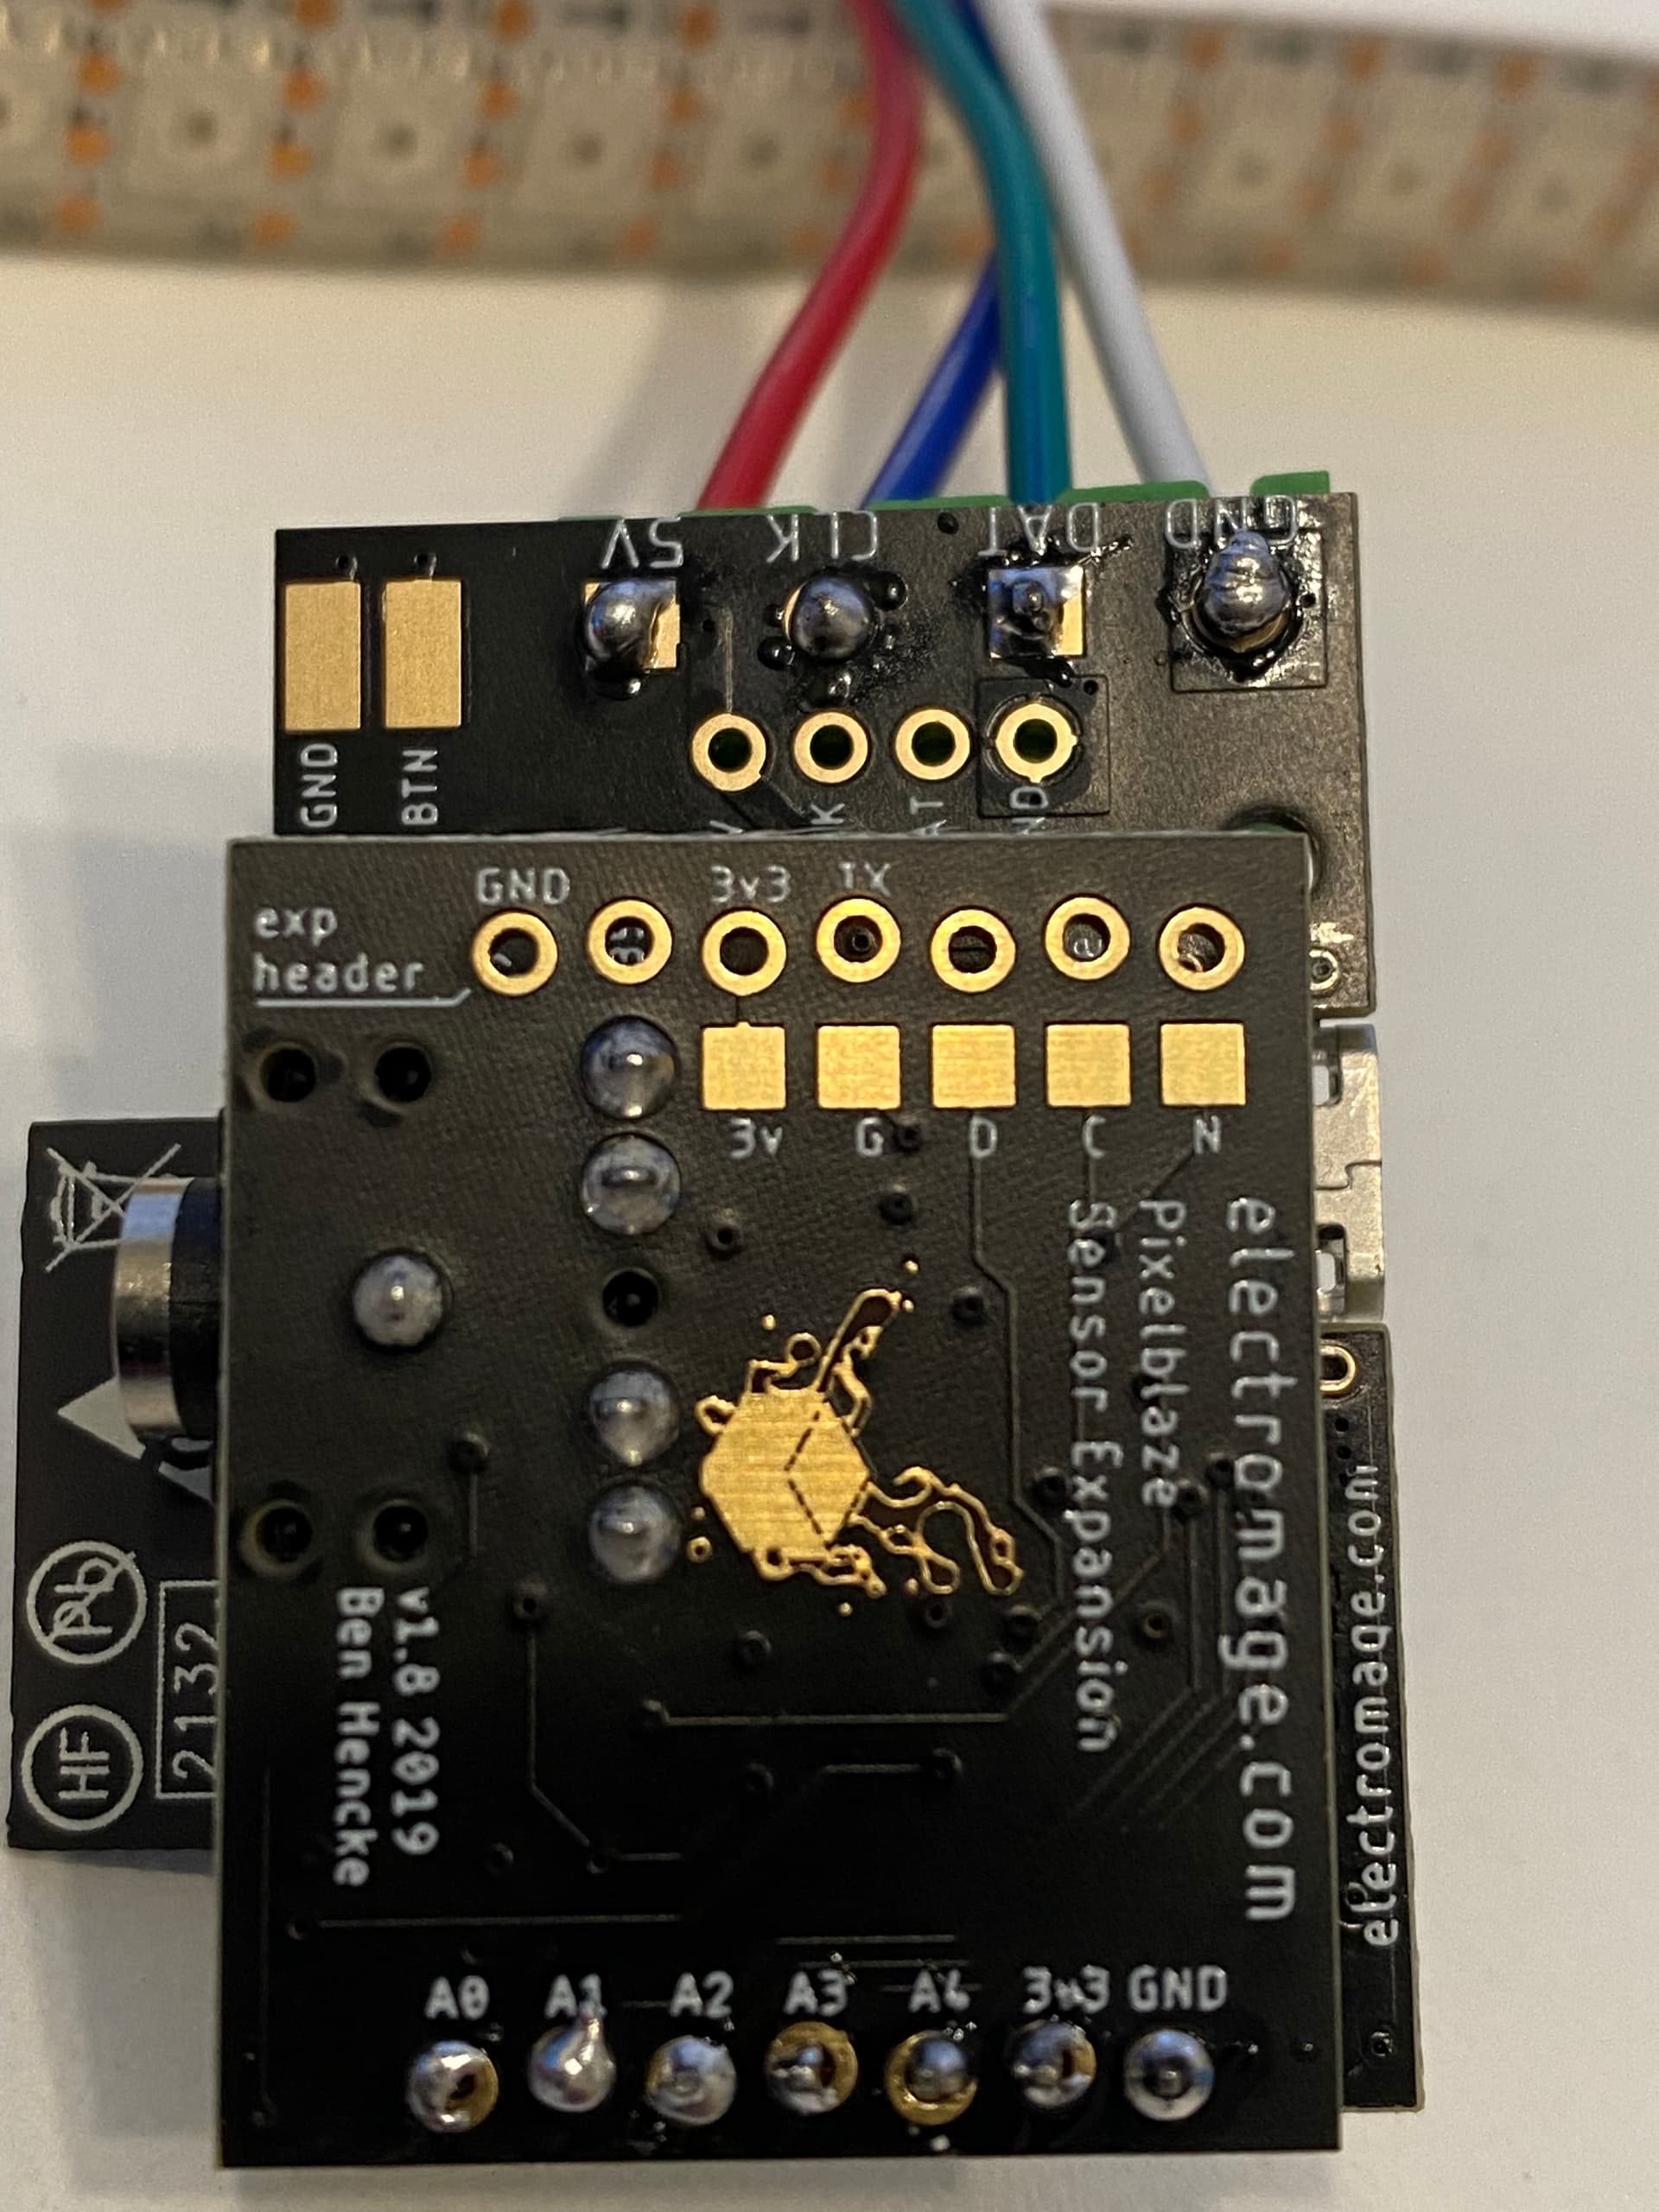
The simple ones are that 5v is red. (Danger Will Robinson! ignore that your skin insulates up to 50v or so. But red is hot, technically…) White is Ground. Dat was green and clock was blue.
Once you plug it in, you should see a row of LEDs light up as they scroll down the strip. That means Intro to Pixelblaze is running on the patterns. Also, if there is like 5 LEDs lit up white, it means you have not changed the number of LEDs on the settings page. Go back and change it.
If the LEDs do not light up, first thing to try is switching the CLK and DAT wires. Also, tug on each wire to make sure you actually got the thing in the hole. Tiny wires and big fingers can make it a challenge.
At the same time, most of your real projects will use WS 2812 LEDs, these are a lot more flexible and useful in projects. Those look like this:
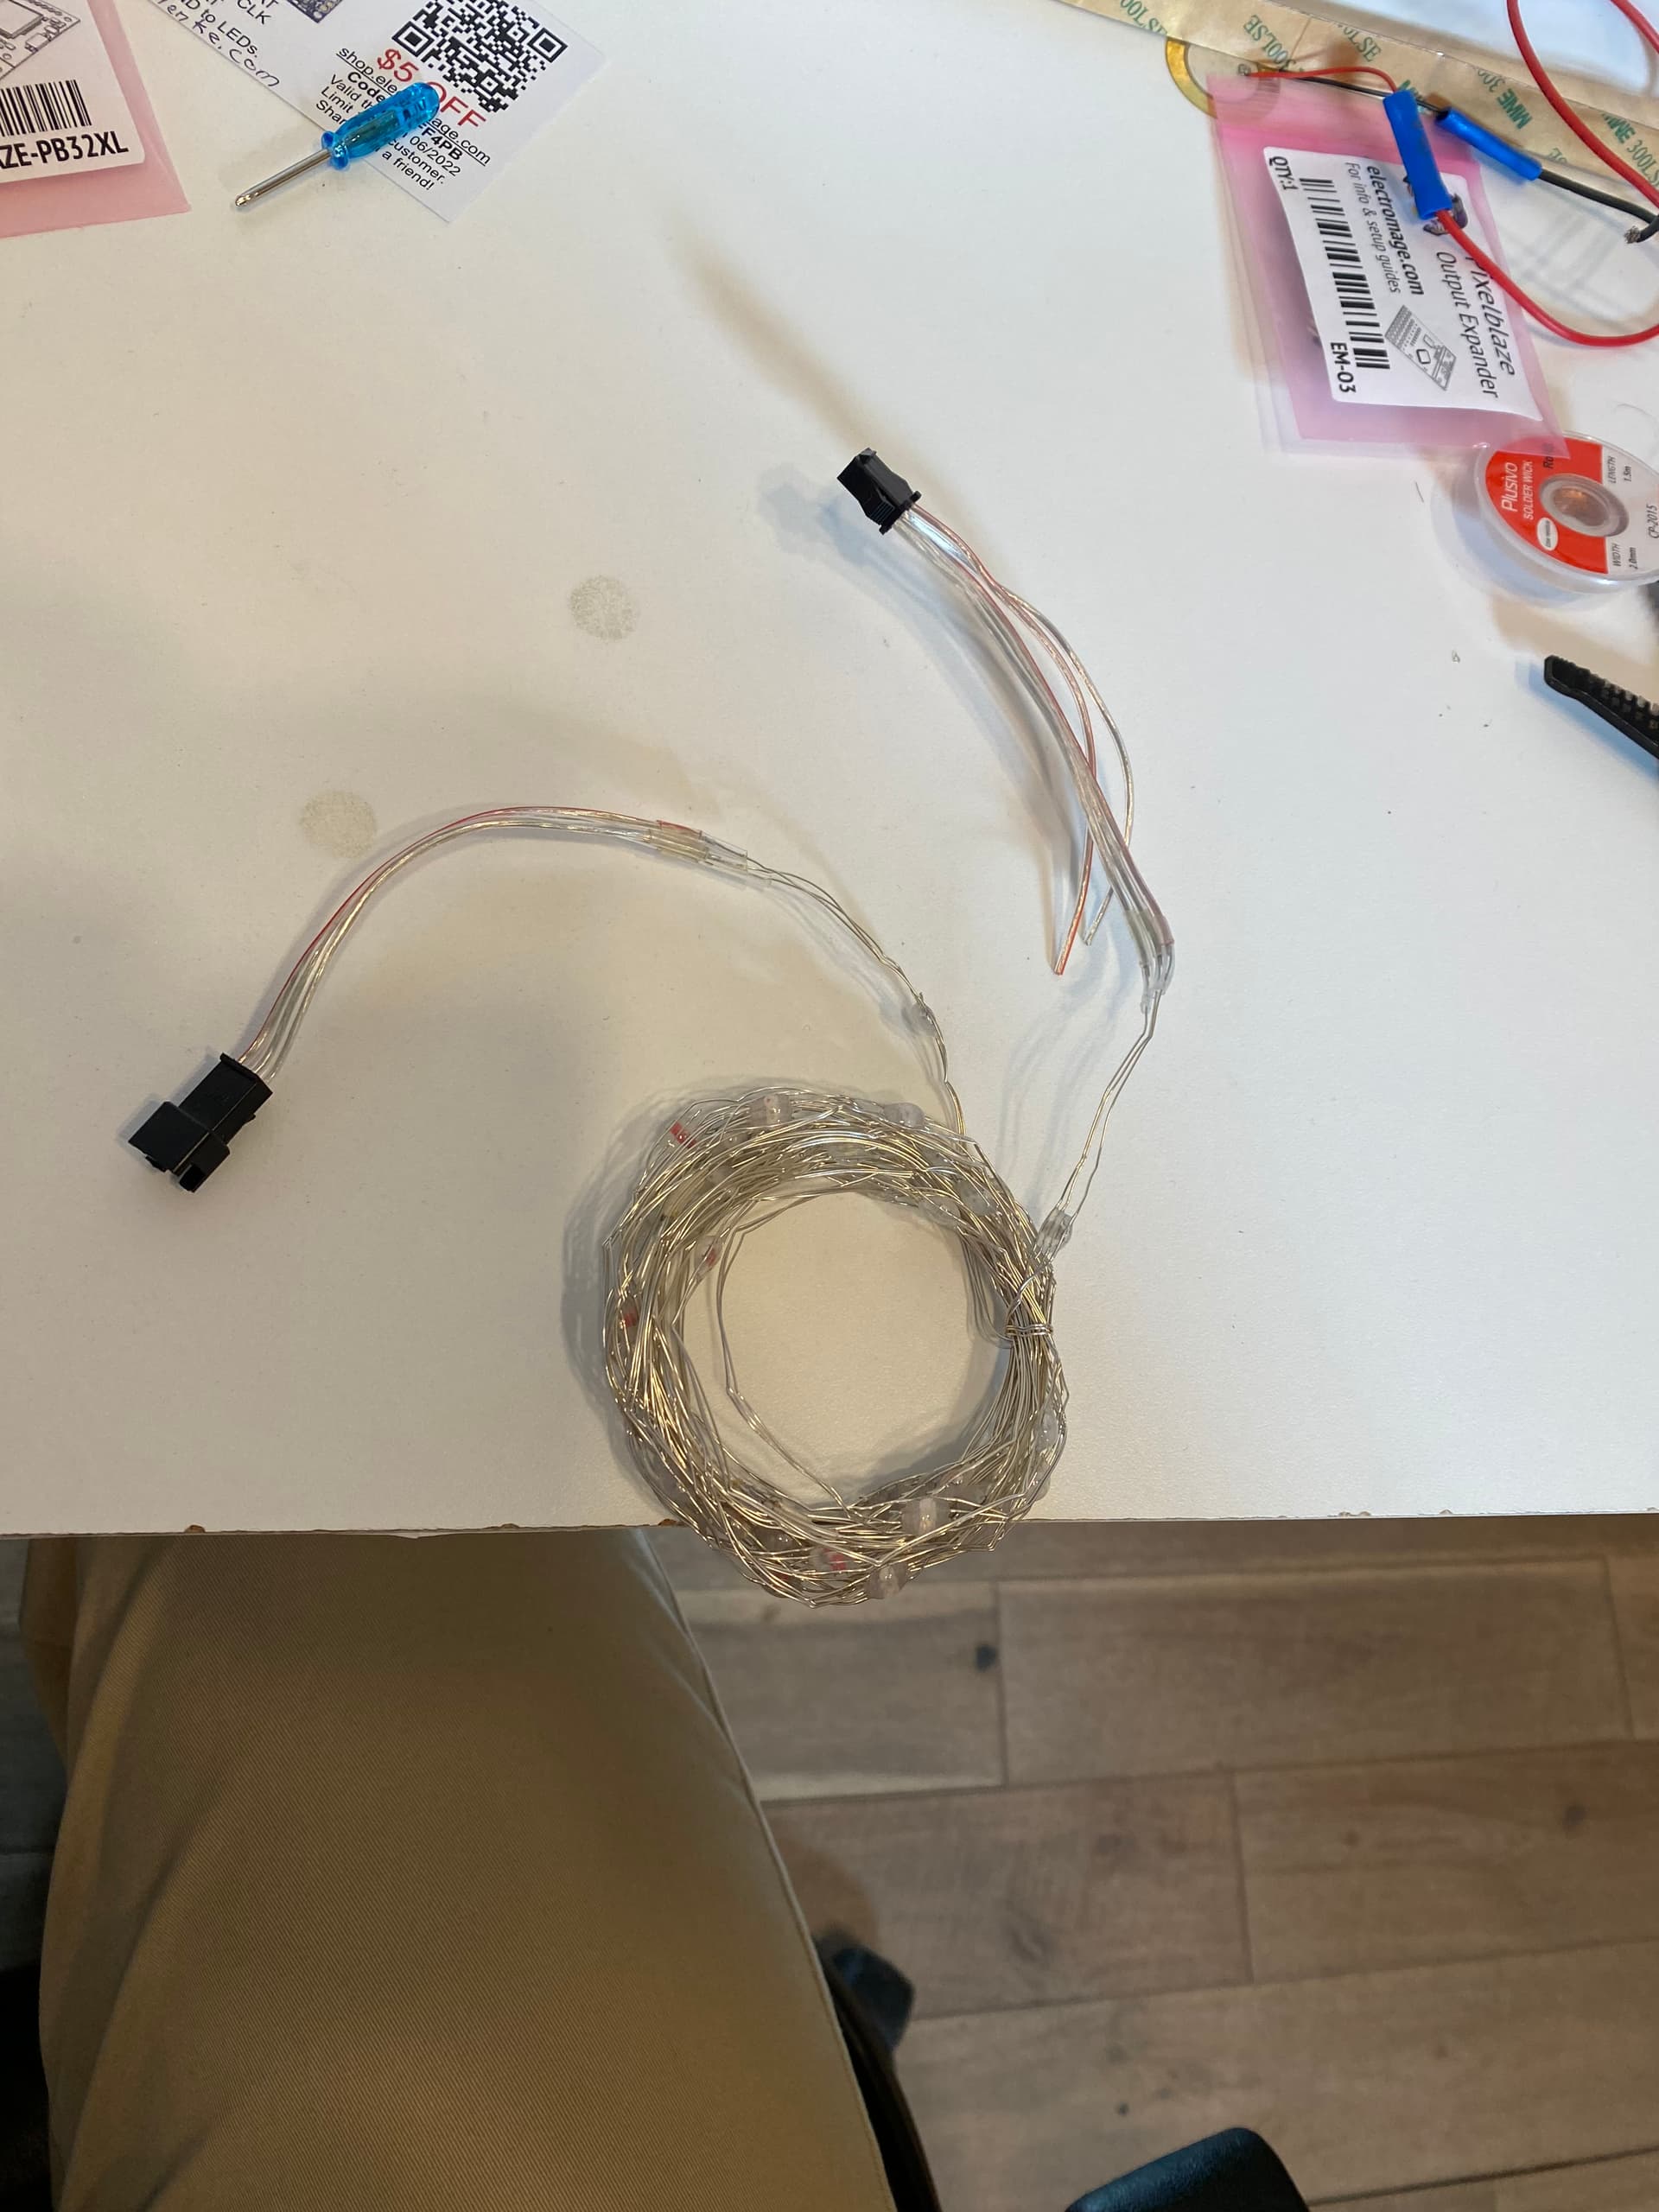
The problem here is they only have three wires:
You hook them up like this:

Note:
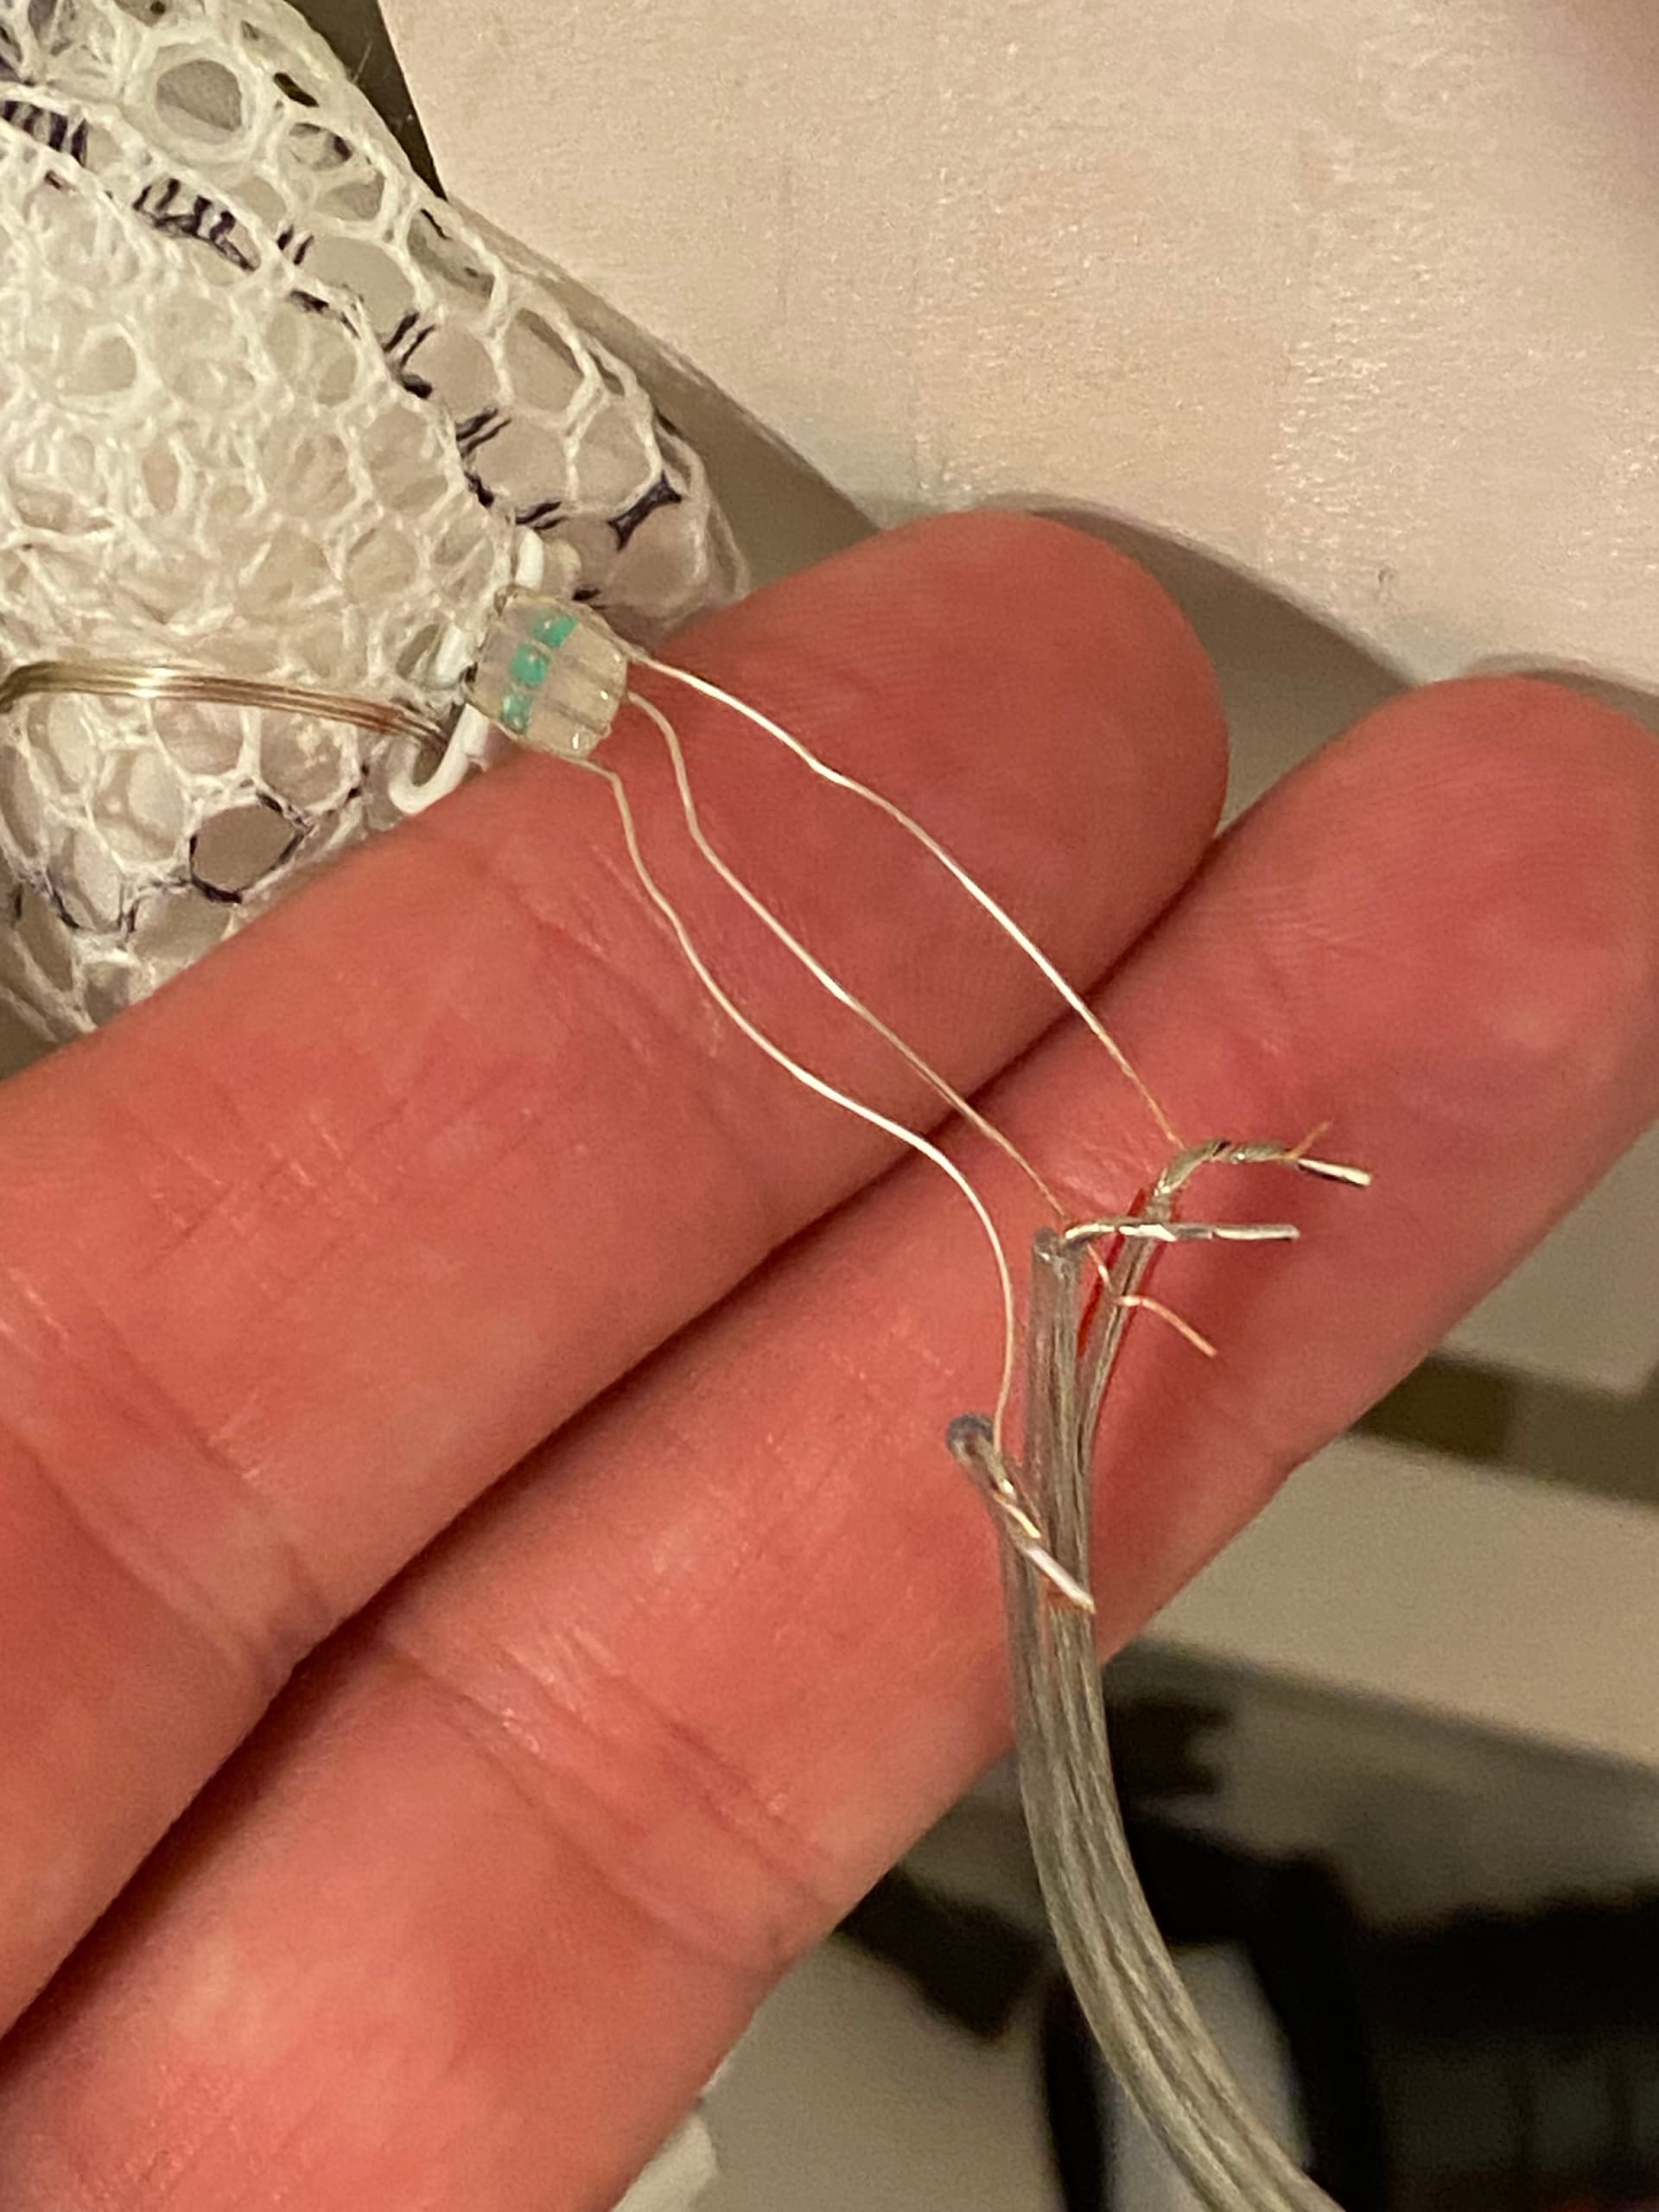
You will likely have to snip off one of the manufactured ends of the LED to fit it into the posts. Both ends are not equal. LEDs are directional, so you need to cut off the male end (The one that is smaller and made to fit inside the other end piece.) You can also note that end will have two extra wires sticking out. If you strip and also put those wires into the green block, you can power the Pixelblaze through those wires. I recommend just using the MicroUSB block. Easier and made to take the constant plug and unplug.
The clear wire with a red stripe is 5v. The middle goes into DAT and the one at the far side is ground.
Once you hook it up, it should also start lighting up the LEDs in a sequence along the string of LEDs.
I am going to end here. At this point you have a working chip and LEDs. Now go play and figure out the rest. Or maybe I will add another of these if I get some time…
Heath
And the shopping list with links…
Note: no endorsement, there are cheaper places, they may not work for you, buyer beware, blah, blah,blah.
Soldering Kit
APA 102 LEDs
WS2812 LEDs (Note this is a five pack, individually they are cheaper, but I needed five…)
Wall wort AC Adapter
AAA USB portable charger
Portable Battery (Note: I got these at Home Depot for cheaper, they are right by the checkout for all the construction workers that need phone batteries…)
USB to microUSB (note: the batteries many times come with a charging cabel that can be reversed and used to power the Pixelblaze, so check that you need this.)