Red/Green Traffic Light for garage with possible scrolling text?

Hi!

Long time :grin:!!

I would like to make a traffic light to use inside the garage to know when the door is fully open and fully closed or somewhere in between.

I have the home automation setup already that triggers my other pixelblazes around the house as a demo, with simple patterns like fully red, and fully green, or flashing red. And this works fine.

However, now I want to use a separate pixelblaze in the garage to drive some LEDs there.

At first I was going to use some simple strips arranged in a rectangle that was 9 rows of 39 LEDs. That I would have scrolling text on it, that said OPEN, CLOSED, OPENING, CLOSING. Each either flashing red or solid green or red, depending on the state of the door.

I however could quite figure out how to get matrixs working or if this is even possible, actually ruined the matrix by soldering incorrectly so just got frustrated and threw the string away, lol, pain, I hate wasting perfectly good LEDs :laughing:.

Then I found some LED rings WESIRI 241 LEDs 9 Rings WS2812B 5050 RGB LED Ring Lamp Light Individually Addressable Full Dream Color DC5V with Mini Controller - Amazon.com that I can see myself getting two, one for red and one for green. But if they’re driven by the same pixelblaze, how can I turn one off while the other is activated? Imagine if there are 241 LEDs in each ring and there are two there is some segment or multi map thing for each group of LEDs?

Effectively, the automation would trigger two different patterns or more to do what I want but I guess I’m curious if this achievable using the pixelblaze. I’m sure the short answer is yes, I just needs time and patience haha

And pointers or tips would be appreciated

I’ve used that set of rings before - they would probably work great for what you’re doing. They have 3-pin JST-SM connectors on the back, so you can chain two together (maybe with a 1m JST extension).

Now you have 241 * 2 LEDs, so you configure Pixelblaze for 482 total. To assign different colors to each, use a conditional statement in your render like this:

export function render(index) {
  if (index < 241) {
    rgb(1,0,0) // first circle is red
  } else {
    rgb(0,1,0) // second is green
  }
}
2 Likes

A matrix would let you do this: https://youtu.be/GWxssA3JNBc

The scrolling and warping are of course totally excessive. It can do static text too. :smiley:

The code is at: Yet another approach to text rendering (WIP) - #19 by sorceror
I’m pretty sure it will work on a matrix of any size.

Like most of my hacks I just drop it on the floor once I’ve achieved my goal. I would be super happy to see someone make use of it in a project and I would be more than happy to help you!

Reading that post, maybe it’s time for me to visit the new pattern library to properly share the pile of hacks on my floor.

2 Likes

Love these responses, thank you both! I have both the rings and a new spool of LEDs arriving today haha. I will go forth and give this a solid 110 percent lmao

I ended up getting a few new soldering tips while I was at it, I suspect mine was dull and wore out after many years on the work table :innocent:

https://www.aliexpress.com/w/wholesale-led-matrix-8x32.html

I have one of these (don’t remember which one exactly) and they sure save a lot of soldering!

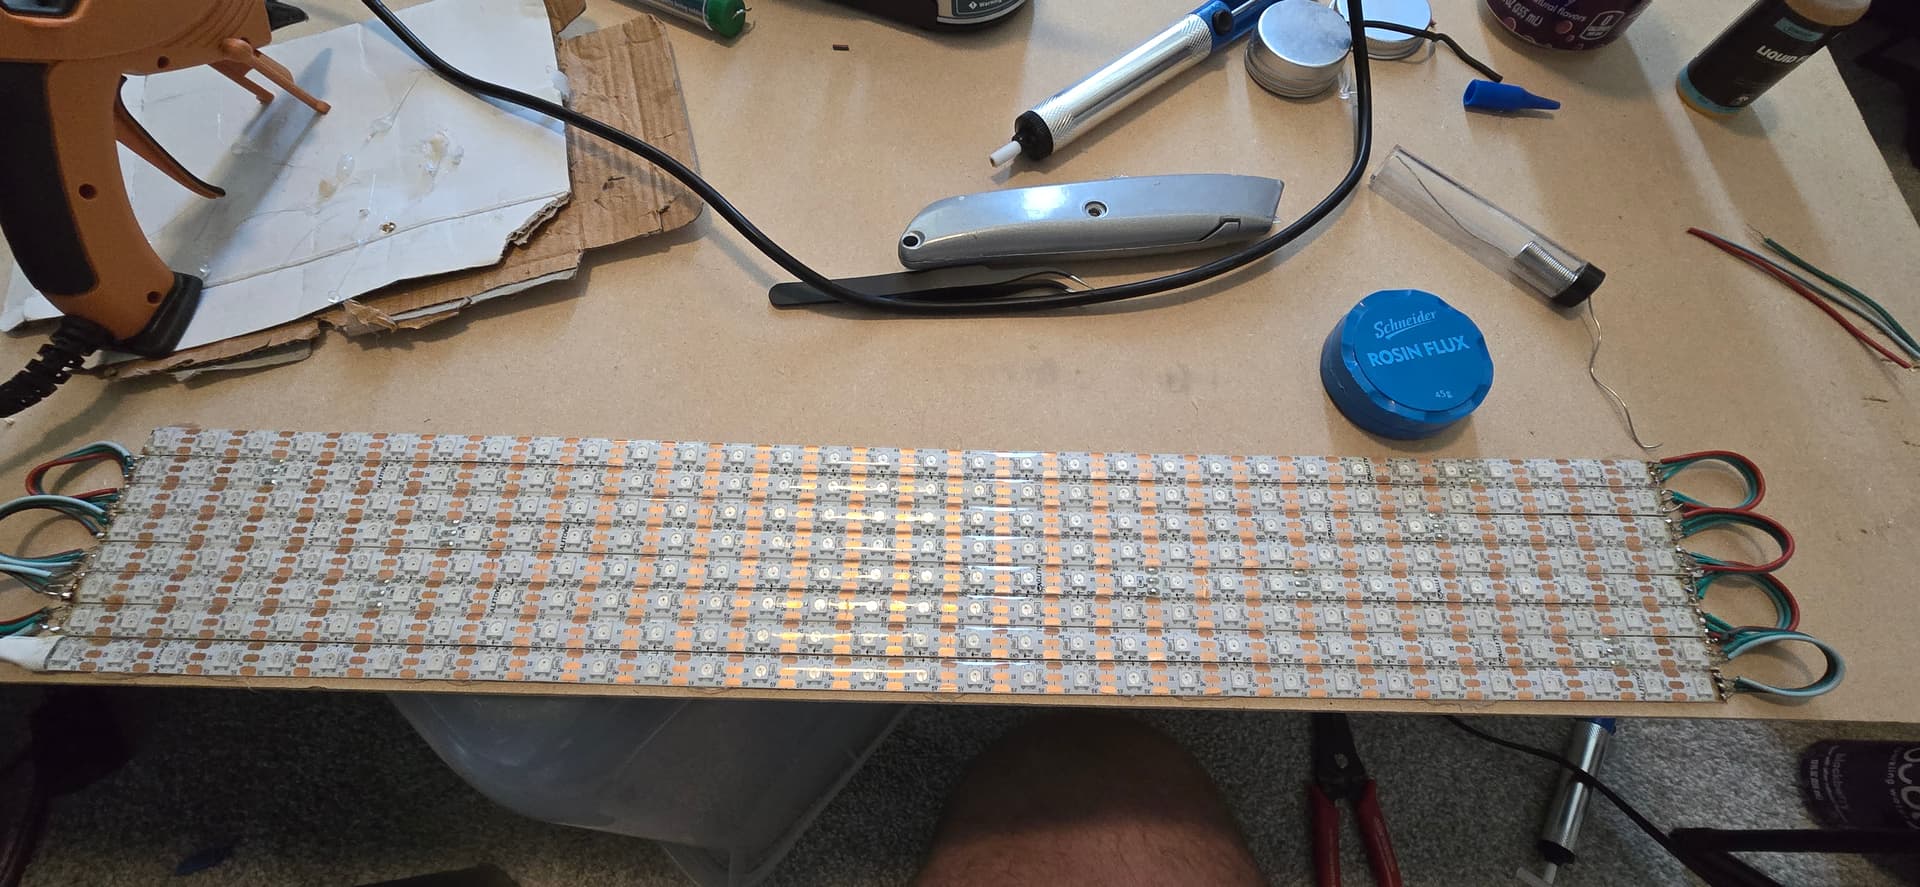
Okay I have my matrix soldered up. I fished this strip out of the garbage lol and tried again with new tips and removed the bad segment :grin:. Much better this time around.

8 rows
32 columns

I have looked over your thread you linked @sorcer and tried my hand at generating just some simple text STOP, with the ruby script, but all I have is just some pretty yellow LEDs that occasionally blink now, thoughts?

// PixelBlaze pattern by Tom Rathborne <tom.rathborne@gmail.com>
// Made for fun. Share and enjoy!

// This pattern creates a rectangular framebuffer
// and does its own integer coordinate mapping
// and draws a text scroller with fonts made at https://brutalita.com/
// using Xiaolin Wu's antialiased line algorithm.

// See the bottom of this pattern for a Ruby program which generates these two lines:
// Ruby-generated coordinate data for S, T, O, P
var chars=[[[[2,0],[0.5,0],[0,0.5],[0,1.5],[0.5,2],[1.5,2],[2,2.5],[2,3.5],[1.5,4],[0,4]]],[[[0,0],[2,0]],[[1,0],[1,4]]],[[[0,0.5],[0.5,0],[1.5,0],[2,0.5],[2,3.5],[1.5,4],[0.5,4],[0,3.5],[0,0.5]]],[[[0,2.5],[2,2.5],[2,1],[1,0],[0,0],[0,4]]]];
var texts=[[0, 1, 2, 3]];  // STOP

// FIXME: So far this pattern only uses texts[0]

// value by which we mulitply each pixel on every frame for motion blur
// more than 50% blur is excessive so /2
var blur = 0
export function sliderMotionBlur(v) { blur = v/2 }

// Duplicate PixelBlaze 'Mapper' functionality without normalizing

var width = 32
var height = 8
// whoops = 1/(pixelCount == (width * height)) // crash on user error :P

// Some constants to avoid repeated arithmetic (esp.division) on constants
var widthm1 = width - 1
var widthm1_inv = 1/widthm1
var heightm1_inv = 1/(height-1)
var heightm1_invR = 0.33333333/(height-1) // How much of a rainbow we want

// Italicization
var italic = 0
export function sliderItalicization(v) { italic = 0.5-v }

// RGB framebuffer
// ... Storage
var FB = array(pixelCount)
FB.mutate(()=>{return array(3)})

// ... direct references to pixel by index for a quick render
var IndexPixel = array(pixelCount)
IndexPixel.mutate((foo,index)=>{
   if (x >= 0 && x < width && y >= 0 && y < height) {
      y = (x % 2 == 1) ? (height - 1 - y) : y
      return FB[x + y * width]
  } else {
    return [0, 0, 0]  // Return black if out of bounds
  }
})

// HSV to RGB using global variables
var r, g, b // filled by HSVtoRGB

function HSVtoRGB(h, s, v) {
  var i, f, p, q, t;
  i = floor(h * 6);
  f = h * 6 - i;
  p = v * (1 - s);
  q = v * (1 - f * s);
  t = v * (1 - (1 - f) * s);
  im6 = i % 6
  if (im6 == 0) {
    r = v; g = t; b = p;
  } else { if (im6 == 1) {
    r = q; g = v; b = p;
  } else { if (im6 == 2) {
    r = p; g = v; b = t;
  } else { if (im6 == 3) {
    r = p; g = q; b = v;
  } else { if (im6 == 4) {
    r = t; g = p; b = v;
  } else {if (im6 == 5) {
    r = v; g = p; b = q;
  }}}}}}
}

// ... Render a pixel
//  - Only used by WuLine, so we do 'alpha' here to keep WuLine readable
//  - Uses max() so overlapping line pixels don't make bright spots
//  - XadjustSV makes the left/right areas fade to black via S and V.

var XadjustSV = array(width)
XadjustSV.mutate((foo,x) => { return clamp(1.1 - pow(2*((x*widthm1_inv)-0.5),2),0,1) })

function PixelMax(x,y,a,h,s,v) {
  if (x >= 0 && y >= 0 && x < width && y < height) {
    adjSV = XadjustSV[x]
    HSVtoRGB(
      (h + y*heightm1_invR) % 1, // rainbow gradient in Y 
      s*adjSV,
      v*adjSV*adjSV*a*a*a // ^2 and ^3 here are some excuse for gamma
    )
    var Pixel = FB[x + y * width]
    Pixel[0] = max(Pixel[0], r)
    Pixel[1] = max(Pixel[1], g)
    Pixel[2] = max(Pixel[2], b)
  }
}

// Xiaolin Wu's antialiased line algorithm
// Adapted from https://gist.github.com/polyamide/3f33cb4dc69e22fbf8b66cee39b78d60
// (replaced utility functions with PixelBlaze built-ins)

function WuLine(DrawPixel, x0, y0, x1, y1, h, s, v) {
  if (x0 == x1 && y0 == y1) return

  steep = abs(y1 - y0) > abs(x1 - x0);

  if (steep) {
    tmp = y0; y0 = x0; x0 = tmp;
    tmp = y1; y1 = x1; x1 = tmp;
  }

  if (x0 > x1) {
    tmp = x0; x0 = x1; x1 = tmp;
    tmp = y0; y0 = y1; y1 = tmp;
  }

  dx = x1 - x0;
  dy = y1 - y0;
  gradient = dy / dx;

  xEnd = round(x0);
  yEnd = y0 + gradient * (xEnd - x0);
  xGap = 1 - frac(x0 + 0.5);
  xPx1 = xEnd;
  yPx1 = trunc(yEnd);

  if (steep) {
    DrawPixel(yPx1, xPx1, 1 - frac(yEnd) * xGap, h, s, v )
    DrawPixel(yPx1 + 1, xPx1, frac(yEnd) * xGap, h, s, v )
  } else {
    DrawPixel(xPx1, yPx1, 1 - frac(yEnd) * xGap, h, s, v )
    DrawPixel(xPx1, yPx1 + 1, frac(yEnd) * xGap, h, s, v )
  }

  intery = yEnd + gradient;

  xEnd = round(x1);
  yEnd = y1 + gradient * (xEnd - x1);
  xGap = frac(x1 + 0.5);

  xPx2 = xEnd;
  yPx2 = trunc(yEnd);

  if (steep) {
    DrawPixel(yPx2, xPx2, 1 - frac(yEnd) * xGap, h, s, v )
    DrawPixel(yPx2 + 1, xPx2, frac(yEnd) * xGap, h, s, v )
  } else {
    DrawPixel(xPx2, yPx2, 1 - frac(yEnd) * xGap, h, s, v )
    DrawPixel(xPx2, yPx2 + 1, frac(yEnd) * xGap, h, s, v )
  }

  if (steep) {
    for (x = xPx1 + 1; x <= xPx2 - 1; x++) {
      DrawPixel(trunc(intery), x, 1 - frac(intery), h, s, v )
      DrawPixel(trunc(intery) + 1, x, frac(intery), h, s, v )
      intery = intery + gradient;
    }
  } else {
    for (x = xPx1 + 1; x <= xPx2 - 1; x++) {
      DrawPixel(x, trunc(intery), 1 - frac(intery), h, s, v )
      DrawPixel(x, trunc(intery) + 1, frac(intery), h, s, v )
      intery = intery + gradient
    }
  }
}

function WarpPoint(x,y,out) {
  xt = x * widthm1_inv
  out[0] = widthm1 * 0.5 * (cos(PI + PI * xt) + 1) + y * italic
  out[1] = y * clamp((1 - pow(2*(xt-0.5),2)),0,1)
}

// Draw a Character
// - starting at x,y
// - draw WuLine with r,g,b
var pstart = array(2)
var pend = array(2)

function DrawCharacter(chr,x,y,sx,sy,h,s,v) {
  var segments = chr.length

  for (N=0; N<segments; N++) {
    var segment = chr[N]
    points = segment.length

    if (points == 1) {
      WarpPoint(x + segment[0][0] * sx, y + segment[0][1] * sy, pstart)
      PixelMax(floor(pstart[0]),floor(pstart[1]),1,h,s,v)
    } else {
      WarpPoint(x + segment[0][0] * sx, y + segment[0][1] * sy, pstart)
      for (L=1; L<points; L++) {
        WarpPoint(x + segment[L][0] * sx, y + segment[L][1] * sy, pend)
        WuLine(
          PixelMax,
          pstart[0], pstart[1],
          pend[0], pend[1],
          h, s, v
        )
        pstart[0] = pend[0]
        pstart[1] = pend[1]
      }
    }
  }
}

// Font data is on a 3x6 grid,
// so we divide our target size by 2 and 5 to get a scaling factor:
cws = 2.3 / 2
chs = 8.3 / 5
// FIXME: just walk over the coordinate array and do this once
// Character spacing
csp = 3.6

// Clear (or fade if blur enabled) framebuffer
// and render the string

export function beforeRender(delta) {
  FB.forEach((Pixel) => { Pixel.mutate((v) => { return blur * v } )})

  text = texts[0] // FIXME: handle multiple strings?
  t1 = time(0.09)

  // FIXME: speed depends on string length
  // FIXME: we start waaaaay offscreen to the left but could just start -1 character
  xoff = -text.length * csp * t1

  while (xoff < width) {
    text.forEach((nchr) => {
      if (xoff > -csp && nchr != -1 && xoff < width) {
        DrawCharacter(chars[nchr],xoff,0,cws,chs,t1,1,1)
      }
      xoff = xoff + csp
    })
  }
}

// Draw from the framebuffer
export function render(index) {
  Pixel = IndexPixel[index]
  rgb(Pixel[0], Pixel[1], Pixel[2])
}

// #!/usr/bin/env ruby
//
// # Usage: $0 < font.json "string" ...
//
// require 'multi_json'
//
// # Output variables
// chars = []
// texts = []
//
// # Character -> chars[] index tracker
// cnums = { ' ' => -1 }
// cnum = 0
//
// font = MultiJson.load(STDIN.read)
//
// ARGV.each do |text|
//   tcnums = []
//   text.chars.each do |char|
//     if cnums.key?(char)
//       tcnums.append(cnums[char])
//     elsif font.key?(char)
//       chars[cnum] = font[char]
//       cnums[char] = cnum
//       tcnums.append(cnum)
//       cnum += 1
//     else
//       warn('Character not in font: ' + char)
//     end
//   end
//   texts.append(tcnums)
// end
//
// puts 'chars = ' + MultiJson.dump(chars)
// puts 'texts = ' + MultiJson.dump(texts)

okay I’m on the struggle bus lol I got it to spell the word STOP, but scrolling isn’t smooth, and not right to left. And jumps around. But close?

// Ruby-generated coordinate data for S, T, O, P
var chars=[[[[2,0],[0.5,0],[0,0.5],[0,1.5],[0.5,2],[1.5,2],[2,2.5],[2,3.5],[1.5,4],[0,4]]],[[[0,0],[2,0]],[[1,0],[1,4]]],[[[0,0.5],[0.5,0],[1.5,0],[2,0.5],[2,3.5],[1.5,4],[0.5,4],[0,3.5],[0,0.5]]],[[[0,2.5],[2,2.5],[2,1],[1,0],[0,0],[0,4]]]];
var texts=[[0, 1, 2, 3]];  // STOP

// Define matrix dimensions globally
var cols = 32;
var rows = 8;

// Export debug variables globally
export var debug_col = 0;
export var debug_row = 0;
export var debug_textX = 0;

// Draw a Character with original vector data
function drawCharacter(chr, xOffset, yOffset, col, row) {
  var segments = chars[chr];
  for (var i = 0; i < segments.length; i++) {
    var segment = segments[i];
    for (var j = 0; j < segment.length - 1; j++) {
      // Scale coordinates for narrower characters
      var x0 = floor((segment[j][0] * 1.2) + xOffset);  // Scale X by 1.2 for narrower characters
      var y0 = floor((segment[j][1] * 1.2) + yOffset);  // Keep Y scale by 1.2 for height
      var x1 = floor((segment[j + 1][0] * 1.2) + xOffset);
      var y1 = floor((segment[j + 1][1] * 1.2) + yOffset);

      // Clamp to matrix bounds
      x0 = max(0, min(x0, cols - 1));
      x1 = max(0, min(x1, cols - 1));

      // Use drawLine to connect points and fill in LEDs
      if (drawLine(x0, y0, x1, y1, col, row)) {
        return;
      }
    }
  }
}

// Bresenham's line algorithm to connect points
function drawLine(x0, y0, x1, y1, col, row) {
  var dx = abs(x1 - x0), sx = x0 < x1 ? 1 : -1;
  var dy = abs(y1 - y0), sy = y0 < y1 ? 1 : -1; 
  var err = (dx > dy ? dx : -dy) / 2, e2;

  while (true) {
    if (x0 >= 0 && x0 < cols && y0 >= 0 && y0 < rows) {
      if (col == x0 && row == y0) {
        rgb(0, 0, 0);  // Off LEDs for text (black)
        return true;    // Stop checking if we draw a point
      }
    }
    if (x0 === x1 && y0 === y1) break;
    e2 = err;
    if (e2 > -dx) { err -= dy; x0 += sx; }
    if (e2 < dy) { err += dx; y0 += sy; }
  }
  return false;
}

// Main render function for 2D pattern
export function render2D(index, x, y) {
  var scrollSpeed = 0.03;  // Slower speed for better readability

  // Convert normalized x, y back to matrix coordinates
  var col = floor(x * (cols - 1));
  var row = floor(y * (rows - 1));

  // Calculate scroll offset
  var offset = time(scrollSpeed) * 40;  
  var textOffset = -((offset % ((texts[0].length * 10) + cols)) - cols);  // Extend scroll range for full off-screen

  // Set red background **first** to prevent overwriting
  rgb(1, 0, 0);

  // Update debug variables globally
  debug_col = col;
  debug_row = row;
  debug_textX = textOffset;

  // Draw the STOP text using the original vector data
  for (var i = 0; i < texts[0].length; i++) {
    drawCharacter(texts[0][i], (i * 4) - textOffset, 1, col, row);  // Reduce spacing to 4 for tighter letters
  }
}

Ps also wow, I never setup a matrix before with pixel blaze and played with the 2d/3d patterns but dang they’re pretty :heart_eyes:. At least I know I have my array right

// Ruby-generated coordinate data for S, T, O, P
var chars = [
  [[[2,0],[0.5,0],[0,0.5],[0,1.5],[0.5,2],[1.5,2],[2,2.5],[2,3.5],[1.5,4],[0,4]]],
  [[[0,0],[2,0]],[[1,0],[1,4]]],
  [[[0,0.5],[0.5,0],[1.5,0],[2,0.5],[2,3.5],[1.5,4],[0.5,4],[0,3.5],[0,0.5]]],
  [[[0,2.5],[2,2.5],[2,1],[1,0],[0,0],[0,4]]]
];
var texts = [[0, 1, 2, 3]];  // STOP

// Define matrix dimensions globally
var cols = 32;
var rows = 8;

// Export debug variables globally
export var debug_col = 0;
export var debug_row = 0;
export var debug_textX = 0;

// Simplified binary mask to track text pixels
var textCache = array(cols * rows);
textCache.mutate(() => 0);  // Initialize to 0 (no text)

// Pre-compute values for speed
var widthm1 = cols - 1;
var heightm1 = rows - 1;

// Slower scroll speed for readability
var scrollSpeed = 0.02;  // Slower speed for smoother scrolling

// Mark text pixels directly
function markPixel(x, y) {
  if (x >= 0 && x < cols && y >= 0 && y < rows) {
    textCache[x + y * cols] = 1;  // Mark as text pixel
  }
}

// Optimized line drawing with no gaps
function drawLine(x0, y0, x1, y1) {
  var dx = abs(x1 - x0), sx = x0 < x1 ? 1 : -1;
  var dy = abs(y1 - y0), sy = y0 < y1 ? 1 : -1;
  var err = (dx > dy ? dx : -dy) / 2, e2;

  while (true) {
    markPixel(x0, y0);  // Mark pixel as part of text
    if (x0 === x1 && y0 === y1) break;
    e2 = err;
    if (e2 > -dx) { err -= dy; x0 += sx; }
    if (e2 < dy) { err += dx; y0 += sy; }
  }
}

// Improved character drawing with finer detail
function drawCharacter(chr, xOffset, yOffset) {
  var segments = chars[chr];
  for (var i = 0; i < segments.length; i++) {
    var segment = segments[i];
    for (var j = 0; j < segment.length - 1; j++) {
      var x0 = trunc(segment[j][0] * 1.2 + xOffset);  // Slightly scale for sharper lines
      var y0 = trunc(segment[j][1] * 1.2 + yOffset);
      var x1 = trunc(segment[j + 1][0] * 1.2 + xOffset);
      var y1 = trunc(segment[j + 1][1] * 1.2 + yOffset);
      drawLine(x0, y0, x1, y1);  // Draw line using optimized function
    }
  }
}

// Efficiently clear textCache
function clearTextCache() {
  textCache.mutate(() => 0);  // Reset all to 0 (no text)
}

// Main render function for 2D pattern
export function beforeRender(delta) {
  // Clear textCache once per frame
  clearTextCache();

  // Use integer time for speed and smoother scrolling
  var offset = trunc(time(scrollSpeed) * 20);  
  var textOffset = (cols - (offset % ((texts[0].length * 12) + cols))) | 0;  // Ensure integer

  debug_textX = textOffset;

  // Draw the STOP text using improved character drawing
  for (var i = 0; i < texts[0].length; i++) {
    drawCharacter(texts[0][i], (i * 6) + textOffset, 1);  // Increase spacing between characters
  }
}

// Main render function for 2D pattern
export function render2D(index, x, y) {
  // Convert normalized x, y back to matrix coordinates
  var col = trunc(x * widthm1);
  var row = trunc(y * heightm1);

  debug_col = col;
  debug_row = row;

  // Directly set LED color based on textCache
  if (textCache[col + row * cols] === 1) {
    rgb(0, 0, 0);  // Black text
  } else {
    rgb(1, 0, 0);  // Red background
  }
}

better code, was able to bump fps to 124 from 1, and improve scrolling just need to sort out the full scroll now

// Ruby-generated coordinate data for C, L, E, A, R,
var chars = [[[[2,0],[1,0],[0,1],[0,3],[1,4],[2,4]]],[[[0,0],[0,4],[2,4]]],[[[2,0],[0,0],[0,4],[2,4]],[[0,2],[1,2]]],[[[0,4],[0,1],[1,0],[2,1],[2,4]],[[0,3],[2,3]]],[[[0,2.5],[2,2.5],[2,1],[1,0],[0,0],[0,4]],[[1,2.5],[2,4]]]];
var texts = [[0,1,2,3,4]]; // CLEAR

// Matrix dimensions
var cols = 32;
var rows = 8;

// Export debug variables
export var debug_col = 0;
export var debug_row = 0;
export var debug_textX = 0;
export var debug_offset = 0;

// Use a simple binary mask for text pixels
var textCache = array(cols * rows);
textCache.mutate(() => 0);

// Pre-computed values
var widthm1 = cols - 1;
var heightm1 = rows - 1;

// Set a scroll speed and multiplier (adjust these for desired marquee pace)
var scrollSpeed = 0.05; // Adjusted for moderate pace
var multiplier = 62;

// Mark a pixel in the text mask
function markPixel(x, y) {
  if (x >= 0 && x < cols && y >= 0 && y < rows) {
    textCache[x + y * cols] = 1;
  }
}

// Basic line drawing (no antialiasing) to mark text pixels
function drawLine(x0, y0, x1, y1) {
  var dx = abs(x1 - x0), sx = x0 < x1 ? 1 : -1;
  var dy = abs(y1 - y0), sy = y0 < y1 ? 1 : -1;
  var err = (dx > dy ? dx : -dy) / 2, e2;
  while (true) {
    markPixel(x0, y0);
    if (x0 === x1 && y0 === y1) break;
    e2 = err;
    if (e2 > -dx) { err -= dy; x0 += sx; }
    if (e2 < dy) { err += dx; y0 += sy; }
  }
}

// Draw a character by drawing each line segment from the vector data
function drawCharacter(chr, xOffset, yOffset) {
  var segments = chars[chr];
  for (var i = 0; i < segments.length; i++) {
    var segment = segments[i];
    for (var j = 0; j < segment.length - 1; j++) {
      // Scale the character (1.2) and add offset
      var x0 = trunc(segment[j][0] * 1.2 + xOffset);
      var y0 = trunc(segment[j][1] * 1.2 + yOffset);
      var x1 = trunc(segment[j + 1][0] * 1.2 + xOffset);
      var y1 = trunc(segment[j + 1][1] * 1.2 + yOffset);
      drawLine(x0, y0, x1, y1);
    }
  }
}

// Efficiently clear the text mask
function clearTextCache() {
  textCache.mutate(() => 0);
}

// beforeRender: update the text mask once per frame
export function beforeRender(delta) {
  clearTextCache();
  
  // Define character width (pixels per character)
  var charWidth = 6;
  // Total width of the text (for "STOP", 4 characters)
  var totalTextWidth = texts[0].length * charWidth;  // e.g. 4 * 6 = 24
  // The scroll range: from when the text is completely off-screen on the right (x = cols)
  // to when the text is completely off-screen on the left (x = -totalTextWidth)
  var scrollRange = cols + totalTextWidth;  // 32 + 24 = 56
  
  // Compute offset using time for smooth scrolling
  var offset = time(scrollSpeed) * multiplier;  // offset increases over time
  debug_offset = offset;
  
  // Calculate textOffset:
  // When offset = 0, textOffset = cols (i.e. 32), so text is off-screen right.
  // When offset = scrollRange, textOffset = cols - scrollRange = -totalTextWidth, so text is fully off-screen left.
  var textOffset = cols - (offset % scrollRange);
  debug_textX = textOffset;
  
  // Draw each character of the text onto the text mask
  for (var i = 0; i < texts[0].length; i++) {
    // Position each character relative to the scrolling offset.
    // (i * charWidth) spaces characters out by 6 pixels each.
    drawCharacter(texts[0][i], (i * charWidth) + textOffset, 1);
  }
}

// render2D: set LED colors based on the text mask
export function render2D(index, x, y) {
  var col = trunc(x * widthm1);
  var row = trunc(y * heightm1);
  
  debug_col = col;
  debug_row = row;
  
  // If the pixel is part of the text (marked in textCache), set it to black; otherwise, red.
  if (textCache[col + row * cols] === 1) {
    rgb(0, 0, 0);  // Black text
  } else {
    rgb(0, 255, 0);  // Red background
  }
}

got it :slight_smile: now to add some flashy bits to it – I couldn’t figure out the anti-aliasing bits :frowning: so I’m gonna run with the blocky bits


Lol I just realized the MeanWell power supply inside to build out my pocs on my bench sounds like a jet engine on camera oof

1 Like

Glad to know you got it working! Apparently my browser doesn’t support the codec so I can’t see the videos. :confused:

1 Like

They might render on your mobile. They show up on my Android :thinking:

I downloaded some and they worked in mpv … looks great!

1 Like

Any idea why the above code wouldn’t work for a 9 row matrix for some reason, the last row of 32 pixels is completely off. This is also true across most of the 2d/3d patterns, but all the regular render() patterns seem to illuminate this last row fine.

9 rows with 32 cols for a total of 288 pixels…

I’ve been banging my head on this trying to figure it out, hoping I can have the text eventually centered on the screen

this is so silly, my matrix mapper wasn’t right, lmao the amount of time I spent on this hahaope

2 Likes