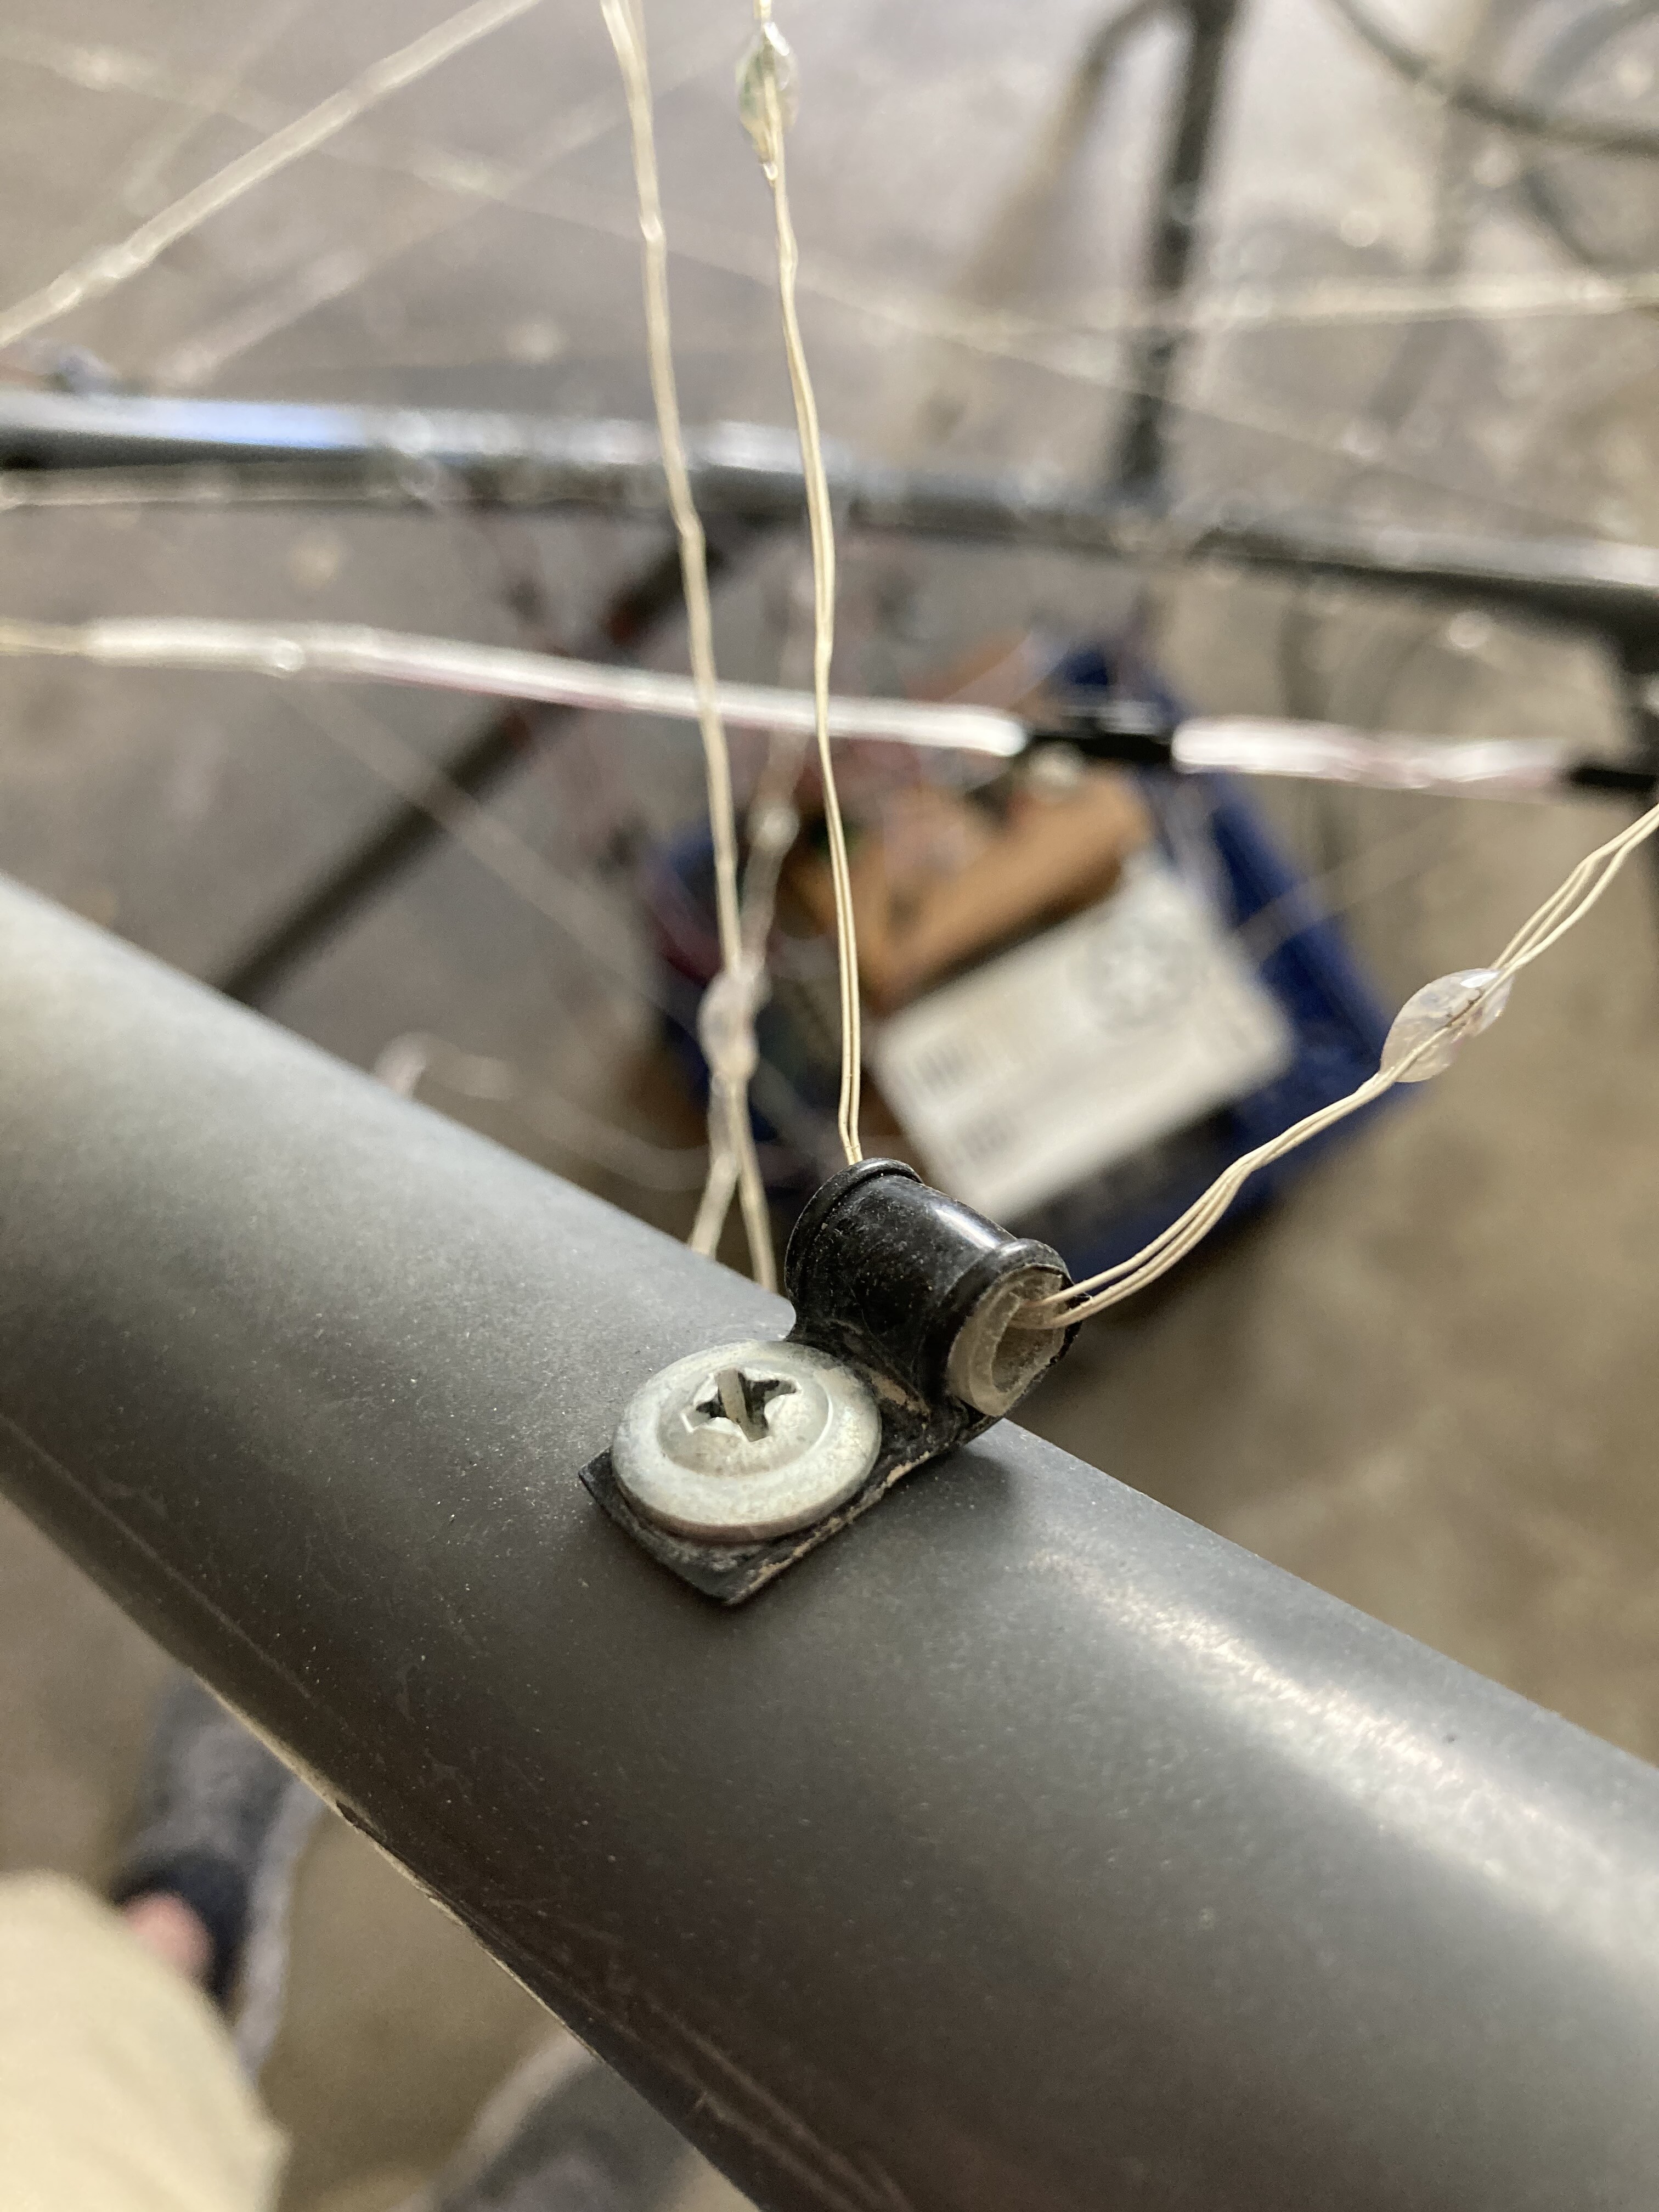
I’ve been stringing Fairy Lights in a cube frame using wire restraints and screws, with a bit of tubing in the wire restraint to provide cushioning, like this:
IMG_7448|375x500
Attachment is to schedule 80 PVC as pictured. Attachment points are scattered along the length and partial circumference of the tubes.
The method is OK but could be better, but I’m not sure how. Any suggestions?
I don’t think this idea is better; it certainly isn’t more professional. Here’s where I’m coming from: I am so, so lazy at builds. I hate the repetitive stuff and especially the rework if a string goes bad.
So if you don’t mind the “utter trash” look, I kind of like the speed, easy adjustments, and field serviceability of… (jesus am I going to put this out there on the internet?) gray tape. Maybe vinyl electrical tape for some give, strain relief and blending in with PVC.
We used to say, “tape and string will fix anything!” But, yeah that trash look is a bit funky for the application, suggestion Re field serviceability super to the point. Stringing this piece is a relative monster. Onward with looking for alternatives.
What about 3D printed quick clips? You could design it for the right anti-strain curve where it holds the enameled solid wire, the right tension on the PVC, probably get a decent color, add a little styling in the curves for the look you’re going for…
Now, I like that suggestion! Back in the day we used to work with an Instron or two and torture adhesives, tapes and assemblies to death.
Just yesterday I was looking at modulus values for various sorts of tubes including carbon fiber. I’m thinking of 3D printing composite cube corners, perhaps some sort of clip doo dah. @jeff are yoyu aware of modeling/design utilities for such design? I’m thinking that separating the entry attachment point from the return point by some distance would be trick. Perhaps automobile trim fasteners.
Also thinking of doubling up those light strings, staggering them for greater pixel density and wrapping them in clear shrink wrap… Just for grins.
I know basic parametric modeling in Autodesk Inventor (and a little less in Fusion). I’d figure out the tension probably by trial and error! Also, I don’t have a maker space membership right now so it’s Shapeways for now
Trial and error, with the emphasis on trial… see what tension yields nice-looking strings then go from there… I’m hopefully/mostly over burning them up, anyway.
Shapeways may be the thing, but soon enough I’m going out to visit a friend who has filament and SLA printers, laser machines and all kinds of stuff. Now, Inventor… I could use some of that.
Anyway @jeff you’ve got me thinking about custom clips… and thanks for that.
Automotive trim fasteners… a commodity product, readily available may do the trick. There are varieties designed for removal so, keeping in mind the likely need for replacement of strings, this seems like a good alternative. Adding a high quality rubber washer or two under the fastener head may also provide some resilience. There are many suppliers, these folks have many many options listed -
If you are using these lights, and ONLY these lights, these special “fairy lights”, the 3 wire ones with the hard coded addresses, you can do parallel, instead of series and they’ll work correctly.
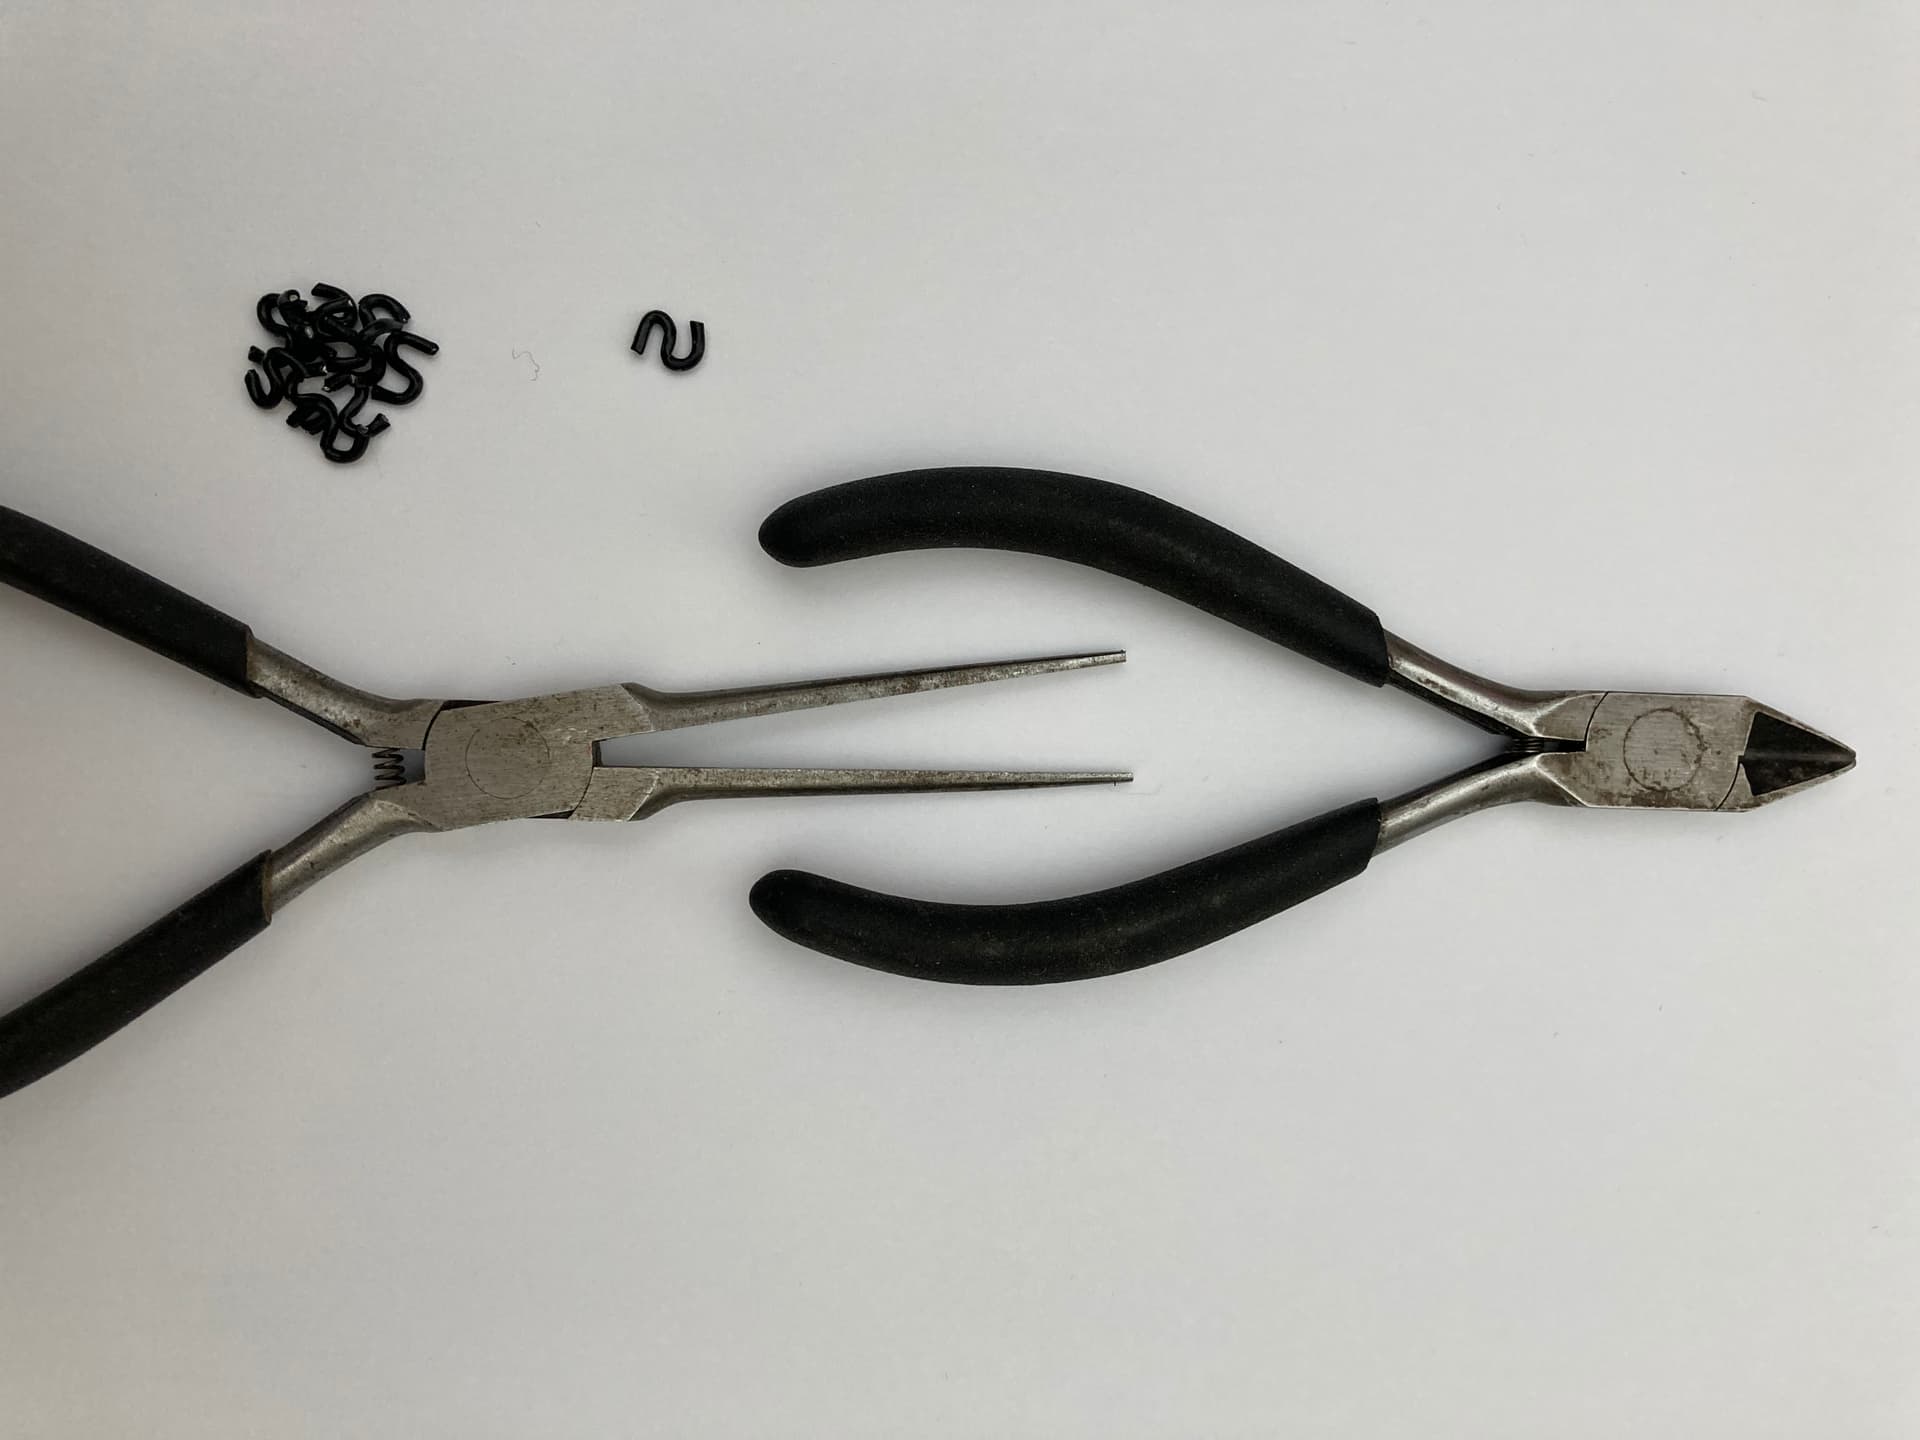
Another home-crafty method for attaching (especially) Fairy Light strings is based on using vinyl coated paperclips, cutting and reforming them as follows, showing tools and attachment to a 1/2" carbon fiber tube -
I like this method. It’s really clean, minimal and quite professional. I wonder if making the inner clear tubing slightly longer than the cable clamp itself might provide a little more cushy strain relief? Have you experimented with any other type tubing for the strain relief function like the stiffer white poly tubing the use for kitchen ice makers? It would provide a different strain relief tension.
Also, I have found a more durable version of the fairy lights, at BTF lighting (AliExpress), which use a transparent insulated 3 pin ribbon cable. The same tiny LED, but, of course, the wire will be more obvious. May not be worth the tradeoff for you, but I wanted to let you know. It’s the first and only place I have seen that version.
Thanks for the tip on the above LEDs from Ali. However, the literature is confusing, some pics showing three wire, some four, and no mention of vinyl coated wire just “copper wire”. Any clarification of guidance you could provide, appreciated!
Regardless, a clear vinyl coated stranded wire might just be the bomb, if this is what they are.
Regarding the P-Clip method, consider using soft silicone tubing for the inner portion - Fuel tubing from an RC model would probably work well. It doesn’t have to be a continuous piece, you can cut a slit along its length so that you don’t need to thread the string through it. The slit can align with the slit in the P-Clip for quick installation.
Ha, you made me remember that when I ordered them, I was wondering which version I was going to get…Ali can be so confusing. I ordered the ones listed as transparent wire P67 and I got the ones I’ve described. But, here’s a link with more consistent advertising. On this link, they are described as IP67 only (as opposed to “with controller”). Hope this helps.
Well, I just checked the ones I got from BTF and they are 3 wire with no visible DI and DO so according to Pixie, they might be the fixed address version.
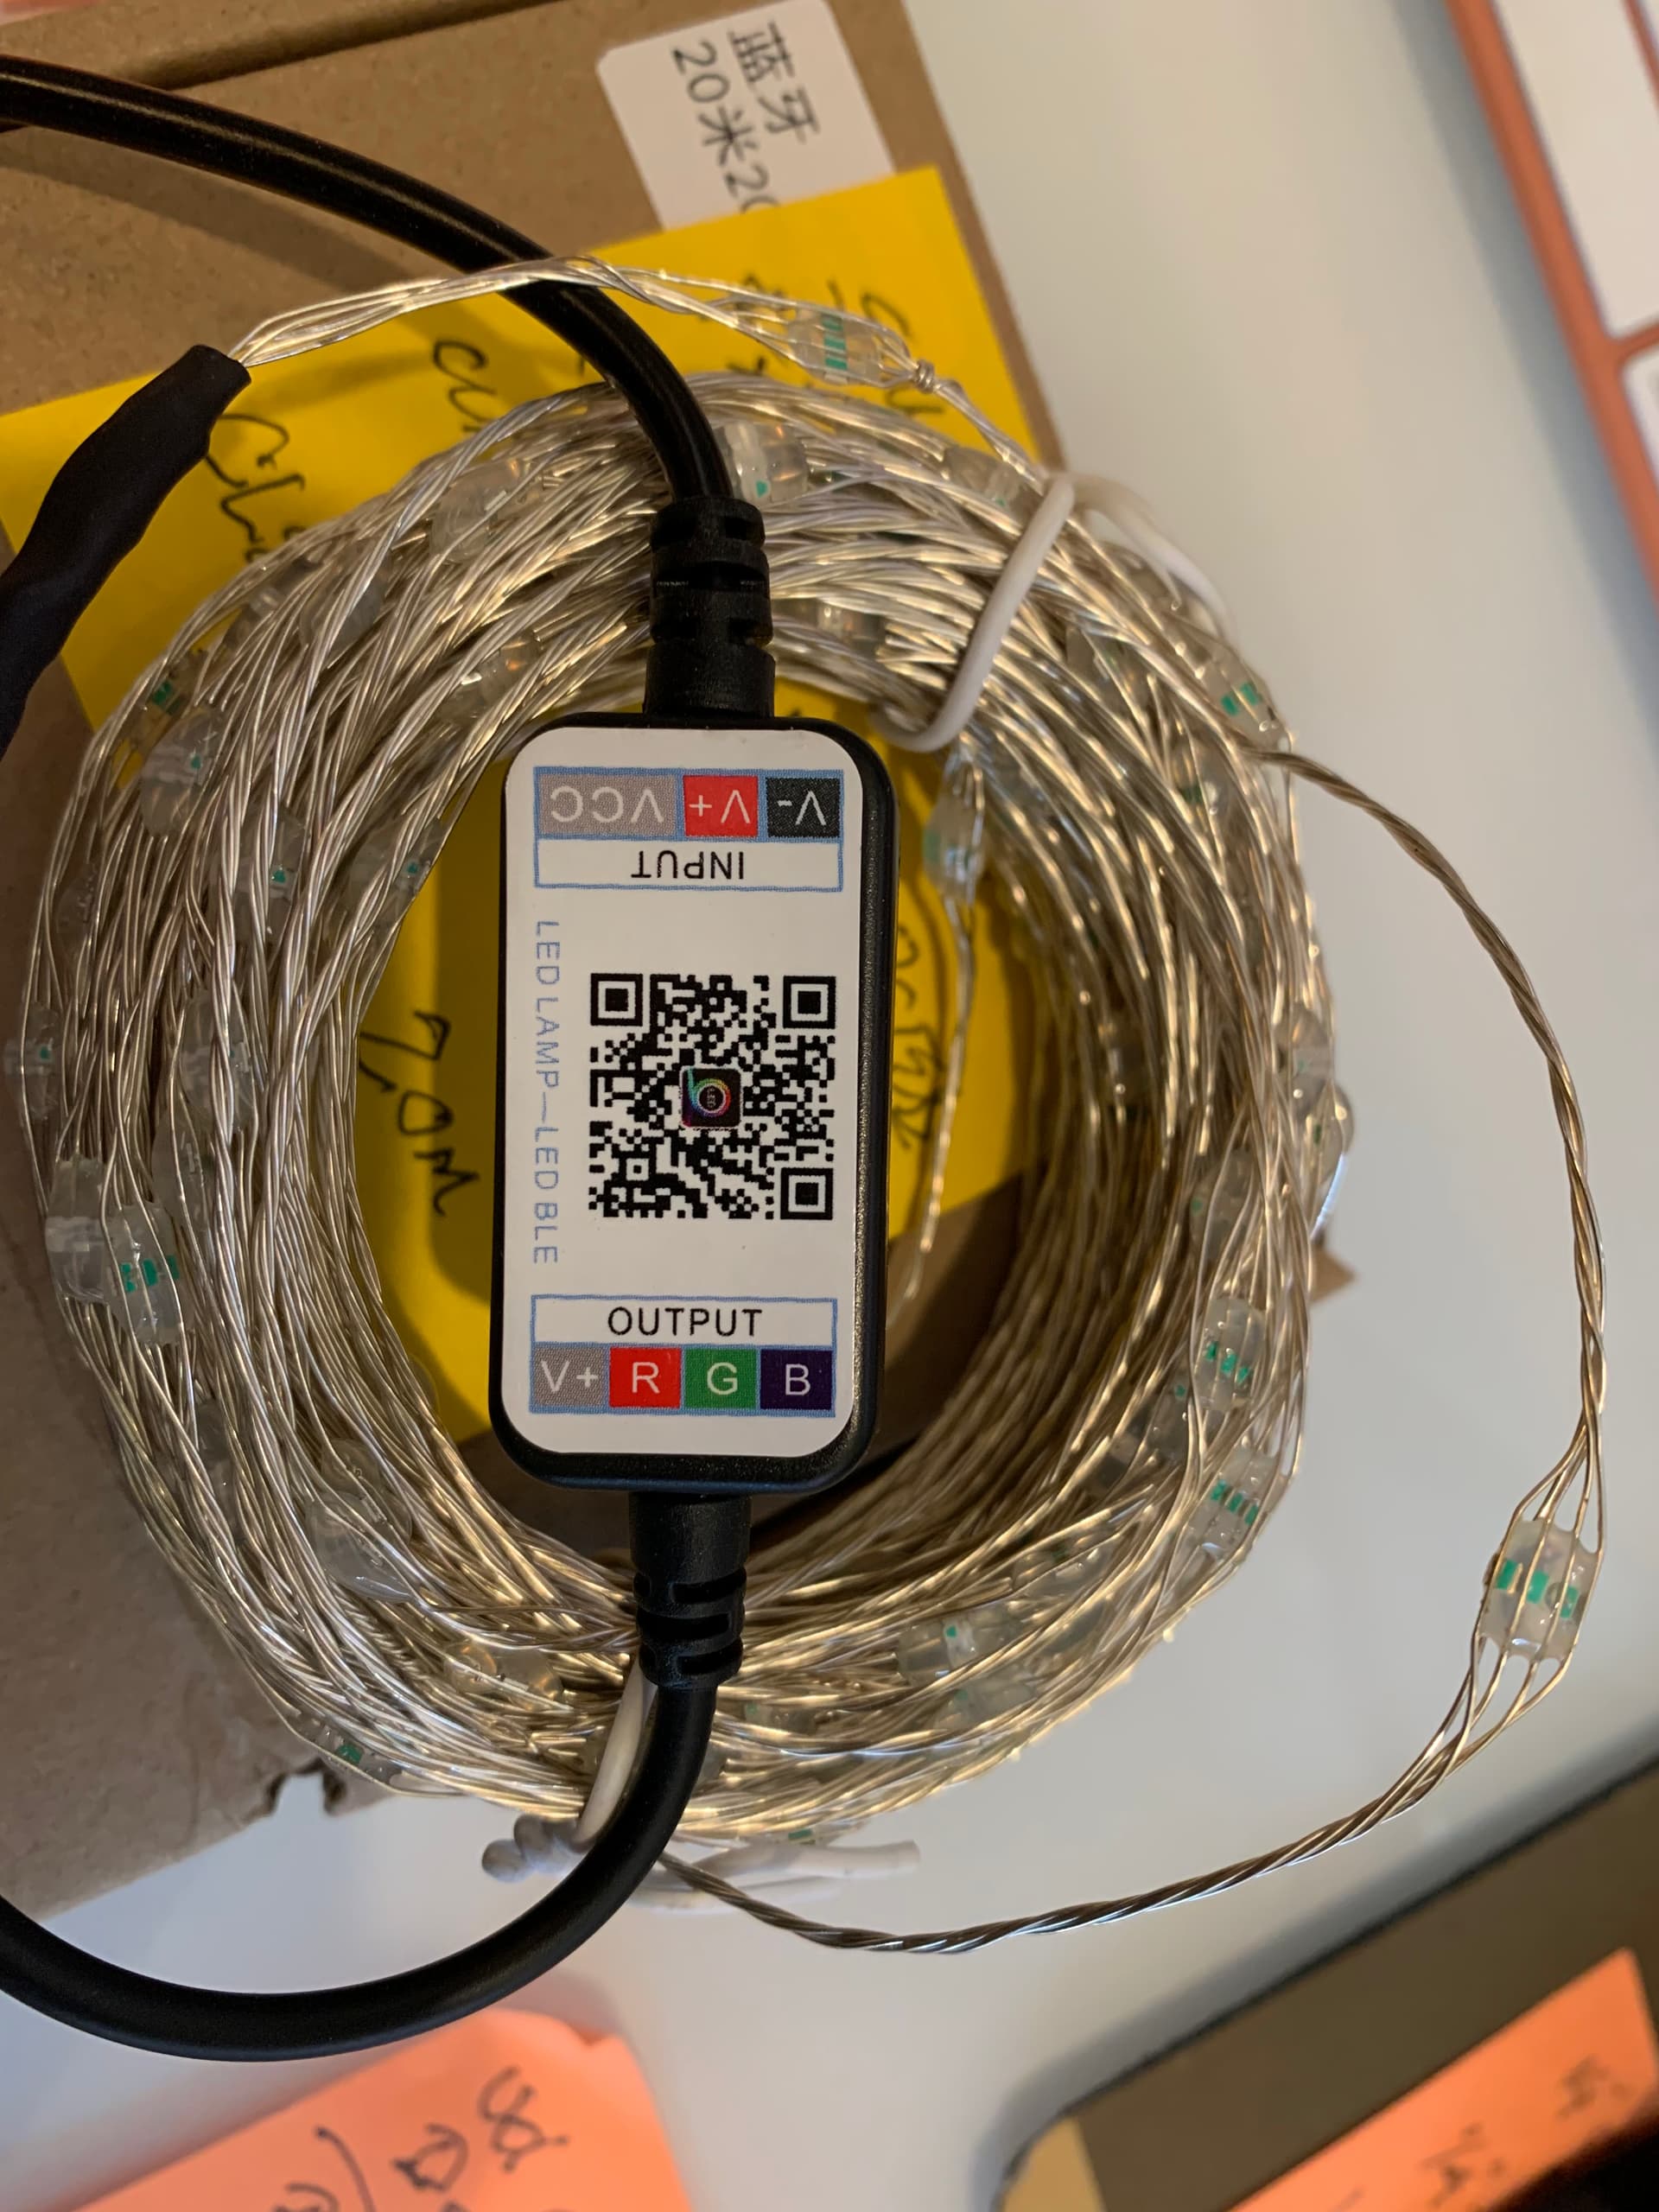
But, I also found these in my stash. They are four wire, so assumably addressable AND the wires are twisted which I think makes them more desirable than the more common untwisted ones. But, I can’t tell where on AliExpress I got them. All I know is that they came with this style bluetooth controller.
My bad, they are analog, not addressable at all (in the photo above shown with controller). I got mixed up because I had them stashed with my addressable fairy lights and I never even noticed the controller. But, interestingly, these actually have 5 wires. One seems to bypass all the leds entirely; it must be a secondary +V that feeds the end of the string to compensate for voltage drop.
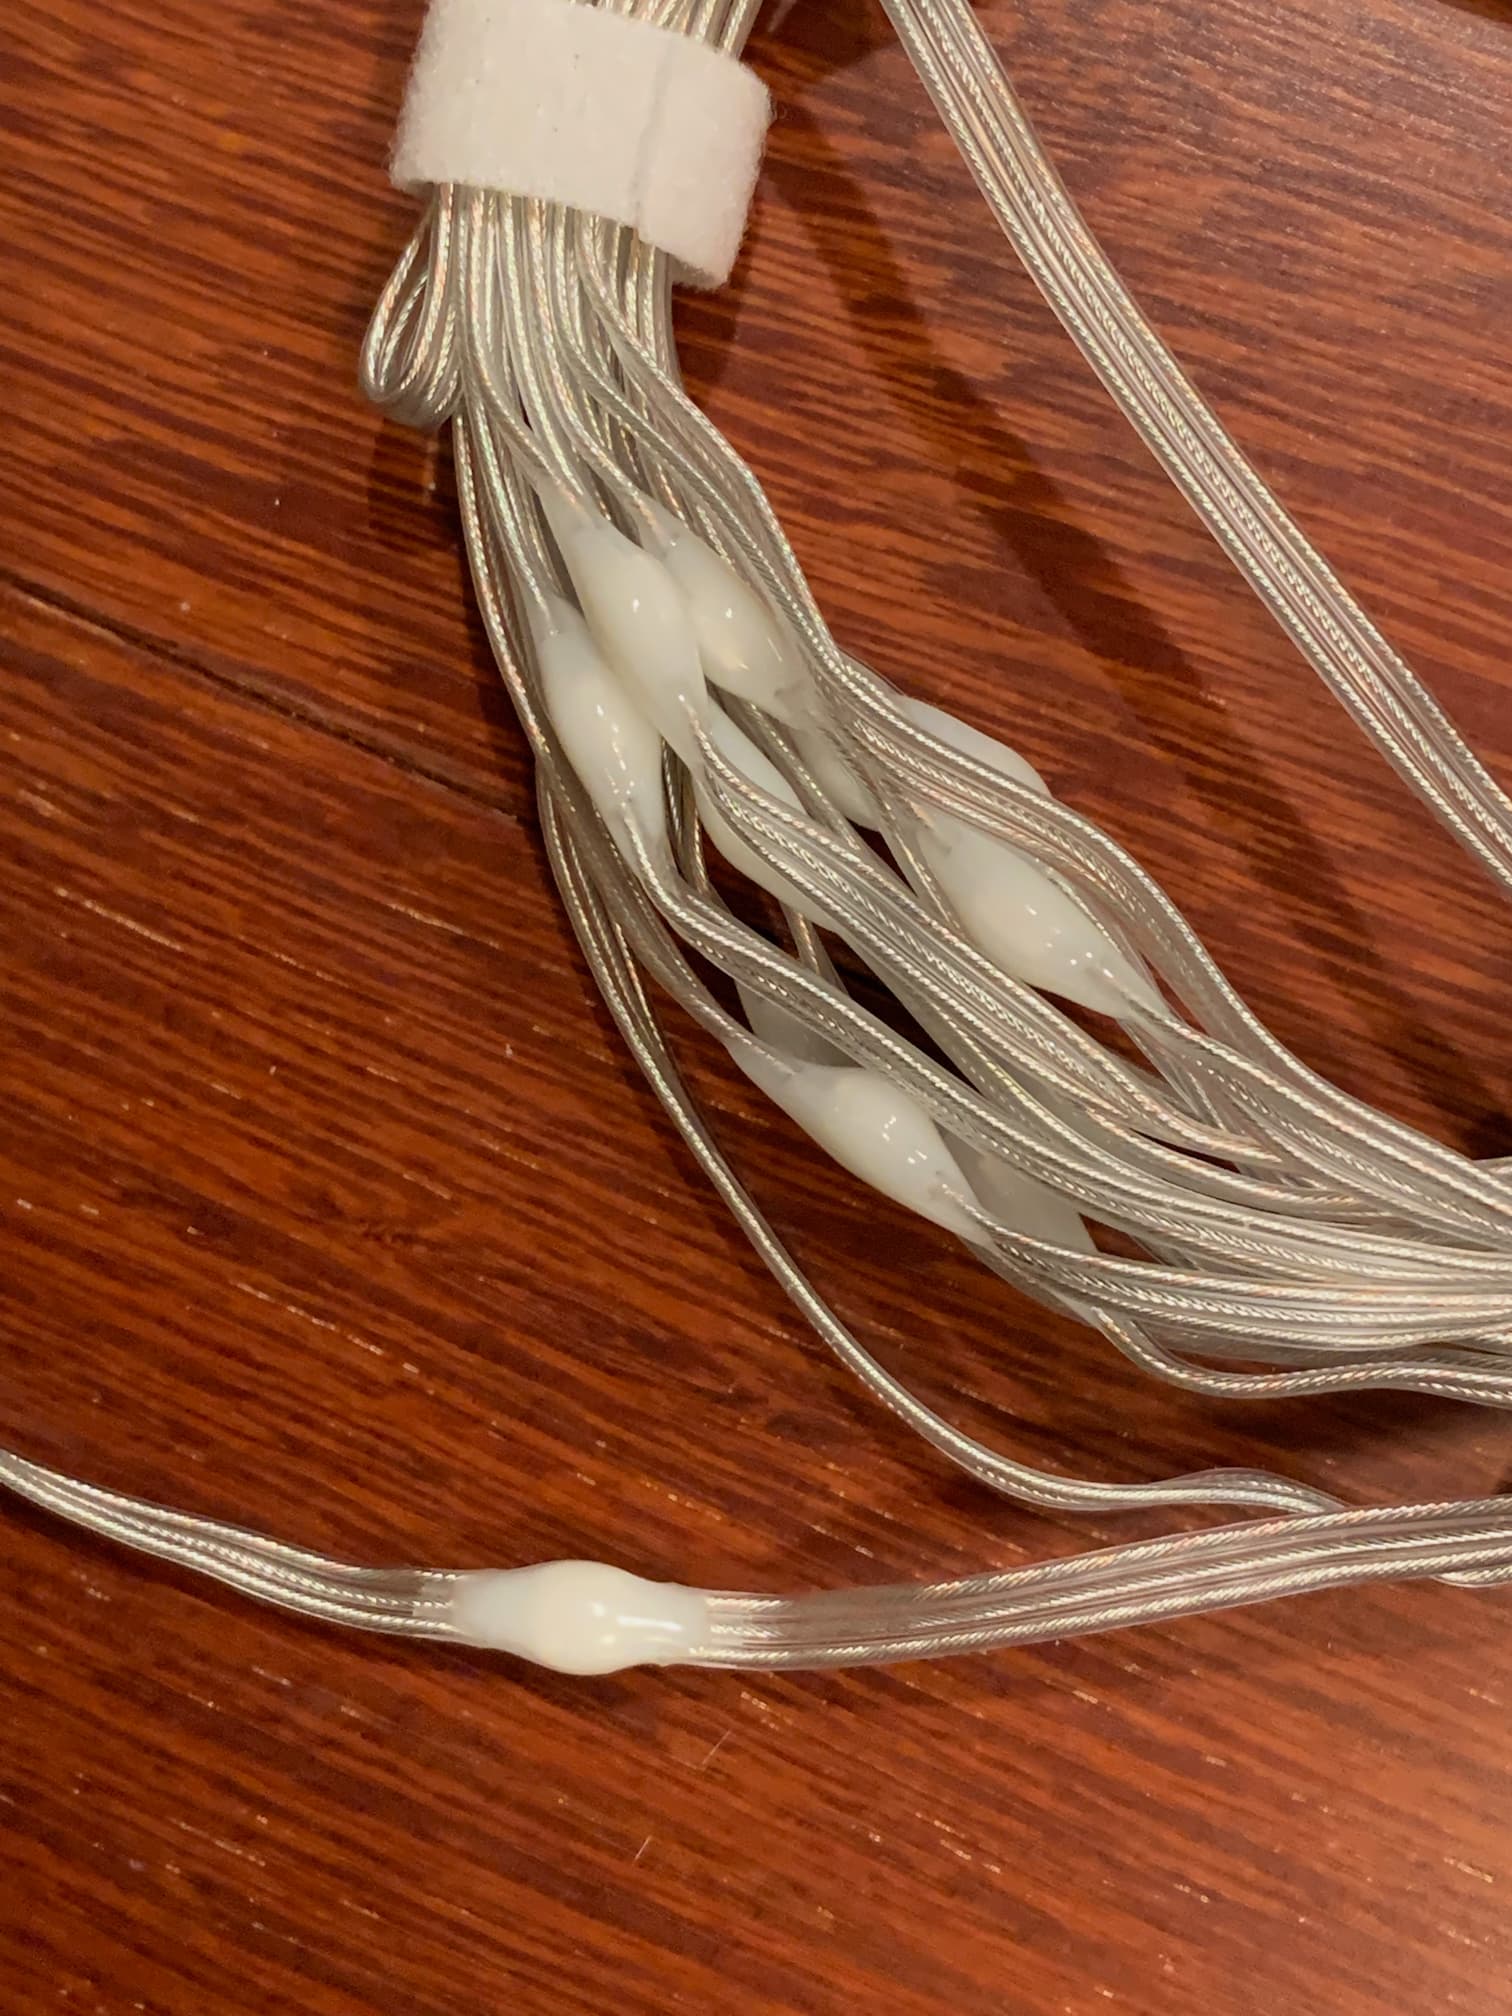
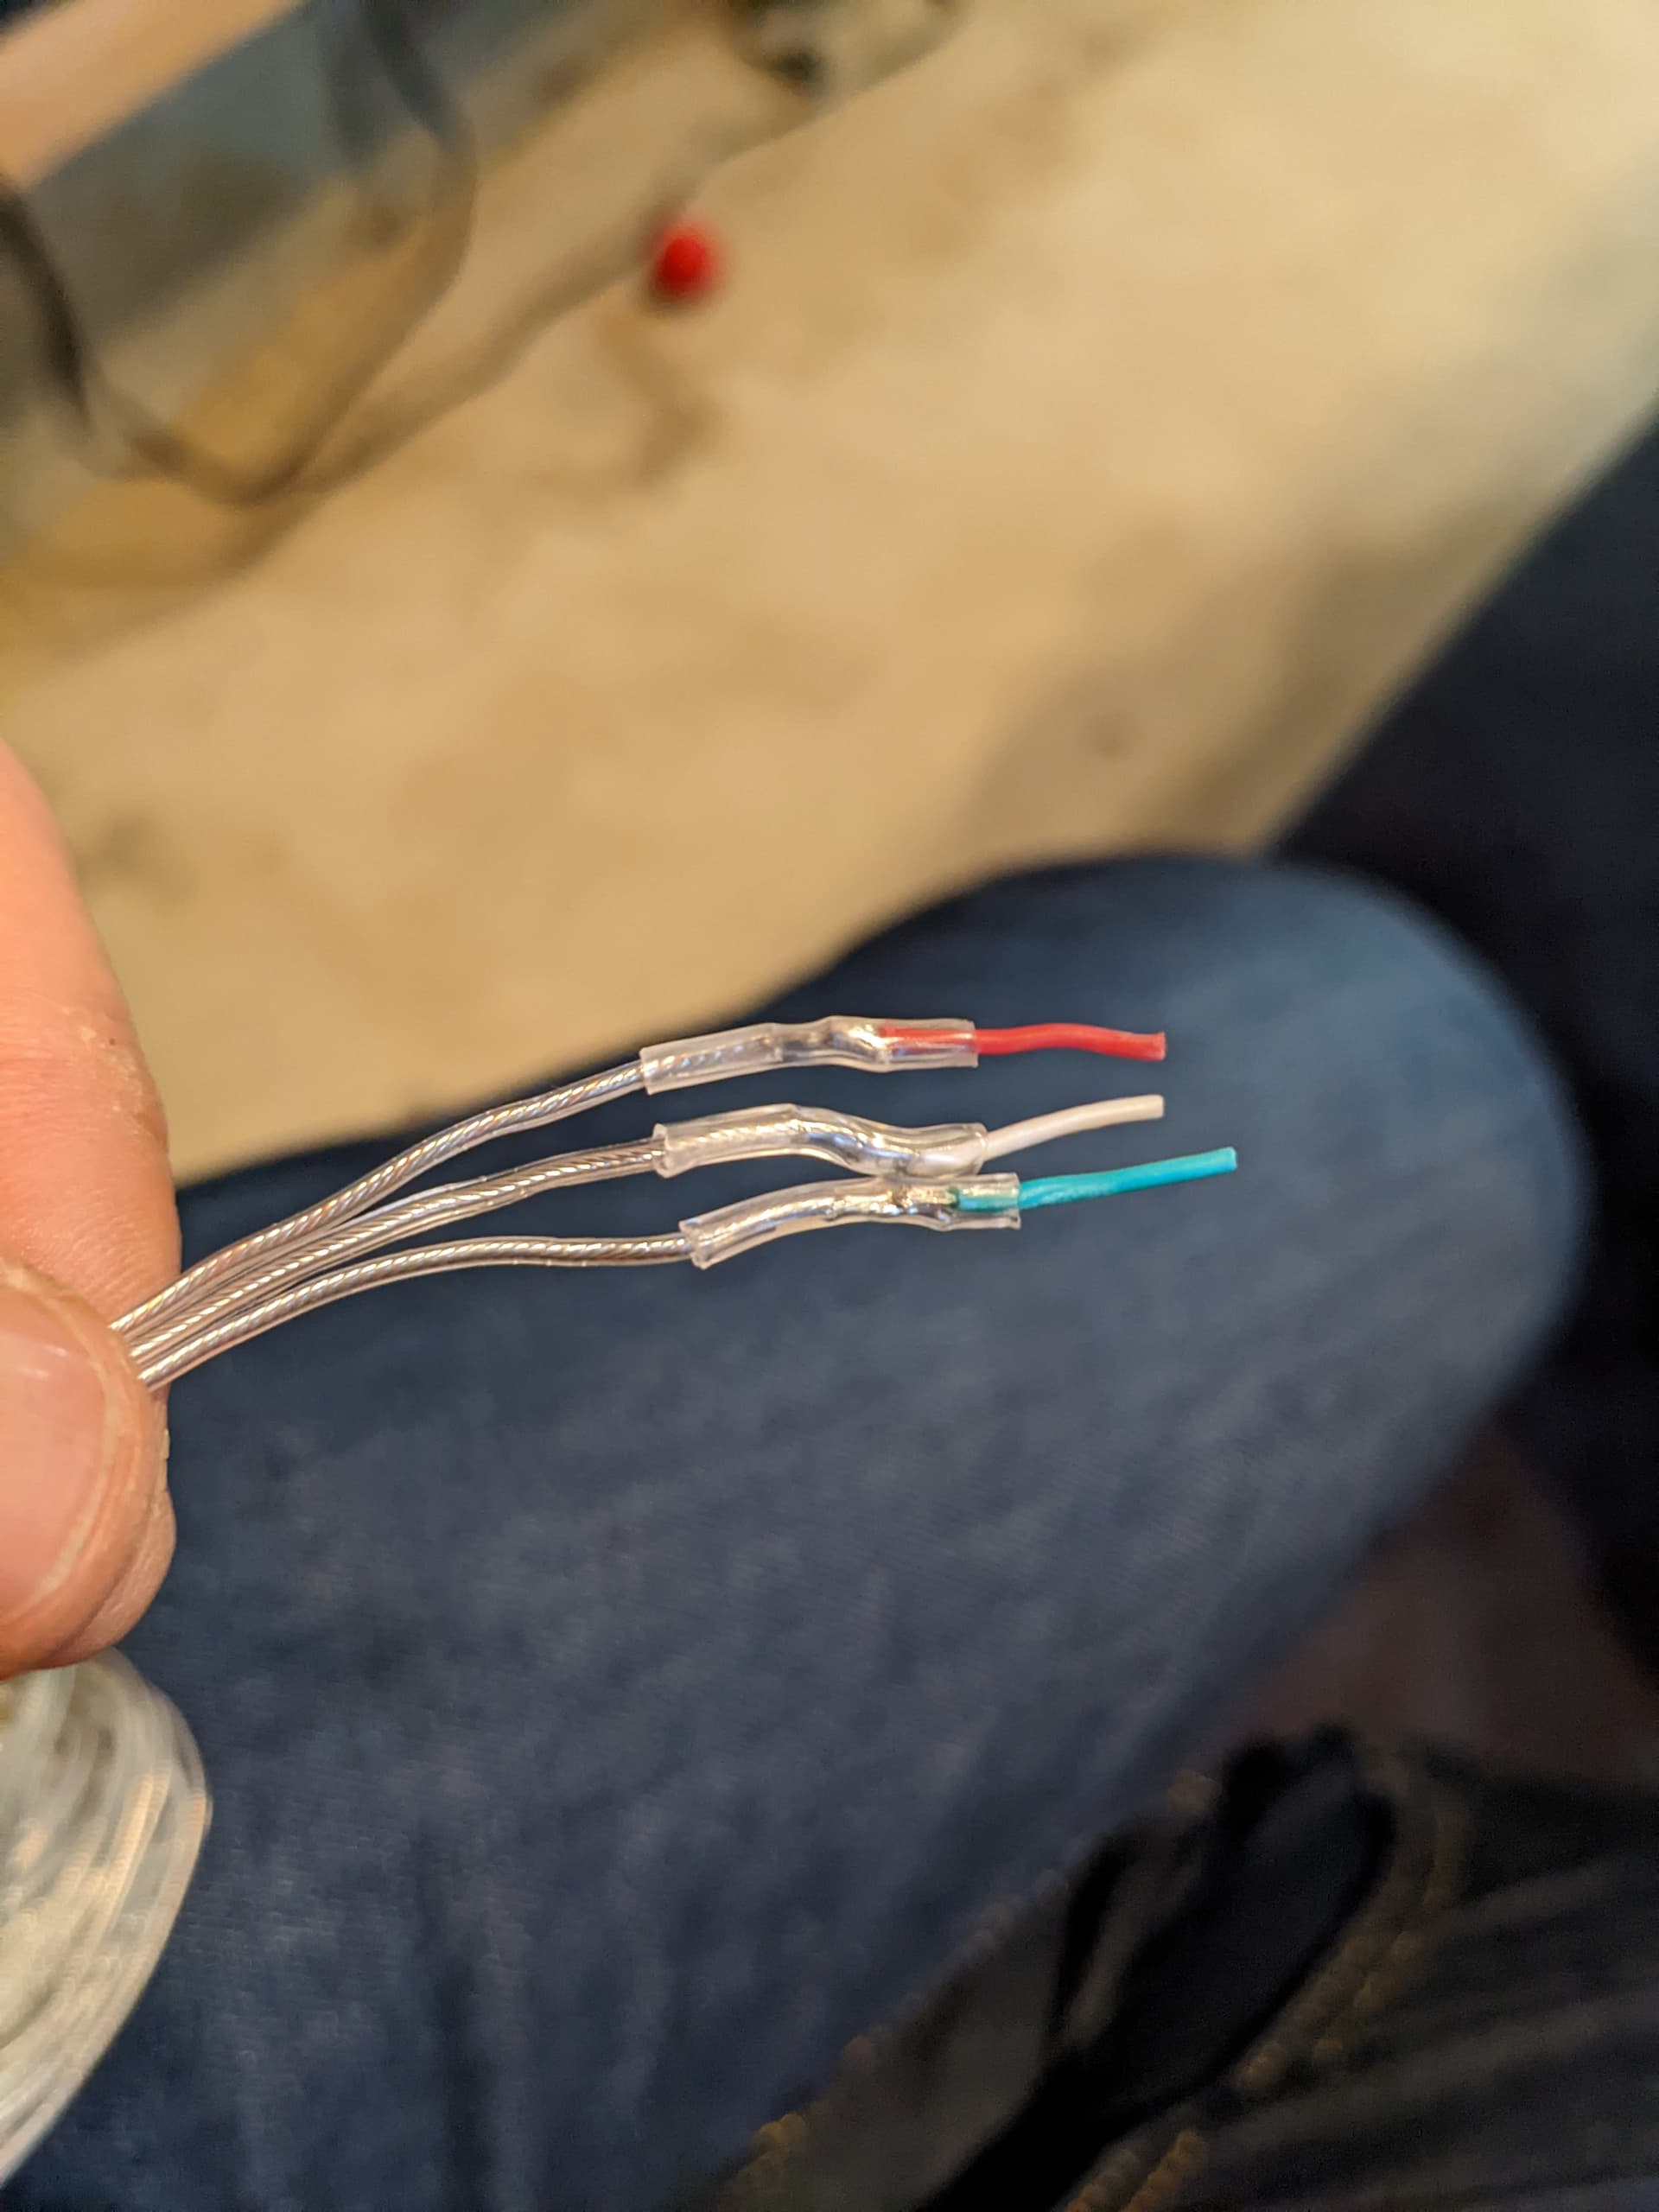
Here’s a photo of the ones from BTF with insulated wiring. The LED diffuser is too opaque to see how they are wired inside.
I recently ordered 5x 100 led strings of these from BTF via Amazon.
The red wire is 5 VDC and has a fine red conductor weaved into it.
White is 0 VDC and in the center of the three conductors.
Green is the logic control signal on the opposite from red.


