The thread Text scrolling Marquee? was asking for an example, and I thought it would be perfect for showing how you could use the WebSocket API to change the message:
Here's the scheme used to store the font bitmap. A period is a zero.

ASCII character  A        B        C        D        E
    `charIndex`  65       66       67       68       69
  array element  [16]     [16]     [16]     [16]     [17]
           bank  0        1        2        3        0
  fontBitmap[0]  ..11.... 111111.. ..1111.. 11111... 1111111.
  fontBitmap[1]  .1111... .11..11. .11..11. .11.11.. .11...1.
  fontBitmap[2]  11..11.. .11..11. 11...... .11..11. .11.1...
  fontBitmap[3]  11..11.. .11111.. 11...... .11..11. .1111...
  fontBitmap[4]  111111.. .11..11. 11...... .11..11. .11.1...
  fontBitmap[5]  11..11.. .11..11. .11..11. .11.11.. .11...1.
  fontBitmap[6]  11..11.. 111111.. ..1111.. 11111... 1111111.
  fontBitmap[7]  ........ ........ ........ ........ ........

charIndex 0..31 (traditionally the ASCII control characters) are left
blank for user-defined custom characters.
Happy to take a look. Would you mind copying the code from your map, as well as the code you’re using that’s modified from my original code, maybe in a Gist or Pastebin?
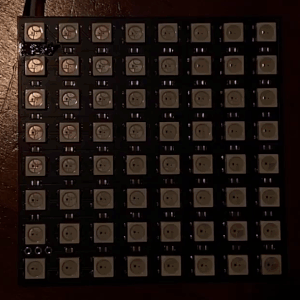
I’ve been playing with my PixelBlaze and a couple of 8x8 matrices this afternoon. I was getting the same issue as @Kenzillla. For me, changing line 100 from this:
if (renderBuffer[row][col]) hsv(0.07, 0.5, 1) // warm white
to this:
if (renderBuffer[row][col])
  hsv(0.07, 0.5, 1) // warm white
else
  hsv(0, 0, 0)
I’m a complete newbie when it comes to PixelBlaze, however I’ve had many years of playing around with LEDs (and coding) so I’ll take a wild stab in the dark that your mapping function is wrong. I have two 8x8 matrices, side by side, the width is 16 and the height 8. I had to write my own mapping function as these don’t zig zag… But that makes the function even easier!
You may want to have a look at that function so that you can get things in the correct orientation. I ended up writing a “pattern” that would just light an individual pixel so that I could work out how it was arranged.
I’ve been doing some work with the code that Jeff posted, mainly changing the font and also looking to get a 5x7 font working so it can exactly emulate a old “moving message display” that I have (it’s working but needs some tidying/optimising) and I noticed a bug in the code! Line 146 in the original code needs to be changed from:
bit = (((character[row] << colIndex) & 0b1000000) == 0b1000000)
to:
bit = (((character[row] << colIndex) & 0b10000000) == 0b10000000)
There’s a zero missing so it’s using the wrong bitmask and ignoring the first column of each character. I’d spotted the issue before but just put it down to the font. Now I’ve finally tracked it down!
I had the same issue as well! I was wondering why my custom characters were getting truncated, but just chalked it up to it being more readily formatted for 7x7 chars. All that really remains is for me to try and figure out how to insert some variable kerning between each character at some point
This is on my list of things to do! I had a 5x7 font working but I appear to have lost the code! I shall recreate it over the next few days and make sure that I keep it somewhere safe!
I found yours “scrolling text” pattern and playing with it now.
My matrix is flex 8x32 but wired in zigzag vertically.
So, I am using “Multiple Matrix” mapping tub/function, adjusted
settings accordingly and mapping looks good.
Text is also scrolling right-to-left, characters looks good
but … up side down!
Is it any variable which may control row indexing order or it
should be reversed manually or mapping is not quite right?
Hey! I coded it for the computer graphics convention where (0, 0) is in the top left with positive Y pointing down. Most 2D patterns will work best if your mapping is for this convention as well - you can confirm it’s mapped correctly if the mapping helper pattern has it’s curve radiating from the top left.
One quick hack is to just invert Y in your map generator code. So, if you see something like push([x, y]) in the Mapper tab, just change it to push([x, -y]).
If for some reason you really don’t want to change the map, you can always do the same Y axis inversion just inside the render2D(index, x, y):
I am using “Multiple Panel Matrix” from Mapper tub.
This version does not use push([x, y]) Instead it uses map.push(p) in the
function panel(w, h, sx, sy, angle)
I tried this method but it generates error message “Array index out of bound”.
My matrix is 8x32 but it zigzagged vertically instead of horizontally.
When I adjusted configuration in the Mapper dots are scrolling left to right
but wave is moving in opposite direction.
I guess, this is a problem.
Also I have a question about mapping code.
How do I save changes and where?
Do I have to copy-paste mapping code into pattern (at the end)?
PS.
I just noticed, after running for a while somehow it fixed itself on its own.
However very bottom line is one step behind.
Thanks, I understand now - the “Multiple Panel Matrix” is a recent new template.
I’m guessing that sometimes your y is equal to 0, which makes the array index 1-too-many. A very quick fix that will probably fix this error and might also fix your bottom line is to instead do:
y = .9999 - y
and if other index errors persist, the fully safe way is to change:
There’s a green Save button below the code textarea that persists it to the board.
I also save my maps in separate JS files on my hard drives for my own reference. In adition, if a pattern is particularly tightly coupled to the particular map or install, I’ll sometimes copy the map generator into a multiline comments section in the pattern itself (but this is not common for me).
I am sorry to say this, but both suggested fixes did not work.
First one still generates the same “Array index out of bound” error message.
Second one simply did not change anything.
I guess, my problem is related to not common wiring for my 8x32 matrix.
Instead of zigzagging rows it zigzagging columns.
Another words, y increments first followed by x.
The starting point is the same - Pixel-0 is a top left LED x=0, y=0
Next Pixel-1 is going down, i.e. x = 0, y=1 instead of expected x=1, y=0 and etc.
I think, I have to create my custom mapping.
So, it is time to learn how to do this and improve my programming skills.
Ops, I was looking for this button but somehow missed it.
This is exactly what I am looking for.
I am very confused.
Could you please provide a quick example (or link) how to do this?
Finally I got thing working right.
I had to create JSON style mapping for my matrix.
Once I loaded it into mapper scrolling became functional in a right way.
I tried to create mapping mathematically but no matter what I tried preview
did not look right. What is expected values for x and y?
Are they integers or floats with 0-1 range?
I was able to save my mapping but where this is stored?
It looks like somewhere in undisclosed location with no name and no way
to see it after browser is closed and reopened again.
Because PB does right thing on power up it definitely uses stored mapping.
But how I can see what exactly is used?
Please provide me an example how to store my custom mapping within pattern?
And I have one more question.
I am looking for the best place how I can assign different colors for a different
characters. I am thinking about using message array index.
Am I right or do you have better idea?

 I shall recreate it over the next few days and make sure that I keep it somewhere safe!