You’re right - the header pins are for the sensor board. 
Here’s a closeup of the connection to an ESP8266. It’s done with the same
3 lines for Pi and for the FTDI adapter.
You’re right - the header pins are for the sensor board.
Here’s a closeup of the connection to an ESP8266. It’s done with the same
3 lines for Pi and for the FTDI adapter.
Quick preview of the next PixelTeleporter update.
I wanted to see if the Fibonacci layout boards were really as cool as people were saying, so I wrote this example sketch. The gif shows the standard 1D Block Reflections pattern. It’s a little over-the-top because it’s using the new experimental blur/persistence renderer, but the spiral layout is indeed super cool!
Source code for the example below so you can check it out early if you like. Set the background to white, run the pattern without a Pixelblaze connected, and you can use it to print the spiral out as a drilling guide if you want to make one of these on your own.
// Pixel Teleporter Fermat Spiral (Fibonacci256) example
//
// 10/21/2020 JEM (ZRanger1)
//
// Creates a fermat spiral of 256 pixels.  Use an angle of 137.5 to create a "normal"
// fibonacci pattern, other angles create other interesting spirals and patterns.
import pixelTeleporter.library.*;
import java.util.*;

// constants
final int numRows=16;
final int numCols=32;

// global variables
PixelTeleporter pt;
LinkedList<ScreenLED> panel;    // list of LEDs in our matrix w/position and color info
//PShader blur;

LinkedList<ScreenLED> buildFermatSpiral(int pixelCount, float angle) {
  float x,y,r,theta;
  float pixSize;
  float originX = 0;
  float originY = 0;
  ScreenLED led;
  LinkedList<ScreenLED> panel;

// set pixel spacing to something that looks reasonable
  pixSize = 1.4 * pt.getElementSize();

  panel = new LinkedList<ScreenLED>();

// create spiral, pixel 0 at center.
  for(int i = 0; i < pixelCount; i++) {
    r = pixSize * sqrt(i);
    theta = i * angle;

    y = originY + (-1 * r * sin(theta));
    x = originX + (r * cos(theta));

    led = pt.ScreenLEDFactory(x,y);
    led.setIndex(i);
    panel.add(led);
  }
  return panel;
}

void setup() {
  size(1000,1000,P3D);     // Set up the stage

  pt = new PixelTeleporter(this,"127.0.0.1");
  pt.setElementSize(18);

// Optional - load single pass blur shader
//  blur = loadShader("blur.glsl");

  panel = buildFermatSpiral(256,radians(137.5));

// add very slow rotation to enhance trippyness.  Spacebar toggles
// rotation on/off, mouse wheel zooms, 'r' resets to original orientation.
  pt.setRotation(0,0,0);
  pt.setRotationRate(0, 0,PI / 8000);

  pt.start();
}

void draw() {
  background(15);

// draw LED matrix
  pt.render3D(panel);

// Optional - Apply blur shader.
//  filter(blur);
}
'''Very very cool. This should prove to be an extremely useful tool!
I have followed everything and all seems to be well until Processing…
I’m fairly new to Processing and so I must be doing something wrong while installing the library as I keep getting errors such as: The function “getElementSize()” does not exist. …or… The method ScreenLEDFactory(float, float) from the type PixelTeleporter is not visible and so on. It’s strange as I can see that the library has been installed as I can see it in my examples under Contributed Libraries. Otherwise, I have the server running on an ESP8266 and is connected to my WiFi. Almost there! any help is appreciated.
Windows 10 - Processing 3.5.4
edit… ok, so i managed to get it working by downloading the zipped library “PixelTeleporter.zip” from here: https://github.com/zranger1/PixelTeleporter/releases/tag/1.1.0
I am not sure why, but I was not able to get the library in “PixelTeleporter-master.zip” to work.
In any case…yay!
First, grab the latest version. It’s in https://github.com/zranger1/PixelTeleporter/releases/tag/v1.1.1. Download PixelTeleporter.zip and copy it into your Processing libraries directory over whatever was there before. (You might want to grab the latest servers too.)
Once you’ve got that installed, try running one of the examples just as is and see if it runs correctly – before you’ve configured it for your setup it may not display anything useful, but it should at least find the library and start up.
Right on. So I have the latest and the matrix example starts up, I see the grid of dots but I’m not seeing anything coming through. I believe I have set up the PB environment correctly. but alas…I will try starting from scratch. I have a feeling this might be due to a faulty ESP, so I have also ordered the USB to TTL.
I’ve found the FTDI board convenient, and it is generally a useful thing to have around but here are a few things to check before you give up on the ESP.
Since the wifi/datagram side has fewer possible config issues, I’ll build an “am I hearing from the Pixelblaze” diagnostic into the next version of this server – maybe flash the first virtual pixel red if we’re not getting data from the Pixelblaze.
OK, so…
-ports are set to 8081 and 8082
-PB is set to “PB output expander” with board number set to zero with WS2812/RGB
-Pixel number is set and “Start index auto” is pressed and auto-populates.
-As far as i can tell the NodeMCU board is clearly marked with pin D7 and is connected to PB dat and ground is connected to ground.
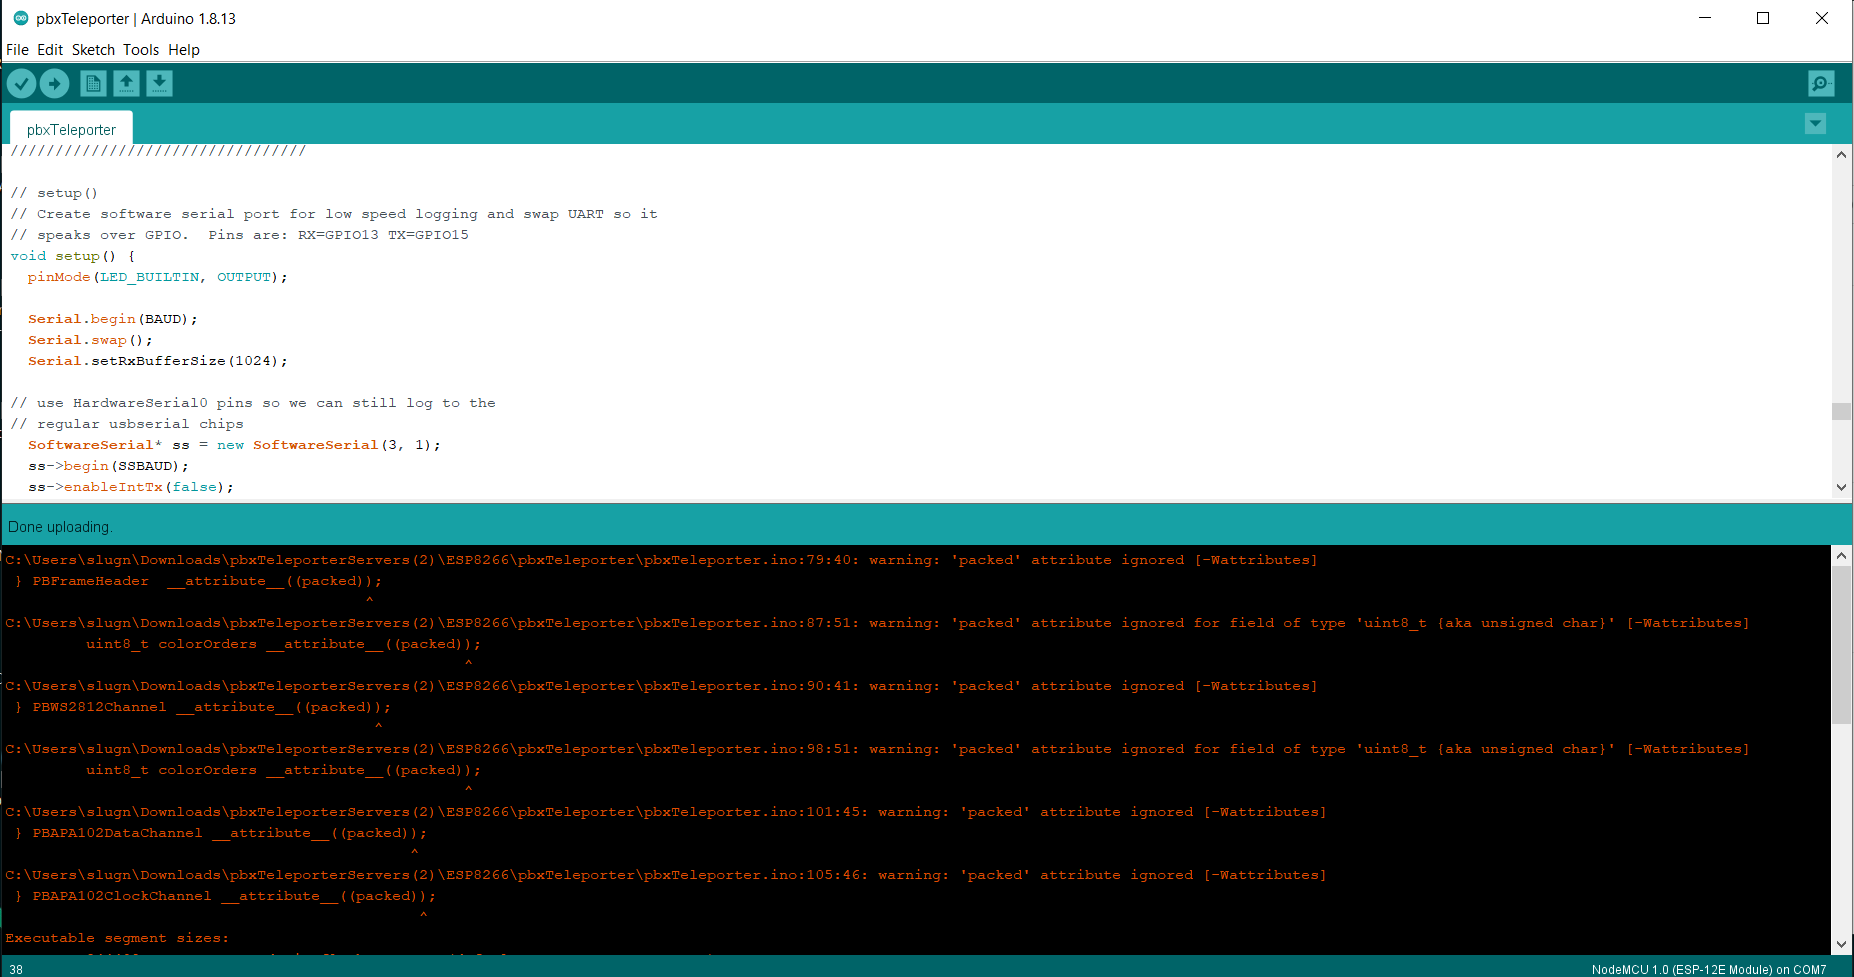
As I was reinstalling the server on the ESP through the Arduino IDE, I noticed that while the server code is being compiled and uploaded to the NodeMCU ESP8266 I am seeing some warnings, such as:
warning: ‘packed’ attribute ignored [-Wattributes]
} PBFrameHeader attribute((packed));
warning: ‘packed’ attribute ignored for field of type ‘uint8_t {aka unsigned char}’ [-Wattributes]
uint8_t colorOrders attribute((packed));
Perhaps something is not being installed due to a compiler error?
and yes some kind of diagnostic tool would cool.
In any case i’m at a loss, but I’ll keep poking at it… Wednesday the USB device arrives, so there’s still hope!
EDIT…
New user…not allowed to post more than 3 replies so I am just going to edit this post…
Sadly, I have been using Arduino IDE 1.8.13.
I just downloaded again from the link you provided to get the latest server, same thing.
I will try reinstalling both arduino and processing.
EDIT #2
Still no luck. I tried switching around the syntax as you suggested, and this took care of all the warnings except for:
warning: ‘packed’ attribute ignored for field of type ‘uint8_t {aka unsigned char}’ [-Wattributes]
uint8_t __attribute__((packed)) colorOrders ;
I also tried a previous version-Arduino 1.8.12 - same thing.
Interesting. Compiling with Arduino IDE version 1.8.13 I don’t get these warnings at all. Structure packing problems would definitely break things. Be sure you’ve got the latest pbxTeleporter.ino from the 1.1.1 release (in pbxTeleporterServers.zip), and see if you still get the errors.
I do recall there was a relatively recent change in the syntax of attribute((packed)) in the Arduino IDE flavor of C++ vs gcc – if you’re using PlatformIO or something like it, you may have to switch to the new syntax, which uses
__attribute__((packed)) objectName
instead of
objectName __attribute__((packed))
which works in the Arduino IDE.
If this is what’s causing the problem, I’ll add figuring out what makes both environments happy with the same code to my list of things for the next build.
Just tested – the compiler warnings don’t affect operation. You can safely ignore them, or if you want, you can get a slightly newer version that doesn’t generate them here. Just copy the code and paste it into your IDE.
Since you got the Processing example to work, I think your setup is correct – you don’t need to reinstall anything.
A few more configuration basics. You’ve probably already done this, but it never hurts to ask.
On the processing side, make sure the server IP address in your example script is correctly set to the IP address of your ESP8266 (not the Pixelblaze). It’s at about line 49 in the script.
You can get the proper address either from your router or DNS server, or by watching the Arduino IDE’s serial monitor when the ESP is starting up. It will display a row of dots while it’s trying to connect to Wifi, and the IP address and port information once connected.
Non-essential, but helpful for future versions – in the Arduino IDE’s Tools menu, check your board settings. Set “CPU Frequency” to 160Mhz, and “IwIP Variant” to “v2 Higher Bandwidth”.
Right on!! With the new ESP server code everything is working as it should.
I also adjusted the CPU frequency and IwIP Varient as you suggested. Otherwise, I had followed your instructions that were laid out in their respective documents and it was only after changing to your new code and adjusting board settings that suddenly everything came to light! Thank you for you time and happy holidays
Thanks for sticking with it 'till we got it solved. Always glad to help - the whole fun of building a tool is seeing it in use!
Sorry it took nearly four months, but my APA102 receive code for ESP32 is now cleaned up and published. It’s working with the Pixelblaze at 4MHz (fastest working option in the dropdown), and with Teensy 4 at 5.5MHz.
It shouldn’t be too hard to extract out the I2sIn and APA102 parsing code for your application and leave the rest. Hope it helps you!
Very nifty. The video of driving a hub75 display using a Pixelblaze v3 (and your engine board) is cool as found here
This is terrific – thank you very much! @scruffynerf is right on – your board is super cool! I’ll definitely send people who want to driver bigger & faster displays your way. If there’s anything in the way of software I can contribute to on your project, just ask!
You actually caught me the perfect time. I’d put direct APA/WS2812 support aside for a while because work was doing its usual end-of-year crazy thing. I’m really looking forward to digging in to this. I’m using the Espressif SDKs, and will try a backport to ESP8266 as well. I’ll post as soon as I get it running. Lots of fun, hopefully useful changes coming to Pixelteleporter in the next few months!
It took a bit of futzing, but I got a Pixelteleporter running. Thanks, @zranger1.
Glad to hear you got it working, @spazzle! When you get time, can you tell me what things slowed you down or made it harder than necessary? I’ve clearly got work on setup and usability to do. It’d help a lot to know where the pain points are.
Right now I’m working the three D’s: Device detection, Diagnostics, and Documentation, particularly on the server side.
On the client side, there are lots of new things coming – the Processing client will soon be joined by others. I’m looking first at building plugins for existing CAD systems, starting with FreeCAD and Blender. If anybody’s got a favorite CAD or design program that supports plugins and has a more-or-less real-time rendering option, let me know, and I’ll add it to the list.
This might be a bit nitpicky.
I used the FTDI connector listed above and windows 10
The directions say that the FTDI USB->Serial adapter would auto install on windows. This was not the case, I had to manually download and install drivers for both hardware components.
the pbXTeleporter server settings operation is unclear. The FTDI USB->Serial adapter shows up as com5 on my system. When you click on the serial device tab it only shows the first com port. It took a while to see that you can mouse click on the port, and then arrow down the side arrows, which are very small. When I selected com5 and hit the “OK” button, nothing obviously happened, whereas the “OK” button in the Settings>Ports pulldown closes the popup. I did see eventually that it had saved it in the ini file.
Sometimes pbXTeleporter just crashes. No idea why. Its infrequent enough that I can make good progress, but still slows things down.
pbXTeleporter has no feedback on windows 10, so I don’t know if (a) Its connected successfully to the adapter, if (b) It is receiving data from the adapter, or if © it is connected to Processing. The only way to know is if you are fully successful and see pixel animation in processing.
The processing window locks sometimes.
The fix for the serial port dialog not closing is already done and will definitely be in. I’ll get it to drop down the entire port list so you can see more of what’s going on too.
Better instrumentation and feedback is also coming. The original idea was that these things would be daemons/services that users would never have to look at, but I think some status information is necessary, especially while getting things set up the first time.
The FTDI driver thing is weird. I’m sure that Windows was able to find a WHQL certified driver in Microsoft’s driver repository. In Device Manager, mine is “USB Serial Converter”, v2.12.28.0, dated 8/16/17.
On locking & crashing: Can I ask what kind of hardware you’re using? Probably the relevant things are laptop vs. desktop, CPU, GPU and amount of RAM. It’ll give me a place to start looking. I’m running an older I7 desktop w/32gig RAM and an Nvidia 1080 and I’ve never had either Processing or pbxTeleporter crash – of course, “it works on my machine”, is the sad and often not-quite-correct lament of developers everywhere!
Thanks for the feedback! It always helps.
Well, Processing isn’t crashing, but the rendering window becomes nonresponsive and doesn’t move on mouse input. I’m able to stop the window and restart it just fine. I’m running a dell desktop with the following hardware.

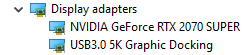
Nice setup! Definitely more than fast enough. Is that USB3.0 5k device one of Dell’s new Thunderbolt docks?
Here are a couple of things that have caused me trouble when using “unusual” USB devices like Kinect, Oculus Rift sensors, etc. Not guaranteed to affect anything, but it’s worth a quick check.
First, power management. With the FTDI board plugged in, go to its entry in Device Manager (“USB Serial Converter”) and check in the Power Management tab that “Allow the computer to turn this device off to save power” is disabled.
Windows is sometimes clueless about when a USB device is or isn’t active – I fought constantly with magically disappearing Oculus sensors 'till I figured this out. Doh! While you’re at it (if you’re not actually worried about power use), might as well turn it off on the USB root hubs in Device Manager too.
The other thing that might help is to move the FTDI board to a different USB controller. It should be one that’s not being used for other high bandwidth things like cameras, mass storage, driving displays and such. USB 2 is actually fine for this purpose. Absolute port speed isn’t the limiting factor – it’s more about avoiding transfer bottlenecks in other parts of the system.
If you want or need to, you can use the Performance Monitor snap-in in Windows management tools to see how your USB controllers are loaded. (right click computer, select Manage, then run Performance->Monitoring Tools->Performance monitor, add the devices and performance counters you’re interested in, and go!)
And just in case Processing is somehow trying to use embedded graphics instead of your 2070, run the short diagnostic sketch below - it’ll tell you the name and GPU name and driver version of the hardware it’s using.
Processing sketch to report GPU info:
void setup() {
    size(100, 100, P3D);
    PGraphicsOpenGL pg = (PGraphicsOpenGL)g;
    println(pg.OPENGL_VENDOR);
    println(pg.OPENGL_RENDERER);
    println(pg.OPENGL_VERSION);
    println(pg.GLSL_VERSION);
}
void draw() {
  ;
}