Has anyone used PixelBlaze for a POV project where the strips are mounted on rotating arms?
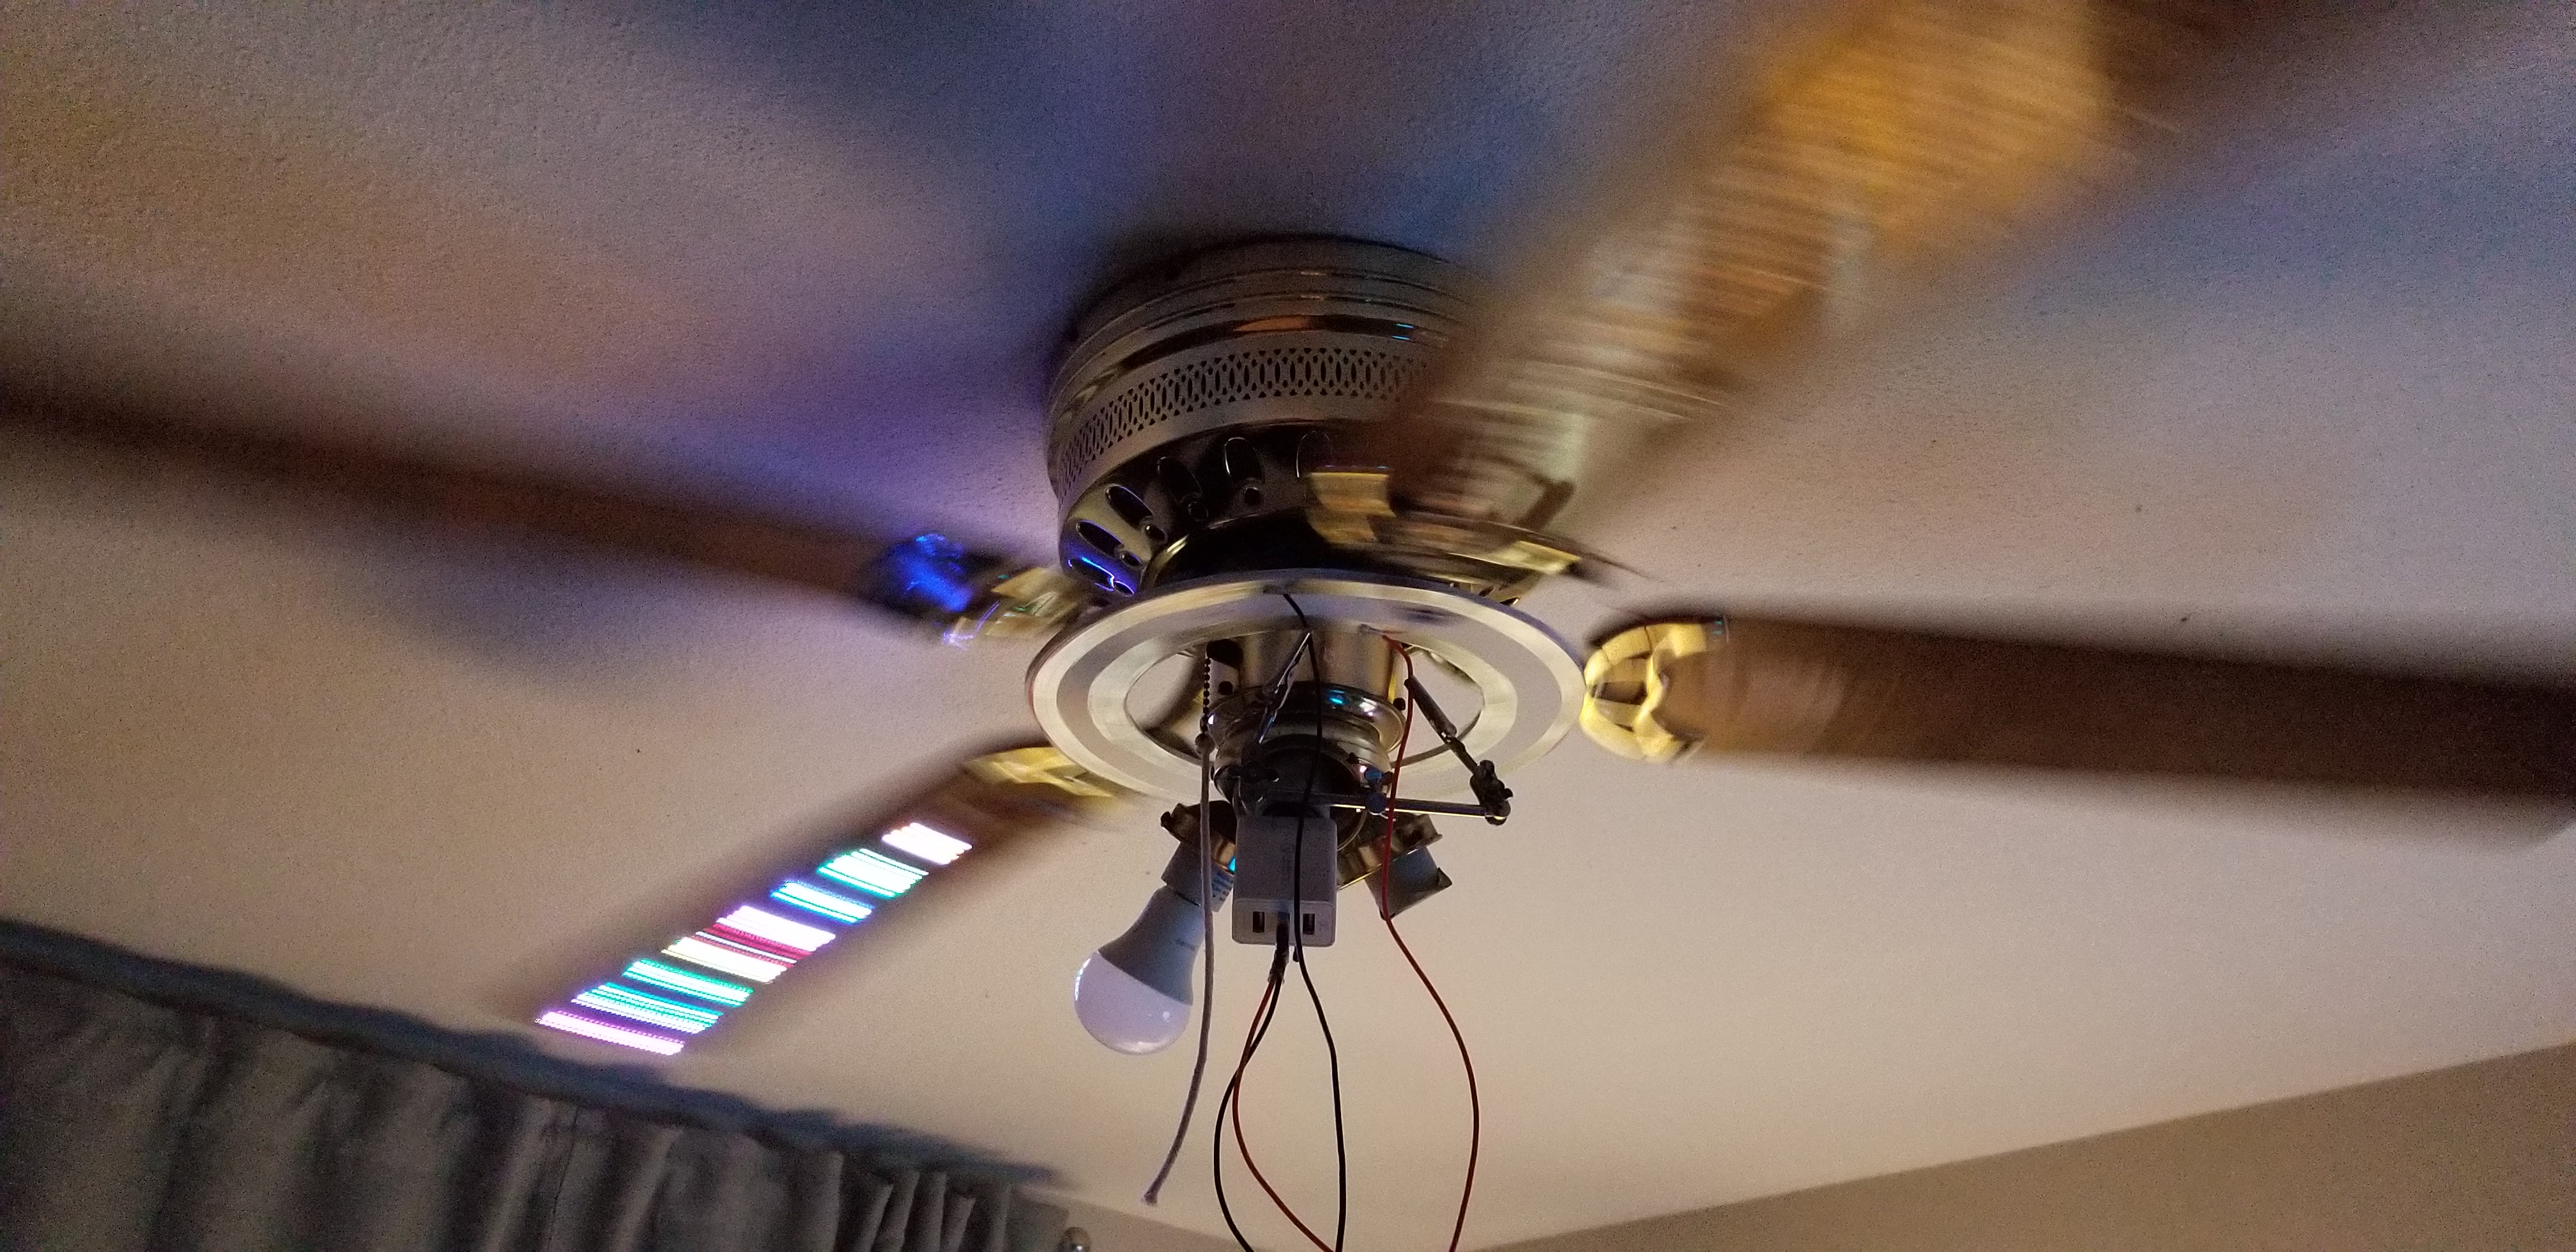
I threw a pixel blaze on my ceiling fan and while the long exposure pictures look pretty cool, with the naked eye it just looks like one single line of LEDs spinning around. I take it from seeing examples like Christopher Schardt’s Mesmer that I need more arms and higher RPMs. I can add more strips on to the 4 of the 5 remaining fan blades (don’t strap heavy batteries to fast spinning blades people), and up the framerate but I’m lost on how to develop patterns or use the mapper for this.
Link to stills of the ceiling fan implementation:
Ceiling Fan PB
I’ve been playing with ceiling fans and POV a little too, partly to see what would happen, and partly to mess with motion blur and POV rendering in Pixel Teleporter.
My experience is that yeah, you can make it work but… a ceiling fan operating at normal speed is too slow for a good visual, and if you crank it to max speed, it looks slightly better but every little blade imbalance or loose part or swinging switch chain starts shaking the fan and rattling around. It’s not something you can really leave running for very long.
FWIW, Here’s a test render of a strip on a single blade running at 480 rpm, which is maybe 100 rpm faster than my ceiling fan can actually go. I’ve got some work still to do on motion blur, but you can see what it’s supposed to do.
(pattern adapted from code posted here by kylarleds)
2 Likes
I just did this too!
I made it for a friend as a gift, and didn’t take good pictures, sorry.

I used 12 radials (6 x 1m diameter strips @ 144/m density). With 864 pixels, a V3, and the pro expander, I’m getting 30-55 FPS. The $70 fan that was in stock locally rotates at 50-140 RPM depending on its speed setting; on high speed I’m getting ~17 distinct “slice” segments. On medium speed, ~90RPM, I get ~26 arcs/revolution (14 degree resolution), and this seems ideal for 12 radials. On high, it also oscillates a bit too much such that pixels aren’t a circle (to @zranger1’s point). On low speed, 50 RPM, it doesn’t shake at all, but the arcs don’t connect to be visually continuous.
I powered it with a LiPo because that was simpler than figuring out how to mechanically set up the $50 slip ring I bought. I can enthusiastically recommend these channels and essentially-a-ND-filter lenses for a project like this. This is a great $16 lightweight buck converter - Up to 20A @5V, about the size of a pack of gum.
I’ve also been in touch with Christopher, because Paraluna was my inspiration for this gift for my friend (we were at BM 2018 together).
My takeaways:
- Half the pixels is twice the frame rate; twice the arc resolution. Consider 60/m strips over 144/m.
- 12 radials with a ceiling fan is a good starting point at medium speed (90 RPM)
- Something to try in the future for PoV is multiple Pixelblaze sync’d with the sync feature. In this way you can scale framerate, and thus the minimum outer radial arc resolution, with linear cost. I think Ben uses an NTP-like protocol for sub-ms sync precision.
Here’s my code that adapted most Pixelblaze default patterns to be either radial-symmetric or spin-RPM aware. I’m happy to share these ~40 adapted patterns, but please note I was in a rush and it wasn’t intended for posting publicly, so the comments are sparse.
When I get to take more proper pictures, I’ll post them.
2 Likes
Jeff, that looks fantastic! I’ve got to confess, it didn’t even occur to me to take the fan apart and rebuild it as a display. One of the things I really missed while being retired – smart people. I love those simple, clear ideas that make a solution possible, whether I have 'em or somebody else does.
And thanks for sharing your code. It’s quite clear, even without extra comments. There’s just a lot of fun to be had with this sort of thing – I’m off to Home Depot for a new test fan tomorrow!
3 Likes
This is amazing!! Can’t wait to see video of this working.
Chiming in, to share my plans.
4 blade Ceiling fan with a single light socket below (so blades above spin, socket is fixed). Wiring setup: fan is adjustable speed, light is on a switch.
I plan on using cheap 120v socket adapter which yields 1-2 normal outlets. Add either 5v usb adapter(s) or a 12v adapter. (problem: find small USB adapter(s) with enough amps/watts to drive everything?)
Slip ring used to convey power to spinning setup below it.
Pixelblaze (or quinled diguno? Playing with both) wired up to 4 strips (or perhaps 4 segments of 1 strip), and entire setup rotates because strip end are attached to fan blade ends. This also will auto balance, if the weight is centered under them all, avoiding blade imbalances. Strips aren’t likely good support so add something like wire to actually hold unit up… This support wiring also allows alternative strip setup: not attached to fan blades but hanging down and attached to each other, which could be when rotating a globe shape (might need some support to stay uniform), yielding a 4 strip rotating “sphere”
Will share more including photos/video once I have something concrete. Happy to clarify if the quick sketch above isn’t clear enough.
It would be useful for POV, especially with the sensor package, to measure the spin of the center “unit” especially if the sensor isn’t dead centered.
2 Likes
Hi @Scruffynerf,
Excited to see what you find and build! My experience suggests that with 4 radials, you’ll need to spin at ~270 RPM if you want to create persistent circles, which might be a lot to ask of a ceiling fan especially with the blades still on. This will also stretch your frame rate because each minimum arc will be longer, limiting the patterns that can be rendered unless you either use a lot less LEDs, use multiple PB, or switch controllers (which will still be better with more radials moving slower). I saw a project where someone doing radial POV On a single strip had to switch to FPGAs to get the frame rate up. I think this helps explain why a lot of Christopher’s work has many radials.
But the rest of it sounds great. Can’t wait to see how you get the slip ring mounted.
Hmm, one option then might be add more strips… adding 4 more would reduce RPM in half, right?
plus, wiring wise, I could wire then in series (go out on a blade, wire to middle of 2 blades, back on strip (held in place by wires between blades), and so on… might be one long strip mapped, or maybe 2 or 4…
plus lower RPM is needed for cheaper slip rings (usually up to 250RPM)
Sounds right to me. Like you, I noticed the RPM ratings and wondered if that’s mechanical, electrical, or both. I kind of wondered if it was more about electrical noise induced on data signals, maybe just delivering power through the ring (spinning the controller) could exceed 250RPM with a capacitor across the slip rings output.
I’ve never had good luck with slip rings. Been thinking a lot about inductive power for this sort of thing. Here’s a paper by somebody who’s actually built a POV capable device:
It’s a master’s thesis, so her device is pretty elaborate, but the principle – she uses two coils separated by a small air gap to transmit the power to the rotating section, with a bunch of off the shelf parts to regulate it for the electronics – seems approachable, and might actually wind up less expensive than doing it with (reliable, durable) physical contacts. If I have access to 120v AC power to feed it, efficiency isn’t really a concern.
2 Likes
I actually seriously considered induction at first, and batteries too, but felt like induction onto a rotating object was more trouble than a slip ring, and batteries to recharge when non moving just limited the use of the item.
@jeff i think that style of slip ring would need to be installed inside the fan housing, as part of the existing shaft. I couldn’t figure a way to add a prebuilt one to an existing fan, so I tried making one from scratch. This is just a prototype from posterboard and foil, but it works!
3 Likes