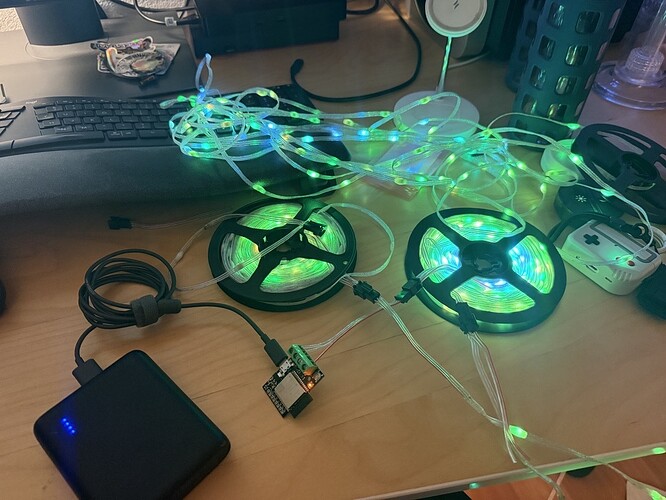
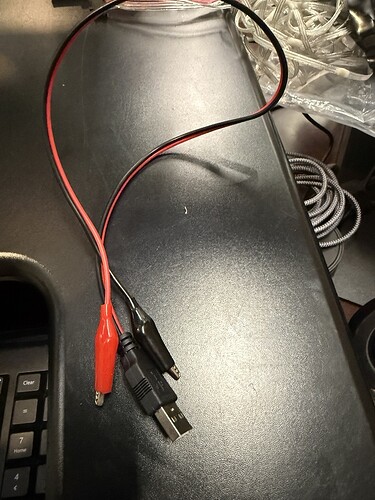
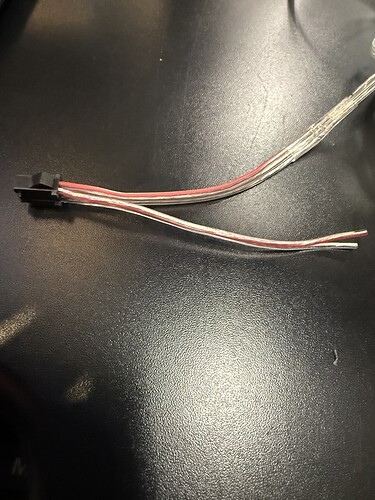
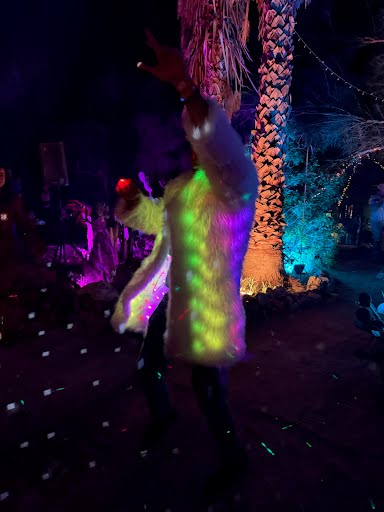
I ran a workshop this weekend for my Burning Man camp, that I called Making Wearable LEDs, the “I’ve never done this before and it’s under month until Burning Man” Way and had a ton of fun doing it. If that describes you or any of your friends, I hope this tutorial is helpful! I’d love any feedback, comments, suggestions; I’ll keep iterating on it. For now, the world has comment access to the presentation.
Note that this is VERY MUCH not the only way, or even the best way, to make wearables – it’s just one path which is meant to be really straightforward for beginners.
I also linked this in the appendix of the post, but if you want to modify any existing Patterns to use the new Palette functionality, start by pasting this code at the top of the Pattern:
Primary code for palettes and an automated palette switcher
//next whole section is for palettes.

/*
  Palettes via http://soliton.vm.bytemark.co.uk/pub/cpt-city/; some picked from
  ColorWavesWithPalettes by Mark Kriegsman: https://gist.github.com/kriegsman/8281905786e8b2632aeb
  Patterns with decimals converted for FastLED with gammas (2.6, 2.2, 2.5)
  Code simplification by ZacharyRD (Zachary Reiss-Davis), Palette Blending Design by zranger1
  Patterns squished into single lines using double-tabs where line breaks would be in expanded spacing.
  This is a cosmetic choice to make them fit into a single page that can be skipped over.
  The palettes are also indented to just be a logical group; there's no functions involved.
*/
      // blue purple teal pop of yellow, balanced.
      var inferno = [ 0.0, 0/255, 0/255, 4/255, 0.1, 22/255, 11/255, 57/255, 0.2, 66/255, 10/255, 104/255, 0.3, 106/255, 23/255, 110/255, 0.4, 147/255, 38/255, 103/255, 0.5, 188/255, 55/255, 84/255, 0.6, 221/255, 81/255, 58/255, 0.7, 243/255, 120/255, 25/255, 0.8, 252/255, 165/255, 10/255, 0.9, 246/255, 215/255, 70/255, 1.0, 252/255, 255/255, 164/255, ]
      //yellow-orange-red-purple-navy
      //http://soliton.vm.bytemark.co.uk/pub/cpt-city/bhw/bhw1/tn/bhw1_04.png.index.html
      var bhw1_04_gp = [0, 229,227,  1,   15, 227,101,  3,    142,  40,  1, 80,   198,  17,  1, 79,   255,   0,  0, 45]
      arrayMutate(bhw1_04_gp,(v, i ,a) => v / 255);
      // blue-purple-red
      // http://soliton.vm.bytemark.co.uk/pub/cpt-city/nd/red/tn/Analogous_1.png.index.html
      var Sunset_Real = [0.0, 0.471, 0.0, 0.0,    0.086, 0.702, 0.086, 0.0,   0.2, 1.0, 0.408, 0.0,   0.333, 0.655, 0.086, 0.071,   0.529, 0.392, 0.0, 0.404,   0.776, 0.063, 0.0, 0.51,    1.0, 0.0, 0.0, 0.627,];
      // Battery Saver: black-blue-purple-pink-white Top pick.
      // http://soliton.vm.bytemark.co.uk/pub/cpt-city/nd/basic/tn/BlacK_Blue_Magenta_White.png.index.html
      var Analogous_1 = [0.0, 0.012, 0.0, 1.0,    0.247, 0.09, 0.0, 1.0,    0.498, 0.263, 0.0, 1.0,   0.749, 0.557, 0.0, 0.176,   1.0, 1.0, 0.0, 0.0,];
      // this is a really good one. Orange Pink Green. Should be garish but isn't.
      // http://soliton.vm.bytemark.co.uk/pub/cpt-city/ma/icecream/tn/rainbowsherbet.png.index.html
      var rainbowsherbet = [0.0, 1.0, 0.129, 0.016,   0.169, 1.0, 0.267, 0.098,   0.337, 1.0, 0.027, 0.098,   0.498, 1.0, 0.322, 0.404,   0.667, 1.0, 1.0, 0.949,   0.82, 0.165, 1.0, 0.086,    1.0, 0.341, 1.0, 0.255,];
      // really good blending, purples blues and pinks. Mild but good.
      // http://soliton.vm.bytemark.co.uk/pub/cpt-city/hult/tn/gr65_hult.png.index.html
      var BlacK_Blue_Magenta_White = [0.0, 0.0, 0.0, 0.0,   0.165, 0.0, 0.0, 0.176,   0.329, 0.0, 0.0, 1.0,   0.498, 0.165, 0.0, 1.0,   0.667, 1.0, 0.0, 1.0,   0.831, 1.0, 0.216, 1.0,   1.0, 1.0, 1.0, 1.0,];
      // Battery Saver: black magenta red yellow.
      //better than just black magenta red.
      // http://soliton.vm.bytemark.co.uk/pub/cpt-city/nd/basic/tn/BlacK_Red_Magenta_Yellow.png.index.html
      var gr65_hult = [0.0, 0.969, 0.69, 0.969,   0.188, 1.0, 0.533, 1.0,   0.349, 0.863, 0.114, 0.886,   0.627, 0.027, 0.322, 0.698,   0.847, 0.004, 0.486, 0.427,   1.0, 0.004, 0.486, 0.427,];
      // yellow to greens to blues. Very little red.
      // http://soliton.vm.bytemark.co.uk/pub/cpt-city/gmt/tn/GMT_drywet.png.index.html
      var GMT_drywet = [0.0, 0.184, 0.118, 0.008,   0.165, 0.835, 0.576, 0.094,   0.329, 0.404, 0.859, 0.204,   0.498, 0.012, 0.859, 0.812,   0.667, 0.004, 0.188, 0.839,   0.831, 0.004, 0.004, 0.435,   1.0, 0.004, 0.027, 0.129,];
      // Battery Saver: an excellent fire look, but too much black in it for many patterns. Black - red - orange - yellow - white.
      // http://soliton.vm.bytemark.co.uk/pub/cpt-city/neota/elem/tn/lava.png.index.html
      var lava = [0.0, 0.0, 0.0, 0.0,   0.18, 0.071, 0.0, 0.0,    0.376, 0.443, 0.0, 0.0,   0.424, 0.557, 0.012, 0.004,   0.467, 0.686, 0.067, 0.004,   0.573, 0.835, 0.173, 0.008,   0.682, 1.0, 0.322, 0.016,   0.737, 1.0, 0.451, 0.016,   0.792, 1.0, 0.612, 0.016,   0.855, 1.0, 0.796, 0.016,   0.918, 1.0, 1.0, 0.016,   0.957, 1.0, 1.0, 0.278,   1.0, 1.0, 1.0, 1.0,];
      // reds to oranges to yellows to purple blue. No black in it.
      // http://soliton.vm.bytemark.co.uk/pub/cpt-city/nd/atmospheric/tn/Sunset_Real.png.index.html
      var BlacK_Red_Magenta_Yellow = [0.0, 0.0, 0.0, 0.0,   0.165, 0.165, 0.0, 0.0,   0.329, 1.0, 0.0, 0.0,   0.498, 1.0, 0.0, 0.176,   0.667, 1.0, 0.0, 1.0,   0.831, 1.0, 0.216, 0.176,   1.0, 1.0, 1.0, 0.0,];
      // as described, blue cyan yellow -- slightly blue biased.
      // http://soliton.vm.bytemark.co.uk/pub/cpt-city/nd/basic/tn/Blue_Cyan_Yellow.png.index.html
      var Blue_Cyan_Yellow = [0.0, 0.0, 0.0, 1.0,   0.247, 0.0, 0.216, 1.0,   0.498, 0.0, 1.0, 1.0,   0.749, 0.165, 1.0, 0.176,   1.0, 1.0, 1.0, 0.0,];
var palettes = [
  inferno,
  bhw1_04_gp,
  Sunset_Real,
  Analogous_1,
  rainbowsherbet,
  BlacK_Blue_Magenta_White,
  gr65_hult,
  GMT_drywet,
  lava,
  BlacK_Red_Magenta_Yellow, ]

// control variables for palette switch timing (these are in seconds)
var PALETTE_HOLD_TIME = 15
var PALETTE_TRANSITION_TIME = 2;

// internal variables used by the palette manager.
// Usually not necessary to change these.
export var currentIndex = 0;
var nextIndex = (currentIndex + 1) % palettes.length;

// primarily useful for testing, go to the next palette in the main array. Skips the blend step.
export function triggerIncrementPalette(){
  currentIndex = (currentIndex + 1) % palettes.length;
  runTime = 0;
}

// arrays to hold palette rgb interpolation results
var pixel1 = array(3);
var pixel2 = array(3);

// array to hold calculated blended palette
var PALETTE_SIZE = 16;
var currentPalette = array(4 * PALETTE_SIZE)

// palette timing related variables
var inTransition = 0;
var blendValue = 0;
runTime = 0

// Startup initialization for palette manager
setPalette(currentPalette);
buildBlendedPalette(palettes[currentIndex],palettes[nextIndex],blendValue)

// user space version of Pixelblaze's paint function. Stores
// interpolated rgb color in rgbArray
function paint2(v, rgbArray, pal) {
  var k,u,l;
  var rows = pal.length / 4;

  // find the top bounding palette row
  for (i = 0; i < rows;i++) {
    k = pal[i * 4];
    if (k >= v) break;
  }

  // fast path for special cases
  if ((i == 0) || (i >= rows) || (k == v)) {
    i = 4 * min(rows - 1, i);
    rgbArray[0] = pal[i+1];
    rgbArray[1] = pal[i+2];
    rgbArray[2] = pal[i+3];
  }
  else {
    i = 4 * (i-1);
    l = pal[i]   // lower bound
    u = pal[i+4]; // upper bound

    pct = 1 -(u - v) / (u-l);

    rgbArray[0] = mix(pal[i+1],pal[i+5],pct);
    rgbArray[1] = mix(pal[i+2],pal[i+6],pct);
    rgbArray[2] = mix(pal[i+3],pal[i+7],pct);
  }
}

// utility function:
// interpolate colors within and between two palettes
// and set the LEDs directly with the result.  To be
// used in render() functions
function paletteMix(pal1, pal2, colorPct,palettePct) {
  paint2(colorPct,pixel1,pal1);
  paint2(colorPct,pixel2,pal2);

  rgb(mix(pixel1[0],pixel2[0],palettePct),
      mix(pixel1[1],pixel2[1],palettePct),
      mix(pixel1[2],pixel2[2],palettePct)
   )
}

// construct a new palette in the currentPalette array by blending
// between pal1 and pal2 in proportion specified by blend
function buildBlendedPalette(pal1, pal2, blend) {
  var entry = 0;

  for (var i = 0; i < PALETTE_SIZE;i++) {
    var v = i / (PALETTE_SIZE - 1);

    paint2(v,pixel1,pal1);
    paint2(v,pixel2,pal2);

    // build new palette at currrent blend level
    currentPalette[entry++] = v;
    currentPalette[entry++] = mix(pixel1[0],pixel2[0],blend)
    currentPalette[entry++] = mix(pixel1[1],pixel2[1],blend)
    currentPalette[entry++] = mix(pixel1[2],pixel2[2],blend)
  }
}
Then go down to “BeforeRender”
And paste this into the start of the "BeforeRender" function
//INSERT THIS PALETTE BLOCK WITHIN BEFORE RENDER AT THE END.
  //  here till end of beforerender is for palette blending.
  runTime = (runTime + delta / 1000) % 3600;

  // Palette Manager - handle palette switching and blending with a
  // tiny state machine
  if (inTransition) {
    if (runTime >= PALETTE_TRANSITION_TIME) {
      // at the end of a palette transition, switch to the
      // next set of palettes and reset everything for the
      // normal hold period.
      runTime = 0;
      inTransition = 0
      blendValue = 0
      currentIndex = (currentIndex + 1) % palettes.length
      nextIndex = (nextIndex + 1) % palettes.length

    }
    else {
      // evaluate blend level during transition
      blendValue = runTime / PALETTE_TRANSITION_TIME
    }

    // blended palette is only recalculated during transition times. The rest of
    // the time, we run with the current palette at full speed.
    buildBlendedPalette(palettes[currentIndex],palettes[nextIndex],blendValue)
  }
  else if (runTime >= PALETTE_HOLD_TIME) {
    // when hold period ends, switch to palette transition
    runTime = 0
    inTransition = 1
  }
Finally, replace the “Hue” call with paint(h,v) in your Render function(s),
I also posted this on the LEDs are Awesome Facebook group, with less code etc.
It builds off my previous post, Beginners Guide to Making a LED Festival Coat , as well.


