Intro
This tutorial walks you through completely unleashing a pixelblaze pico’s powers! Written for this quest.
Required Material list:
Optional Material List
- Device capable of connecting to WiFi, such as a smartphone, table, laptop, desktop, etc.
- Headers
- Soldering stand
- JST connectors
Tutorial time!
-
Find a nice workspace with plenty elbow space to set up your solder kit along with all of the other components of this tutorial.
-
Cut some lengths of wires, preferably red and black to be soldered to the pixelblaze’s 5v and gnd slots on the edge, red to 5v and black to gnd.
-
Apply some solder flux to the pico’s edge where the v5 and gnd slots are. If you have a soldering stand, clamp everything up to hold them in place as you do your soldering magic, if not, tape everything to the edge of your work table and get to soldering in the next step!
-
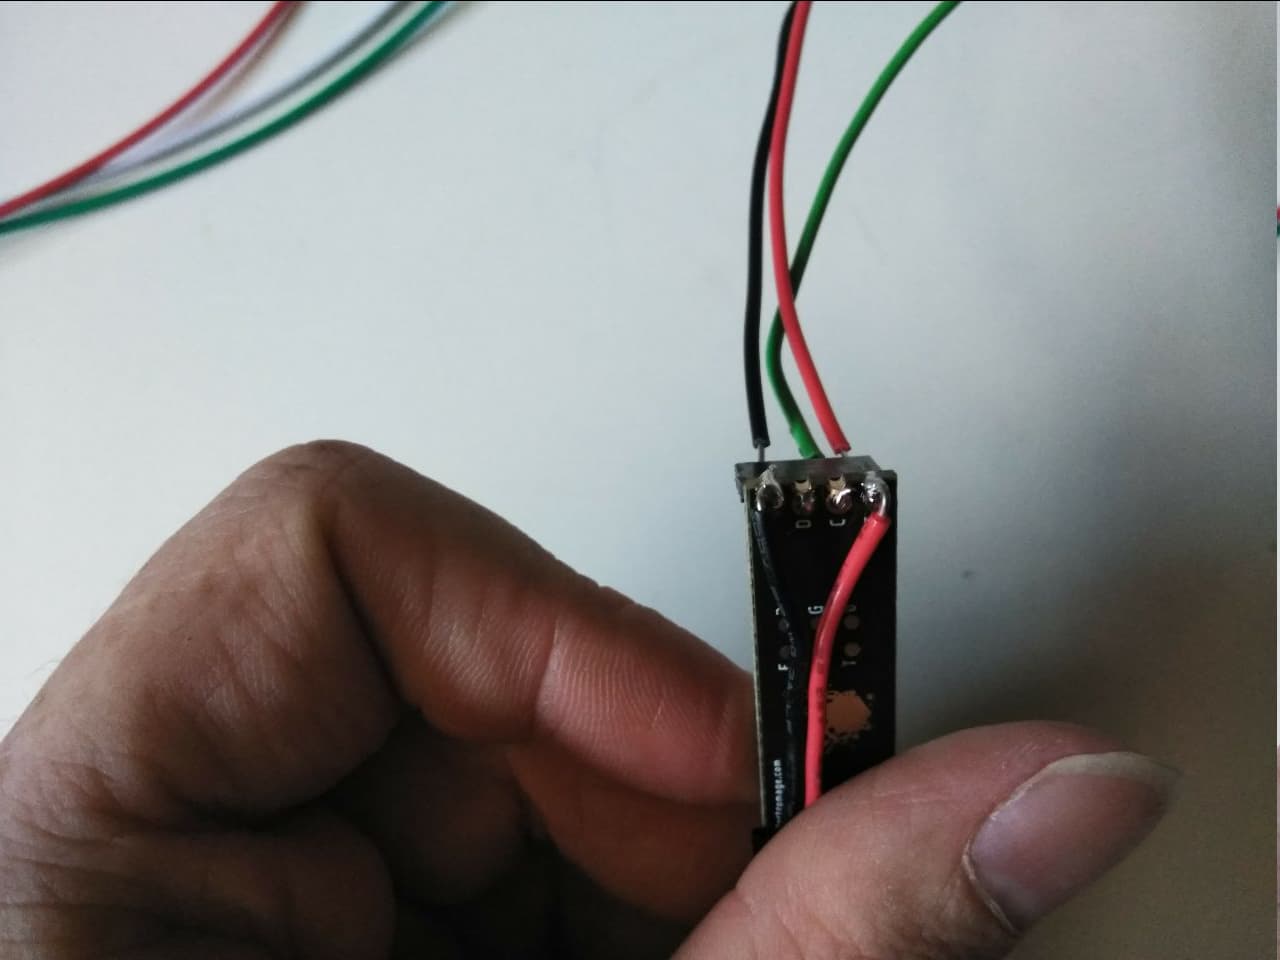
Melt some solder onto the wires first, then hold the wire against the right slot on the pico and melt the solder and perfect!
In this picture, I’ve soldered a header along with the two aforementioned wires to my pico. The purpose of the header was to make it easier for me to quick-swap to different connectors since my workspace isn’t using just JST connectors! There’s all sorts of other strange connectors laying around.
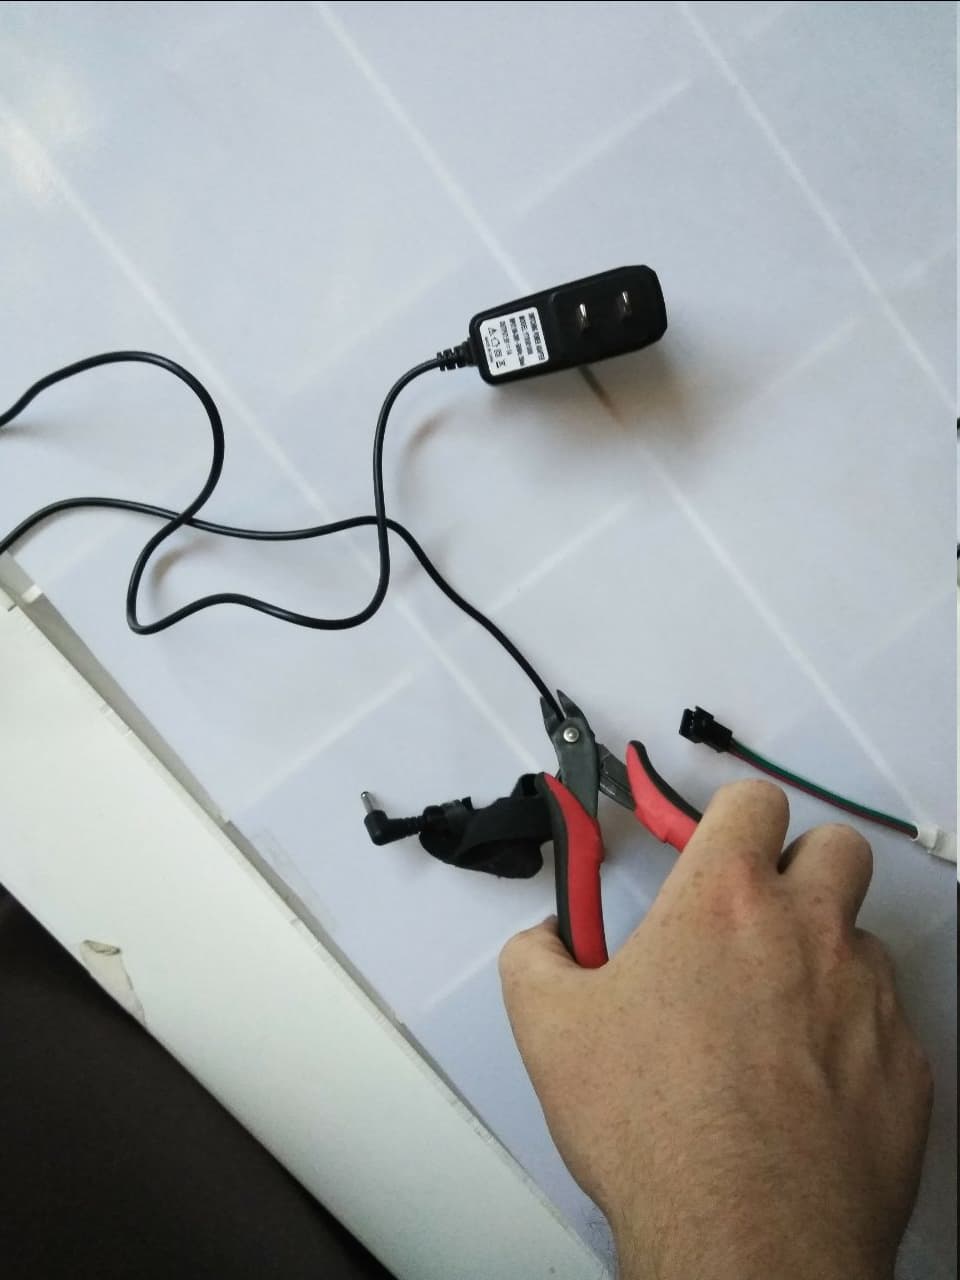
- Cut your power transformer up! Inside the cable you’d normally use to plug it into stuff, there’s two cables, red and black. Strip those wires a bit to make soldering easier.

-
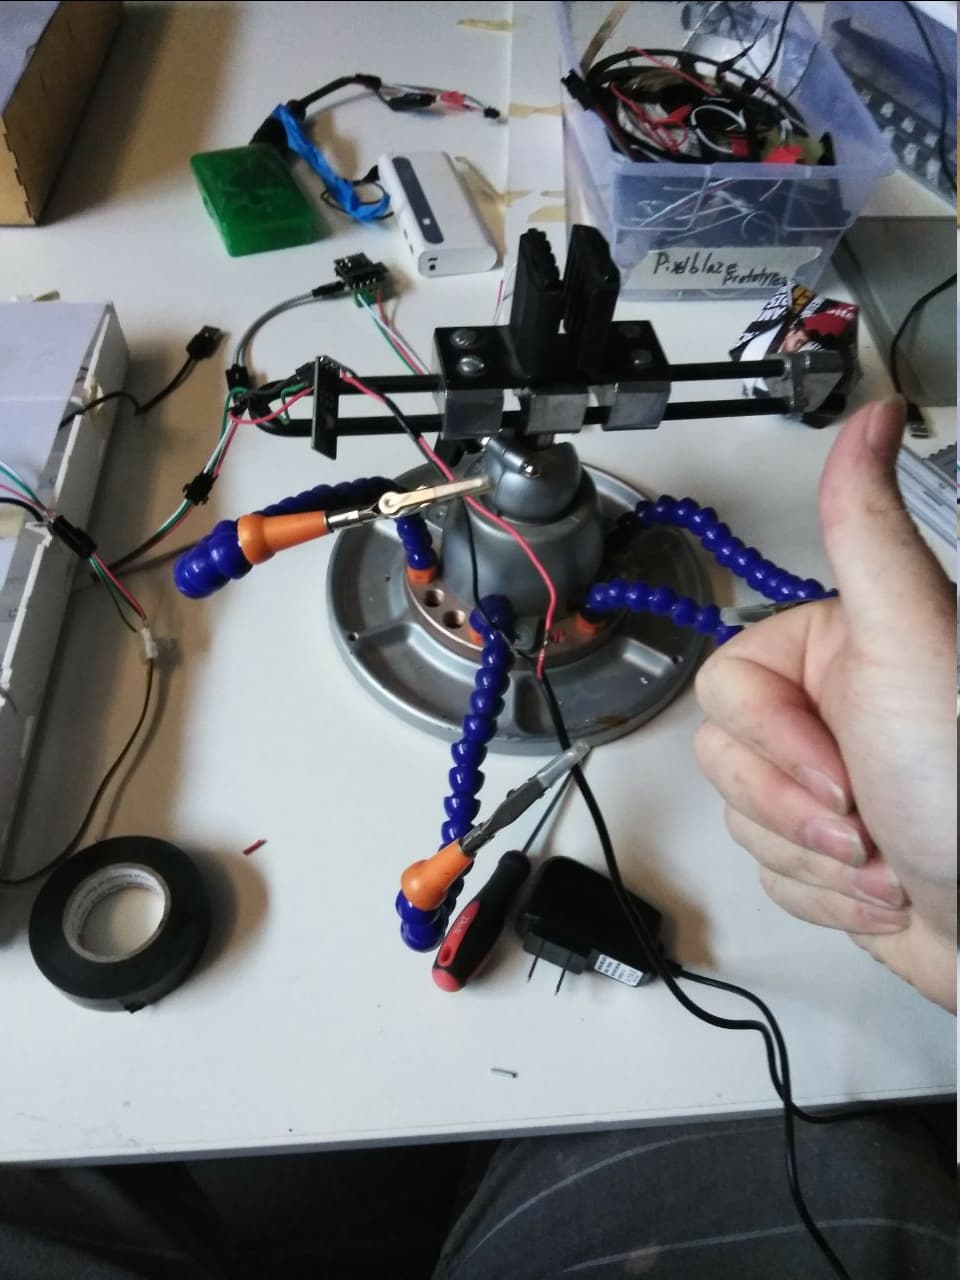
DO A SANITY TEST! First, plug the transformer in while making sure that the red and black wires aren’t touching, then touch the red wire to the 5v slot on your pico, and the black wire to the gnd on your pico. If an orange light lights up on the pico, you’ve just confirmed that the pico is in working order. Then do the same at the ends of the wires you soldered to your pico to confirm that the wires are fine.
This is important because the soldering on this is fine enough that it’s possible for a complete beginner to accidentally solder some slots together, shorting out the pico while it’s powered. If the light don’t come on, look closer at your solder job and see if there’s solder touching solder across the slots! Melt and wipe those off then try again. Shorting the pico out like that won’t kill it easily!
If all fails… Is your power transformer getting some power? Touch the red and black wires together quickly to see if there’s any sparks! If there’s no sparks, there’s no power!
-
Solder the power transformer’s wires to the right wires attached to the pico!
-
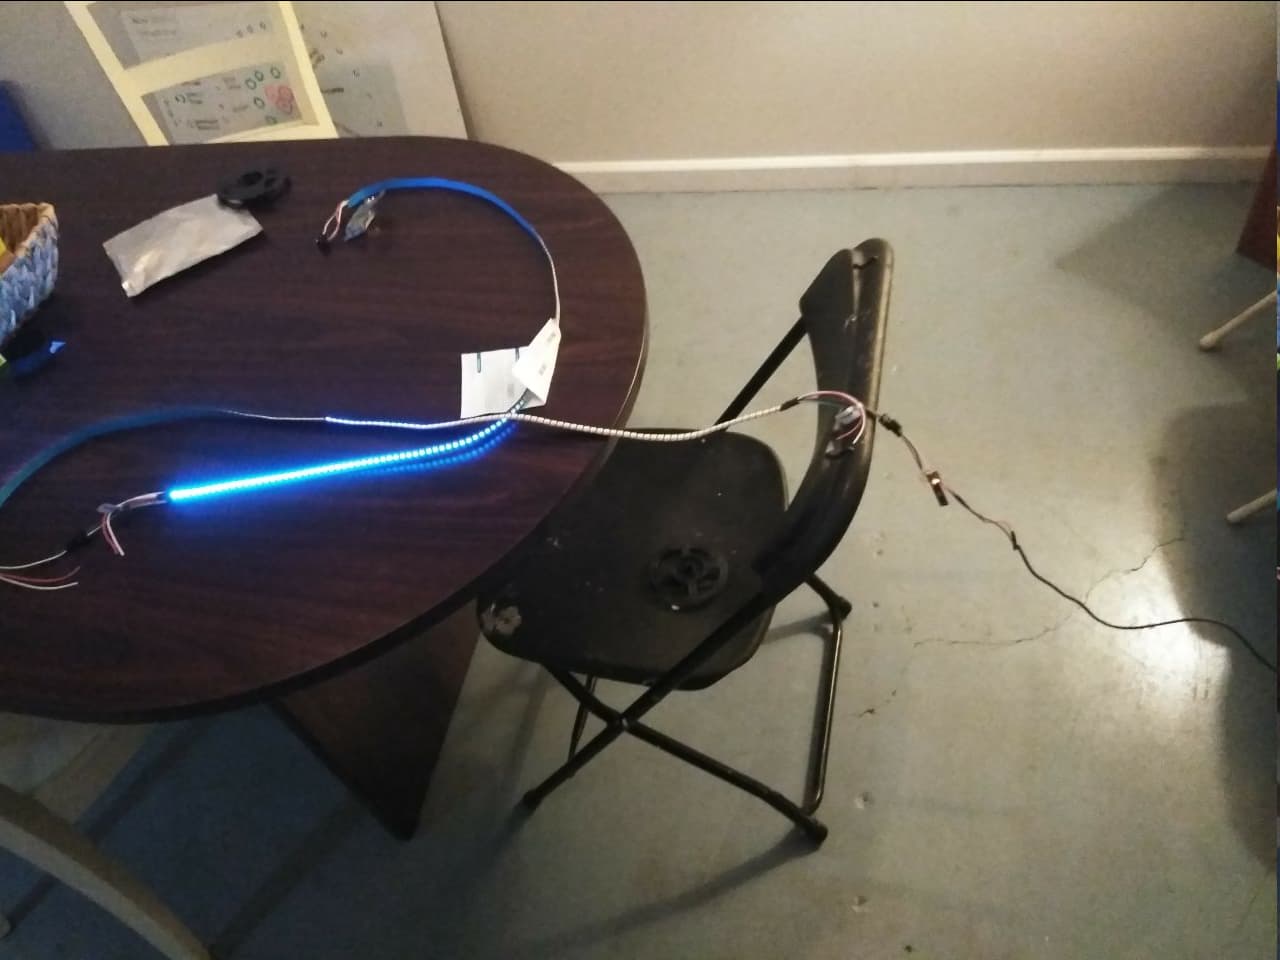
Connect a led strip to the pico, by either plugging a JST connector into the headers like I did, or soldering wires from the pico to the led strip, soldering a JST connector to the pico, etc. Many ways to skin the cat here!
-
Plug it in, and you’re a wizard, Harry!
By default, you’ll be able to toggle between patterns on the pico by pressing the button near the middle of the pico.
BONUS ROUND - WiFi magic
-
Hold down the button on the pico for a few seconds, then release. If it start flashing, there should be a new WiFi point for any of your WiFi-capable devices to connect with. If not, hold the button down for longer and release!
-
Connect to the pico wifi point, and set up an AP client. In this picture below, I’m using my smartphone.
The password need to be some letters and characters. I often use Shrek123!
-
Assuming that you was successfully able to set up the AP client, go back to your WiFi connection list and you’ll see a new WiFi network. That’s the one you just set up! Connect to that then go to 192.168.4.1 in the device connected to the pico WiFi’s browser and you’ll see your pico’s graphic user interface!
From there, you can select patterns, set up a playlist of patterns, shuffle patterns, create new patterns and tweak with settings. Most of the knobs and dials in there are self-explanatory, but one important point to note is that pixelblazes are capable of handling three different ranges of led lights. So if you’re using a different light strip than the one I recommended, you may need to tweak with the led type setting in the pico’s settings to get your mysterious light set-up to work!

Video of one of my projects using picos

In this video, you can see me interacting with the GUI I mentioned in Bonus round - WiFi magic, step 3.
One very important problem you can see me bumping in again and again is the pico browning out due to the light cube trying to pull too much power, this causes the pico to freeze up and become brain dead until I disconnect it from the light cube, reconfigure it and plug it back in.
If I had used the massive power transformer I found and held up at the end of the video, likely I’d be able to turn that cube into a second sun without burning down the entire workspace. Probably. I hope! Long as it’s at 5V, it should be fine! The amps is what makes it possible to support more and more led lights at once!
Basic math I’ve been using to calculate the amp draw of a strip at 100% brightness and white is 0.06amp per led light. The light strip I recommended at the beginning of this tutorial is a strip of 144 leds, so…
0.06 * 144 = 8.64amp
You need almost 9amp to power the strip at 100% brightness and all leds set to white! But as you saw in the video, it’s possible to make the strip to work with less power by not turning on all the leds at the same time, or lowering the brightness.
The cool thing about this light cube in my video is that I can take it apart and rebuild it as I will, there’s plenty of parts!

It’s modular as they can get! Light tunnels? Light house? A freaking light wizard tower to throw pixel fireballs at the victims below? THIS IS THE THING FOR THAT!
Go forth and create magic!